Page 1
Page 2
Page 3
Page 4
Page 5
Page 6
Crescent moon wire-wrapping tutorial (page 2)
Prefer this tutorial in a PRINTABLE FORMAT?
Click here for the PDF version of Crescent Moon Wire-Wrap Tutorial
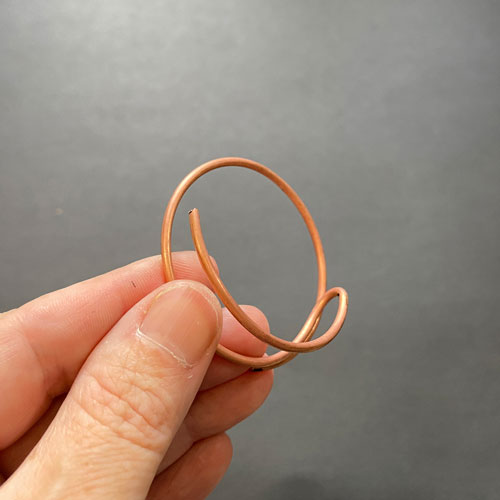
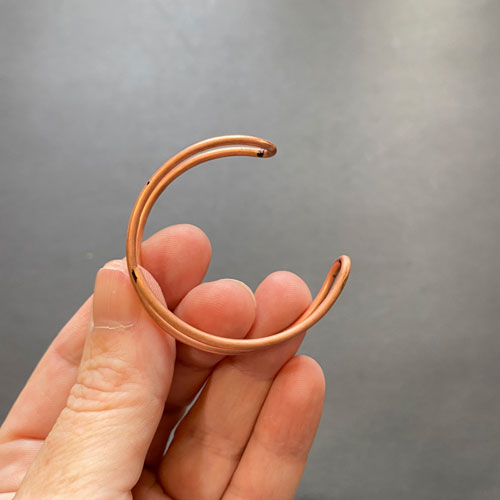
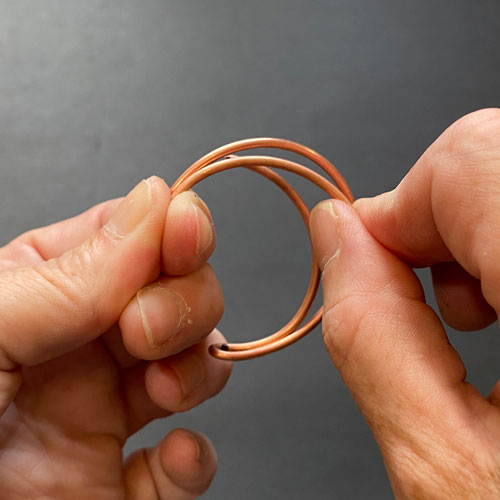
Step 3
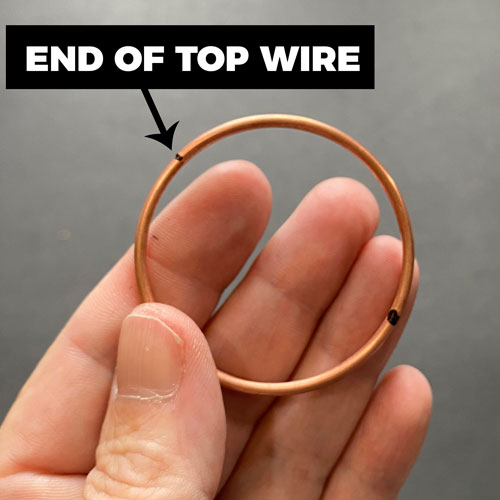
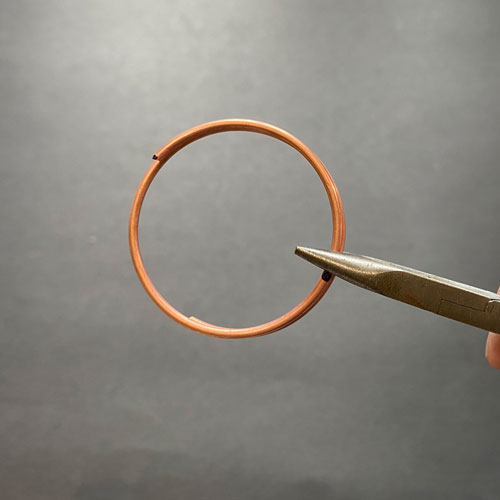
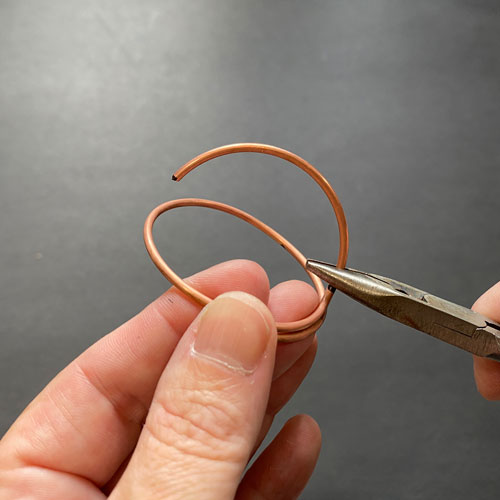
Hold the frame as shown and mark the wire across from end of top of wire (fig. 3a). Securely place your needle-nose pliers on the sharpie mark, between top and bottom wires (fig. 3b). Hold the frame tightly with one hand and flip the top wire over (fig. 3c, 3d, 3e).

FREE WIRE-WRAPPING GUIDE TO YOUR EMAIL!
JOIN NEWSLETTER
We respect your privacy. Unsubscribe at anytime.
Prefer this tutorial in a PRINTABLE FORMAT?
Click here for the PDF version of Crescent Moon Wire-Wrap Tutorial
RELATED CONTENT
- How to Wire-Wrap Stones Without Holes
- Wire-Wrapping Tutorial Simple Bead Pendant
- Wire-Wrapped Hair Pin Tutorial
- How to Wire-Wrap a Simple Brooch
- Grab the PRINTABLE Wire-Wrapping Tutorial Bundle + BONUS MATERIAL
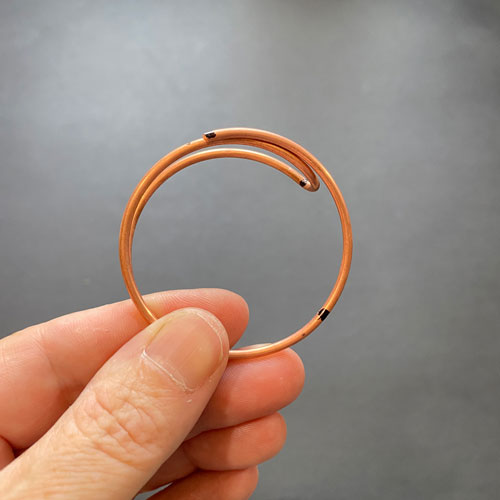
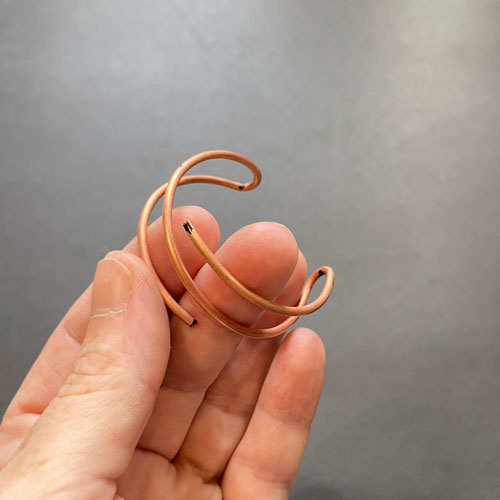
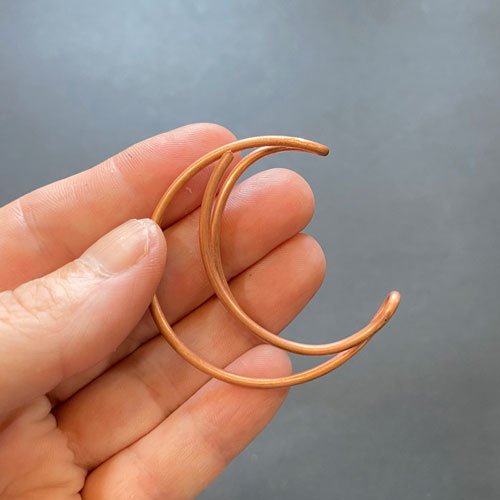
Step 4
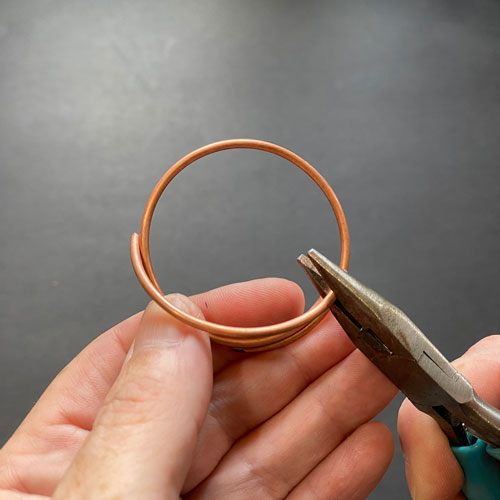
Flip the frame over and add another sharpie mark as shown (fig. 4a). Using your needle-nose pliers, flip the other wire over (fig. 4b, 4c, 4d, 4e).

RELATED CONTENT
- How to Wire-Wrap Stones Without Holes: Wire-Wrapping Tutorial for Beginners
- How to Wire-Wrap a Hair Pin Wire-Wrapping Tutorial
- Wire-Wrapping Tools & Supplies for Beginners
- Beginner’s Guide to Jewelry Wire for Wire-Wrapping
- How to Wire-Wrap Crystals: Wire-Wrapping Tutorial for Beginners
- How to Wire-Wrap Beads
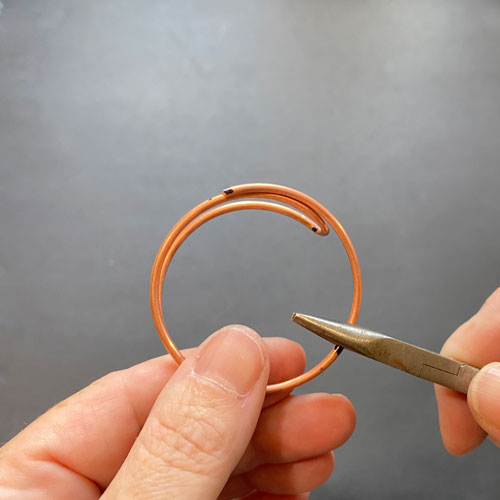
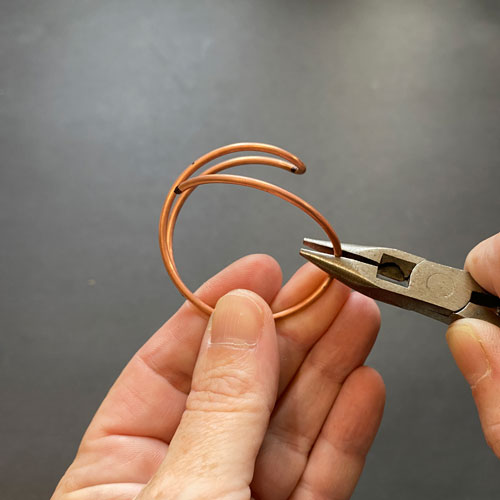
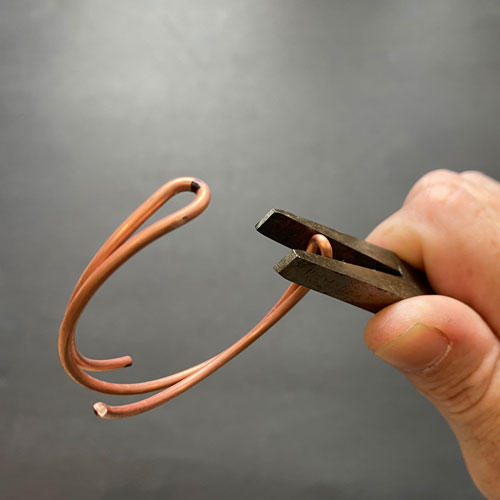
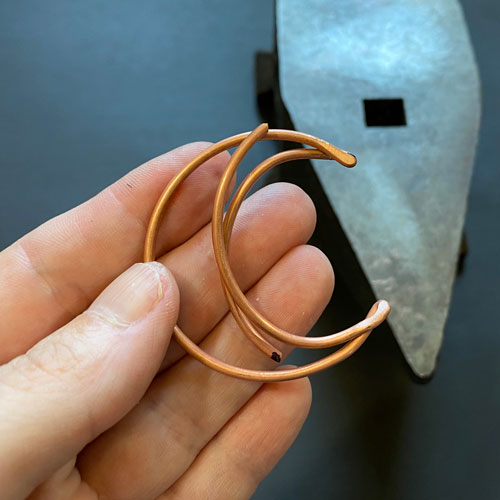
Step 5
Using a pair of flat nose pliers, close the gap at both ends (as much as possible), where the wires have been folded over (fig. 5a). Hold the end of the moon and gently pull wire end down to start forming the crescent moon (fig. 5b). Repeat at other end (fig. 5c). This forms the basic frame of the moon (fig. 5d).
Prefer this tutorial in a PRINTABLE FORMAT?
Click here for the PDF version of Crescent Moon Wire-Wrap Tutorial
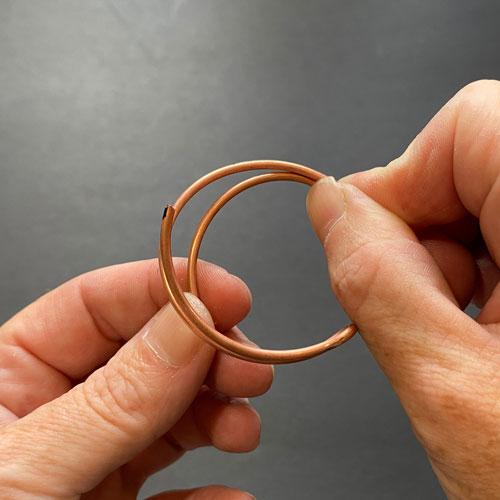
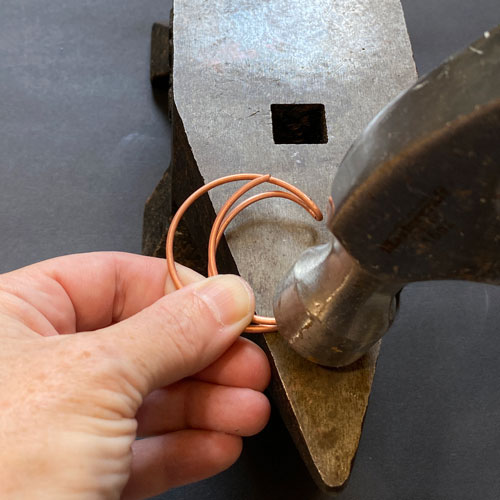
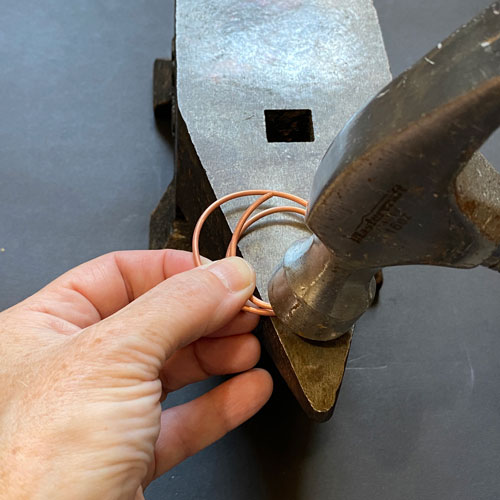
Step 6
Now that the basic frame is done, we need to tighten up each end of the moon, where the wires were folded over. Securely hold one end, close to the very tip – this is to make sure that the wire doesn’t shift while you are hammering. Gently hammer the end (fig. 6a, 6b). Repeat on other end (fig. 6c, 6d).

KEEP READING…
Page 1 – Materials, Steps 1-2
Page 2 – Steps 3-6
Page 3 – Steps 7-10
Page 4 – Steps 11-14
Page 5 – Steps 15-18
Page 6 – Steps 19-21
RELATED CONTENT
- How to Wire-Wrap Stones Without Holes
- Beginner’s Guide to Jewelry Wire for Wire-Wrapping
- How to Wire-Wrap a Hair Pin Wire-Wrapping Tutorial
- Wire-Wrapping Tutorials: 13 DIY Wire-Wrapped Pendants
- Wire-Wrapping Tutorial DIY Jewelry Kits on Etsy
