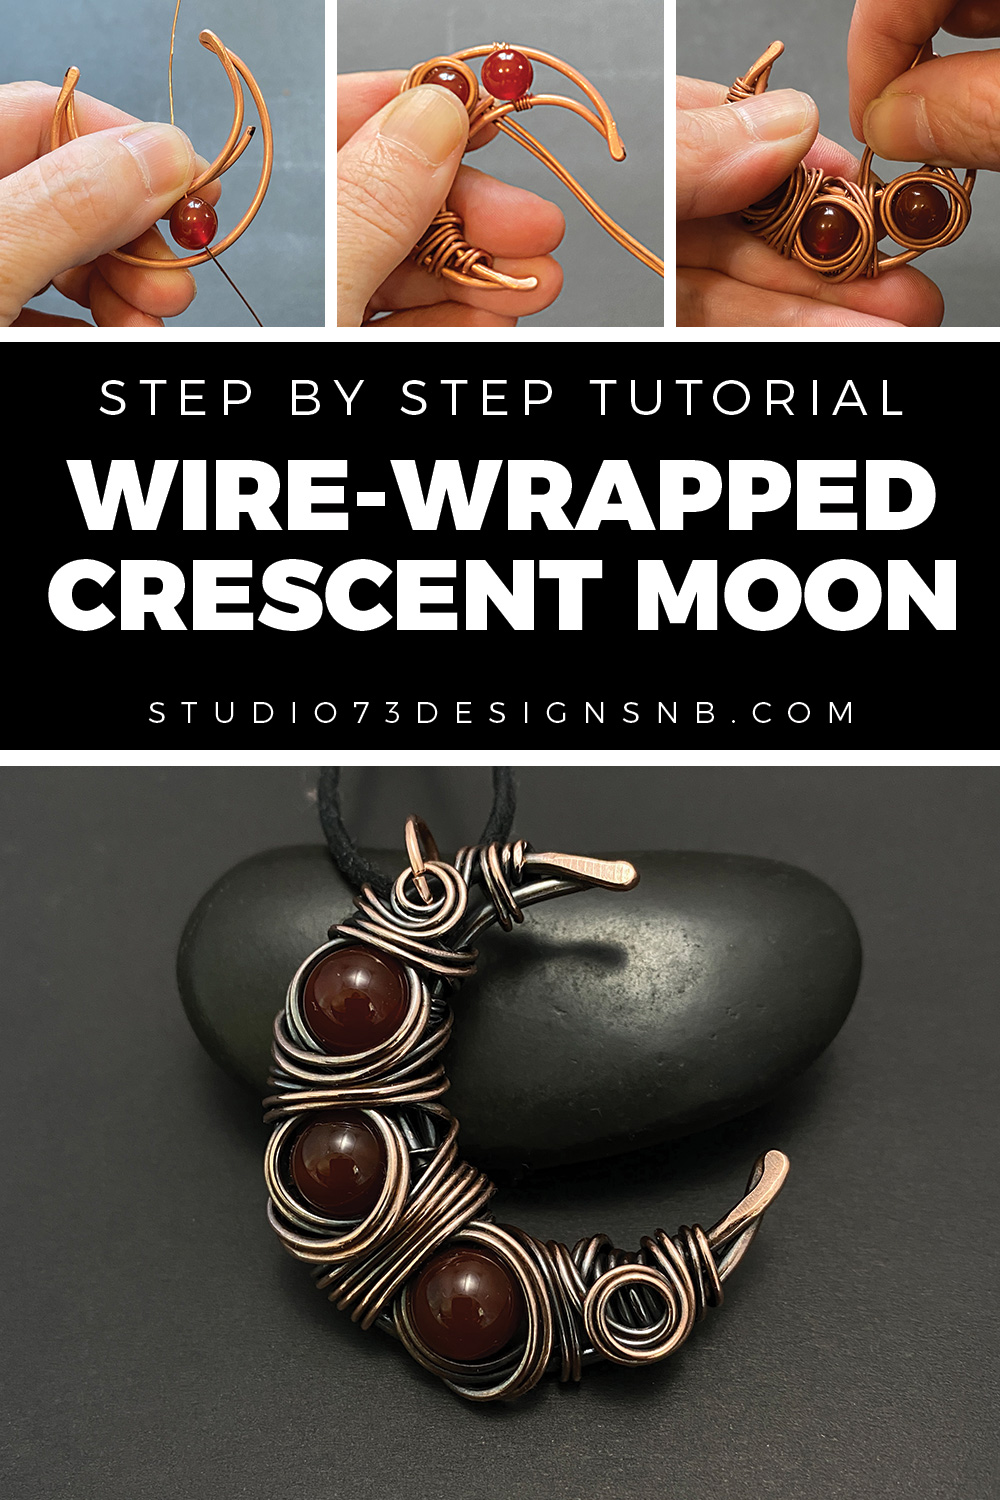
Learn how to wire-wrap a crescent moon pendant in this step by step wire-wrapping tutorial.
This wire-wrapped crescent moon pendant tutorial will teach you a very “free-flow” method of wire-wrapping. If you prefer working with thicker wire, you’ll love this tutorial.
This is a versatile design and I’ve made MANY wire-wrapped crescent moons, all of which are unique. Once you get the hang of it, the design options are UNLIMITED. I’m addicted to making these crescent moons….and the best part? Absolutely no wire-weaving patterns or soldering.
Prefer this tutorial in a PRINTABLE FORMAT?
Click here for the PDF version of Crescent Moon Wire-Wrap Tutorial

FREE WIRE-WRAPPING GUIDE TO YOUR EMAIL!
JOIN NEWSLETTER
We respect your privacy. Unsubscribe at anytime.
This is a HUGE wire-wrapping tutorial with over 100 photos so I’ve divided it into different pages:
Page 1
Page 2
Page 3
Page 4
Page 5
Page 6
LEVEL: INTERMEDIATE
MATERIALS + TOOLS
- 1 piece x 46″ of 18 gauge copper wire (dead soft)
- 1 piece x 46″ of 20 gauge copper wire (dead soft)
- 1 piece x 15″ of 14 gauge copper wire (dead soft)
- 3 pieces x 6″ of 24 gauge copper wire
- Needle nose pliers
- Flat nose pliers
- Side cutters
- Heavy duty cutters
- Anvil or hammering block
- Hammer
- Rubber Mallet
- Bracelet Mandrel
- 3 gemstone beads of your choice, 8 mm
- Jump Ring
- Necklace cord
- Wire gauge tool (not required but nice to have)

PRO TIPS FOR SUCCESS
- Although this wire-wrapping tutorial focuses on using 3 beads, please feel free to experiment! I’ve made some moons with only one bead and some with no beads.
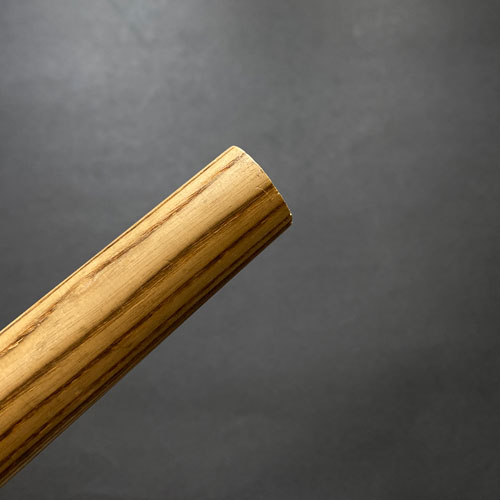
- If you don’t have a suitable mandrel, find an old baseball bat and cut off the handle. (fig. A)
- You will get different results based on the gauges of wire you use – experiment with different gauges too!
- When wrapping around the frame of the moon, I always use 2 different gauges of wire. The first one (18 gauge) is the thickest of the two (steps 10-14). This one helps to define the beads a little better. The second wire (20 gauge) is used to “fill in the gaps” and add some decorative flair to the design (steps 15-21).
- Make sure your all of your wire is DEAD SOFT. If it isn’t, please anneal your wire before starting for best results.
- Always make sure that you leave yourself enough room at the top of your pendant for a jump ring.
- You can use as much wire as you’d like to add extra texture
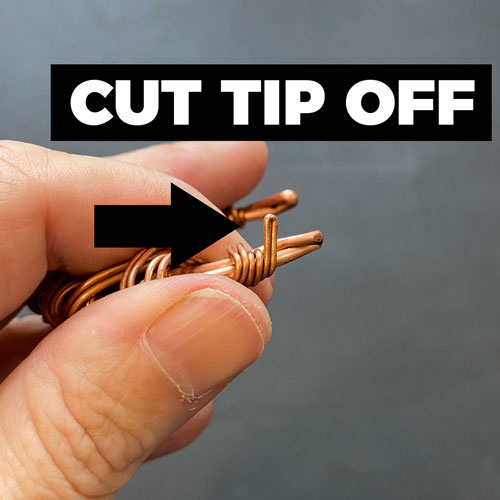
- To make it easier to tuck your wire ends away, cut off the tip (fig. B).
Prefer this tutorial in a PRINTABLE FORMAT?
Click here for the PDF version of Crescent Moon Wire-Wrap Tutorial
CRESCENT MOON WIRE WRAPPING TUTORIAL
Step 1
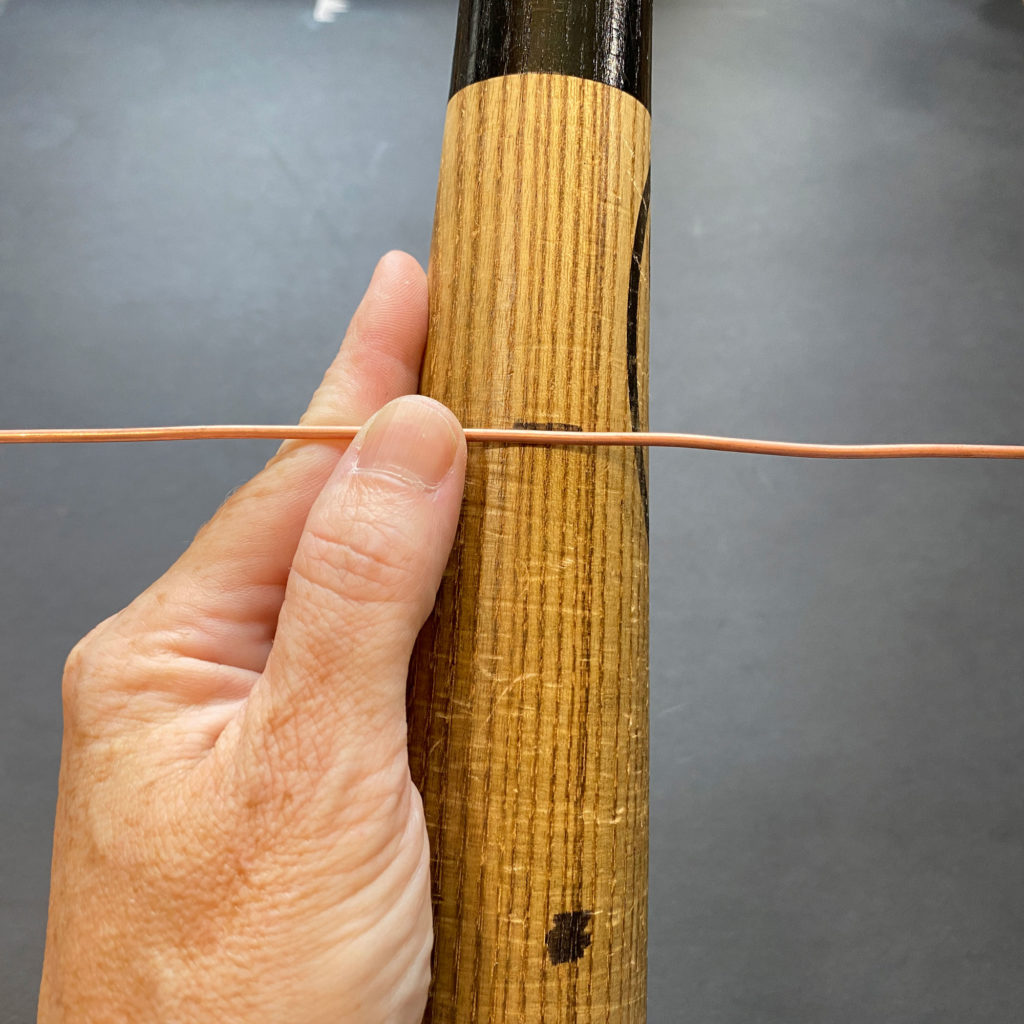
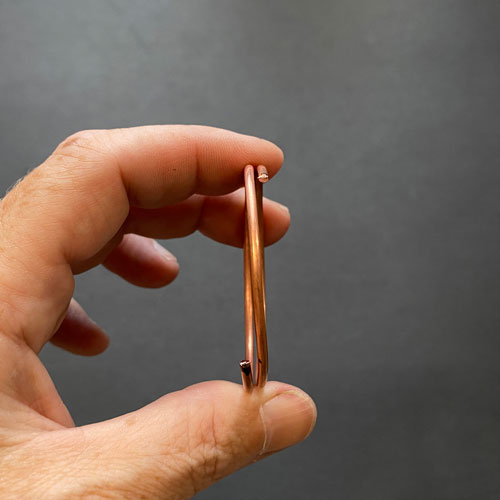
Using your mandrel (or in my case a baseball bat), measure the circumference of your moon. In this wire-wrapping tutorial, I am measuring a circumference of about 5.5 inches (fig. 1a). The finished pendant should measure approximately 1.75” tall & 1.75” wide.
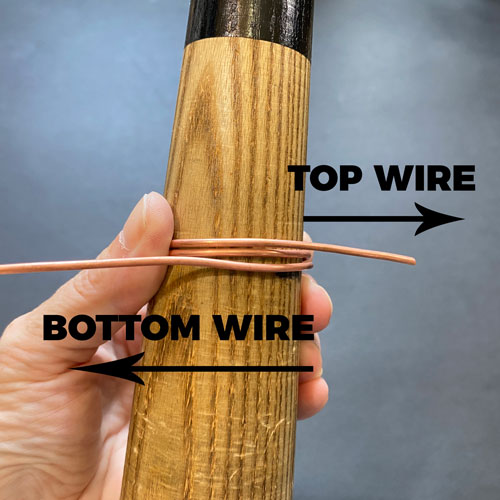
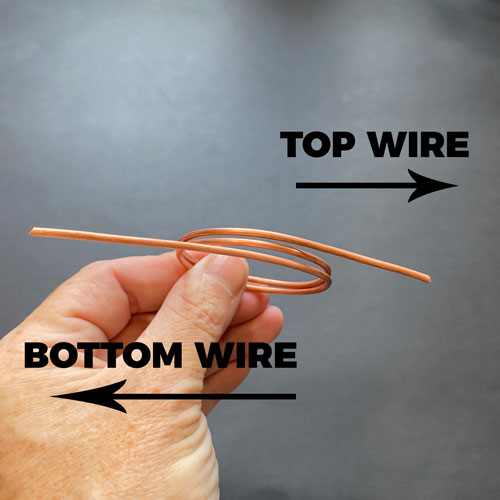
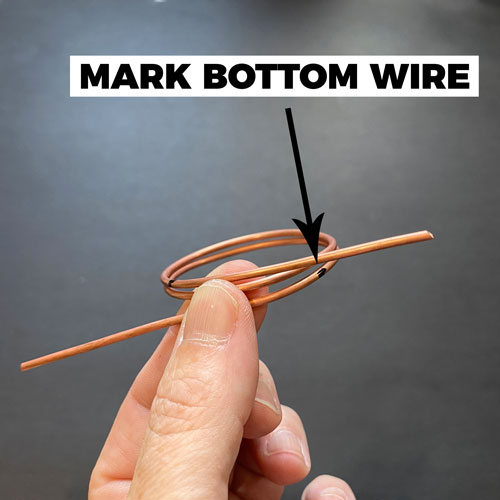
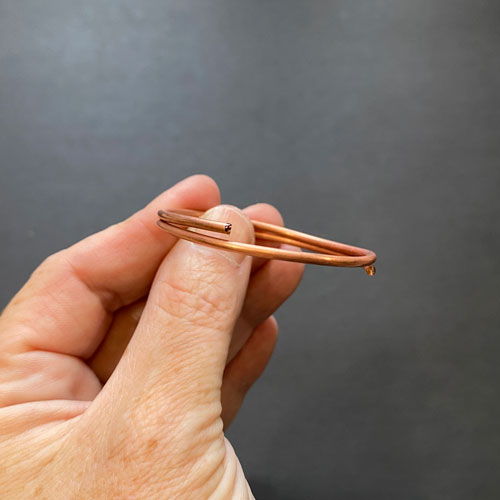
Using a sharpie, leave a mark where you want to start your pendant (fig. 1b). First we need to build the frame of the moon. Line up your 14 gauge wire along the mark on your mandrel (fig. 1c). Form the wire around the mandrel as shown, (fig. 1d) with the top wire end pointing to the right and the bottom wire end pointing to the left (fig. 1e).


Step 2
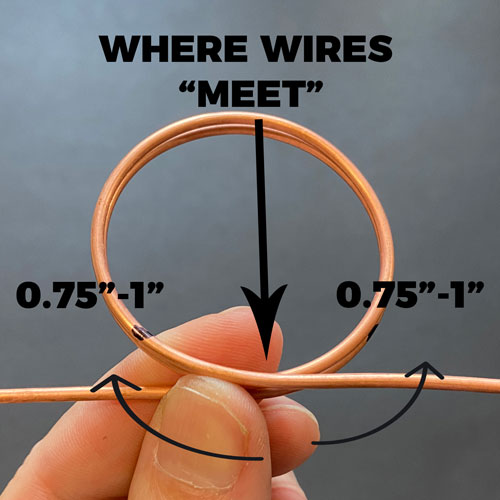
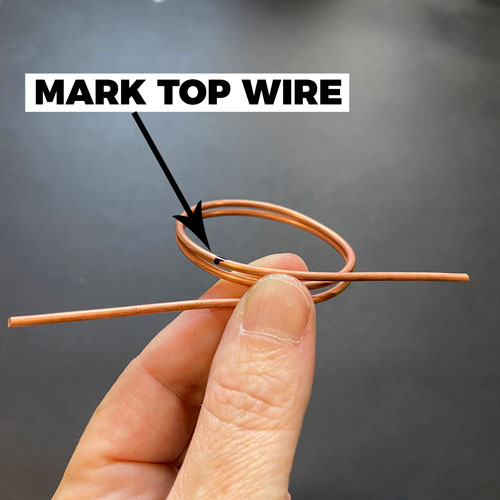
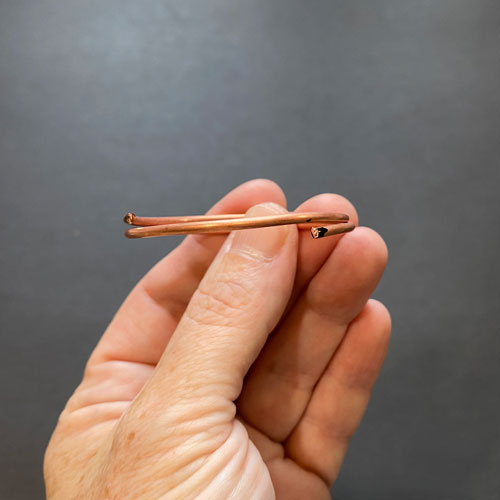
Using a sharpie, mark the top and bottom wire about 0.75”-1” from where the wires cross each other. (fig. 2a, 2b, 2c). Using a pair of heavy duty cutters or snips, cut the top and bottom wires where you marked them. (fig. 2d, 2e, 2f).
Prefer this tutorial in a PRINTABLE FORMAT?
Click here for the PDF version of Crescent Moon Wire-Wrap Tutorial

KEEP READING…
Page 1 – Materials, Steps 1-2
Page 2 – Steps 3-6
Page 3 – Steps 7-10
Page 4 – Steps 11-14
Page 5 – Steps 15-18
Page 6 – Steps 19-21
