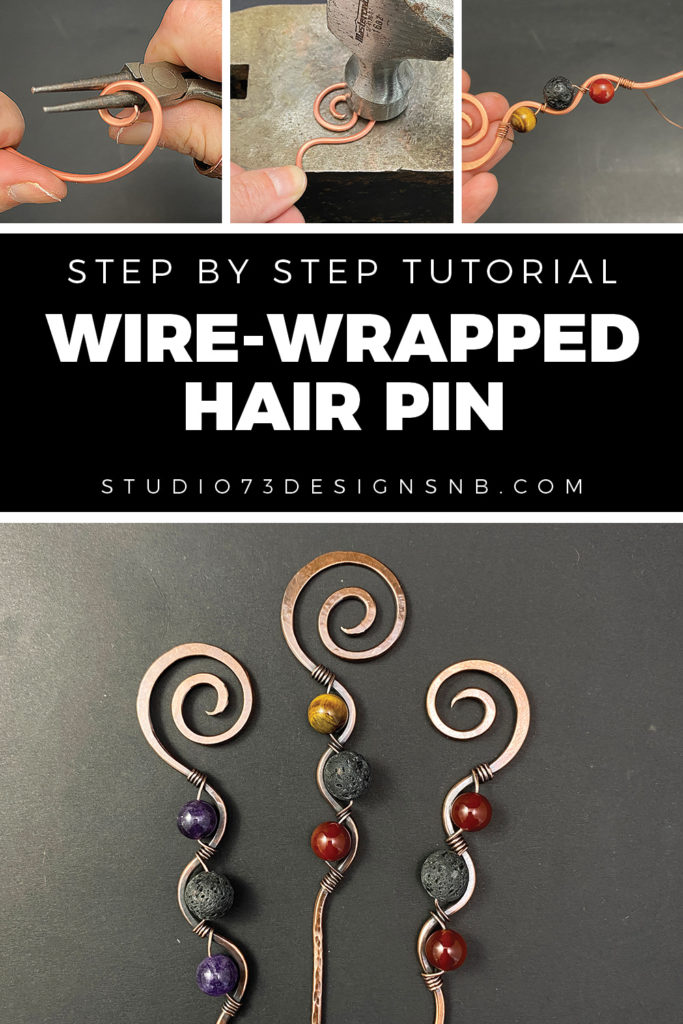
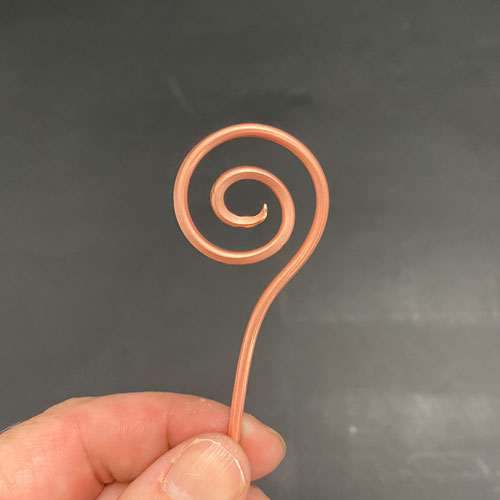
Learn how to wire-wrap a really cute boho hair pin with gemstone + lava beads. This wire-wrapping tutorial is a great introduction to wire-wrapping with thicker wire – it’s suitable for all beginners and you can use any gemstone bead you have on hand.
These wire-wrapped hair pins are gorgeous and the design is versatile. Make at any length you’d like – I make mine at 9″ and I use a lava bead so it can be used as an essential oil diffuser.
Prefer this tutorial in a PRINTABLE FORMAT?
Click here for the PDF version of “How to Wire-Wrap a Hair Pin”
LEVEL: BEGINNER
MATERIALS + TOOLS
- 15” – 12 gauge wire (dead soft)
- 12” x 20-22 gauge copper wire
- 1 Lava Bead (12 mm)
- 2 Gemstone Beads (8 mm)
- Round nose pliers
- Needle nose pliers
- Wire cutters
- Heavy duty cutters
- Anvil or bench block
- Hammer
- Rubber Mallet
- Ball Peen Hammer
- File
- Liver of Sulfur (optional)

How to Wire-Wrap a Hair Pin
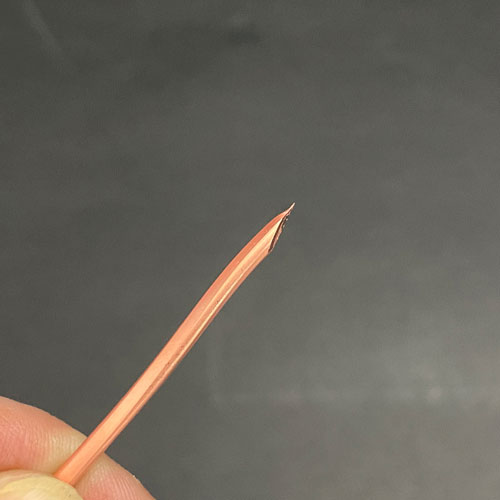
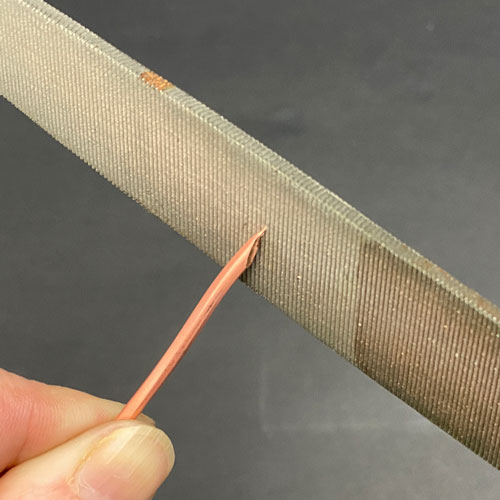
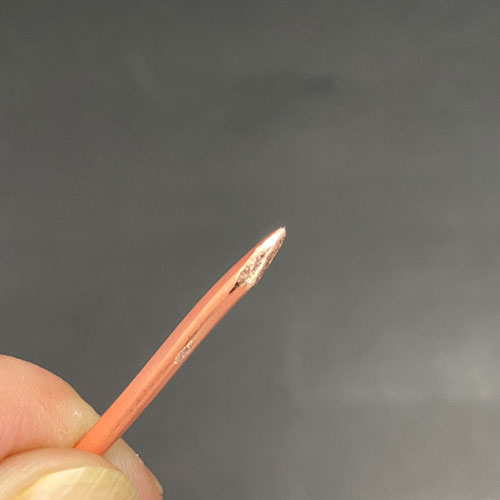
STEP 1
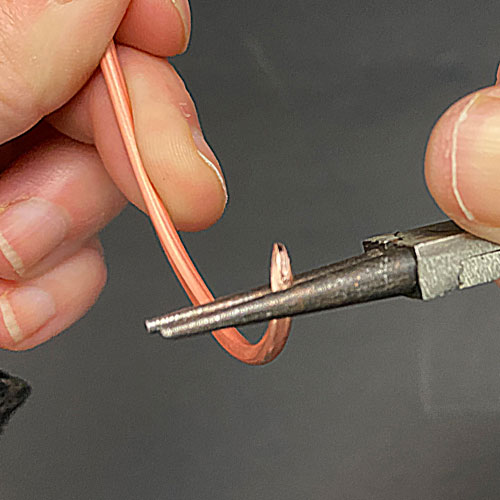
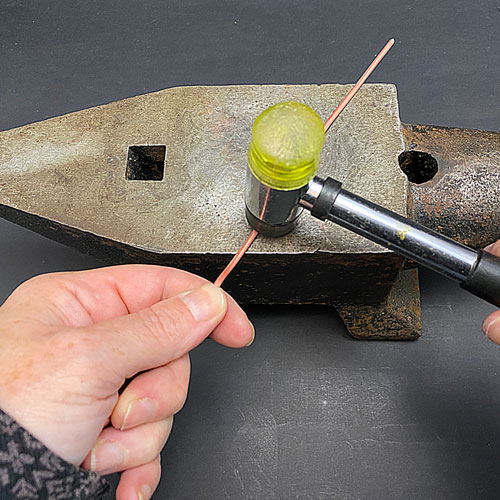
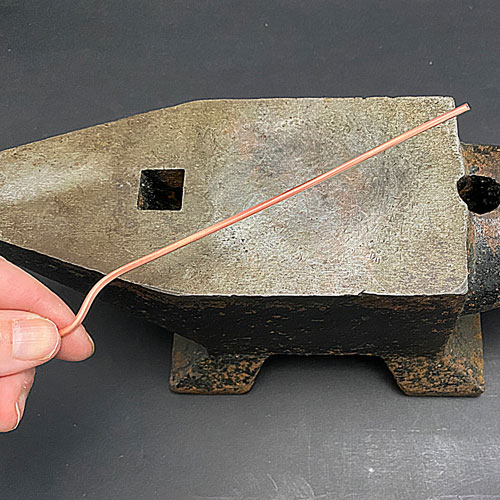
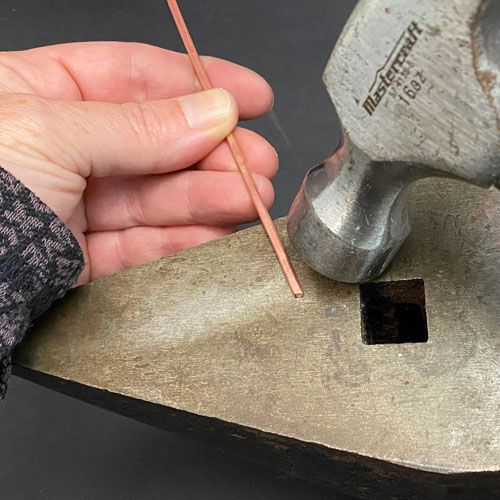
Using a pair of heavy-duty cutters, cut the end of your 12 gauge wire in a diagonal cut. (fig. 1a). File until smooth (fig. 1b, 1c).

FREE WIRE-WRAPPING GUIDE TO YOUR EMAIL!
JOIN NEWSLETTER
We respect your privacy. Unsubscribe at anytime.
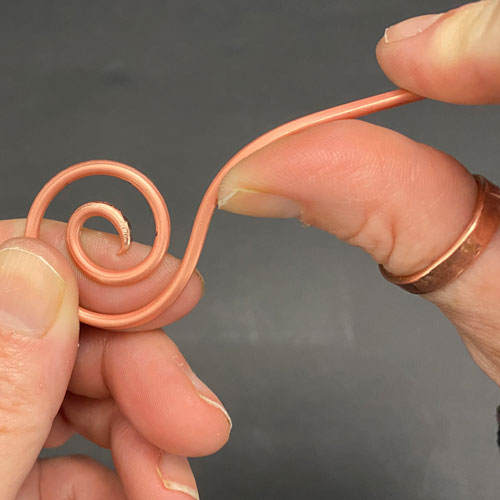
Step 2
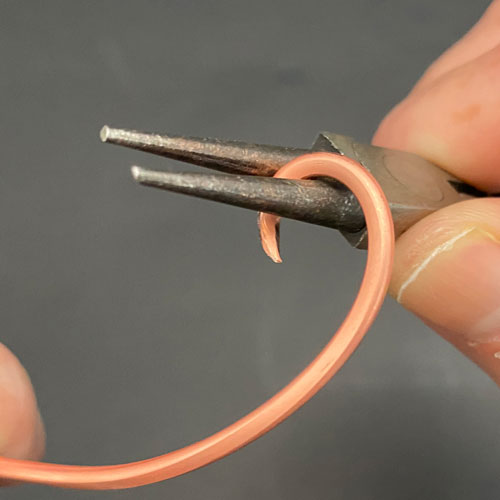
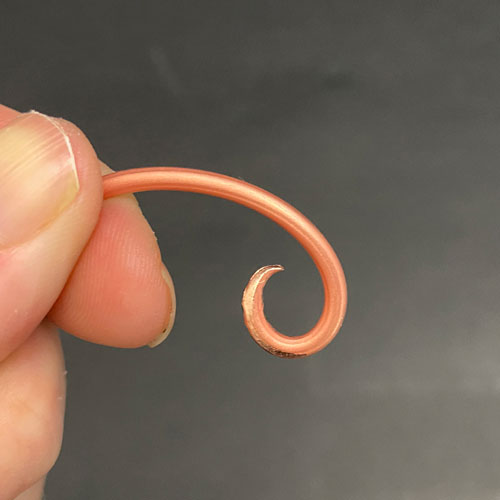
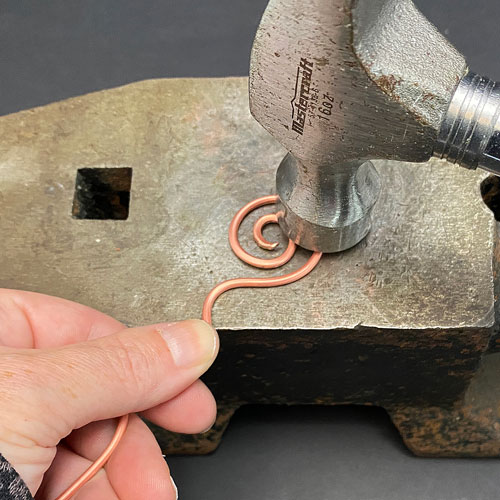
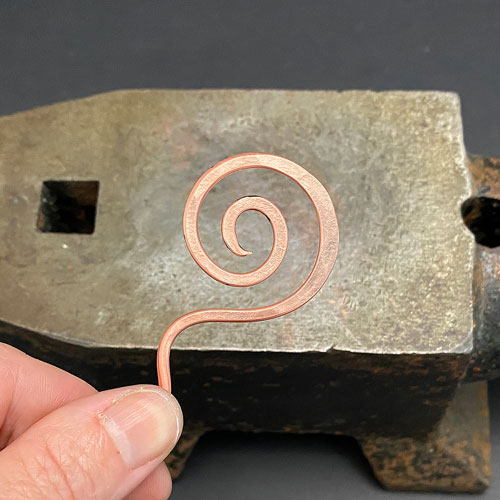
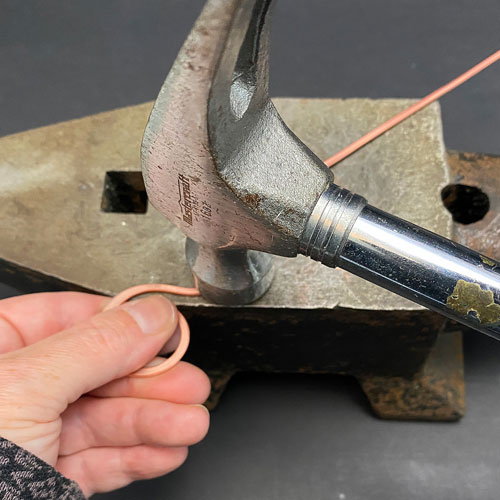
Using a pair of round-nose pliers, start forming your swirl. Try to keep as tight as possible (fig. 2a, 2b, 2c, 2d). This part can be a little tricky which is why your wire should be dead soft.
Prefer this tutorial in a PRINTABLE FORMAT?
Click here for the PDF version of “How to Wire-Wrap a Hair Pin”

RELATED CONTENT
- How to Wire-Wrap Stones Without Holes
- Wire-Wrapping Tools & Supplies for Beginners
- How to Wire-Wrap Crystals
- How to Wire-Wrap a Simple Brooch Wire-Wrapping Tutorial
- Beginner’s Guide to Jewelry Wire for Wire-Wrapping
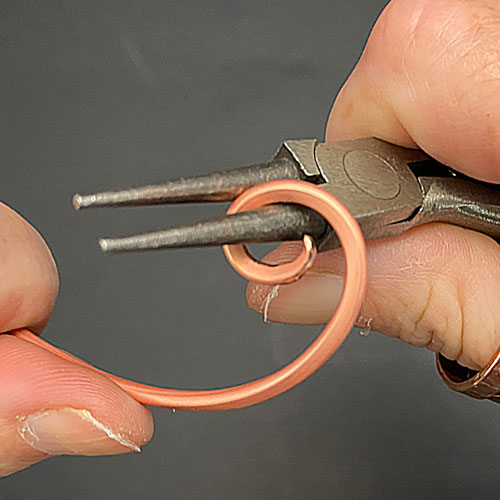
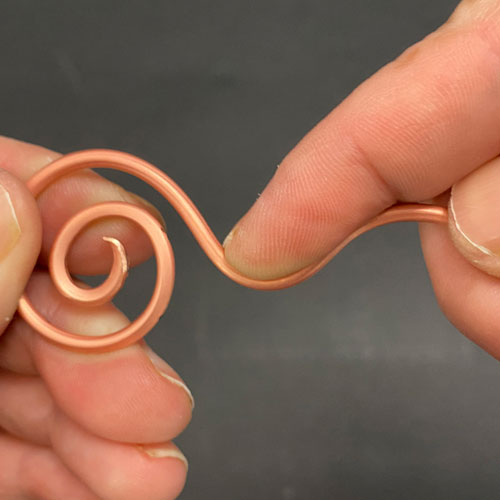
Step 3
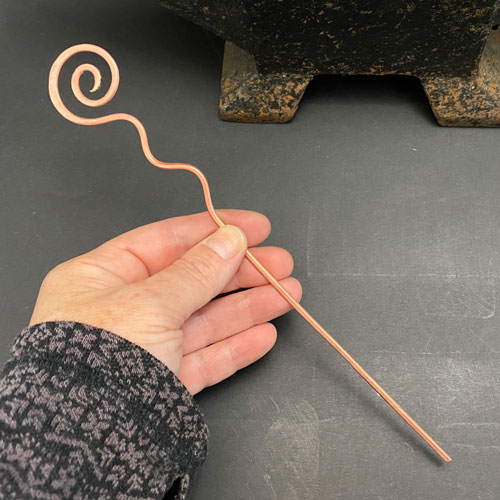
Make a few loops and straighten out base wire (fig. 3a). Using your thumb and fingers, start forming 3 bumps in the wire. This is where we will put the beads. (fig. 3b, 3c, 3d).

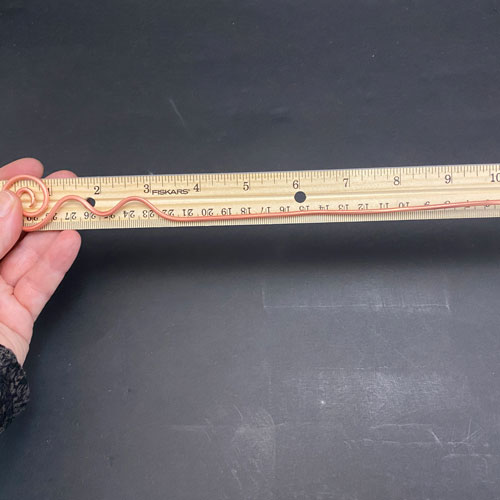
Step 4
Once your bumps are formed, measure the TOTAL length of your hair pin. In my tutorial, I’m measuring my pin at 9” (fig. 4a). Using a pair of heavy duty cutters, trim down your wire to make your hair pin as long as you’d like.
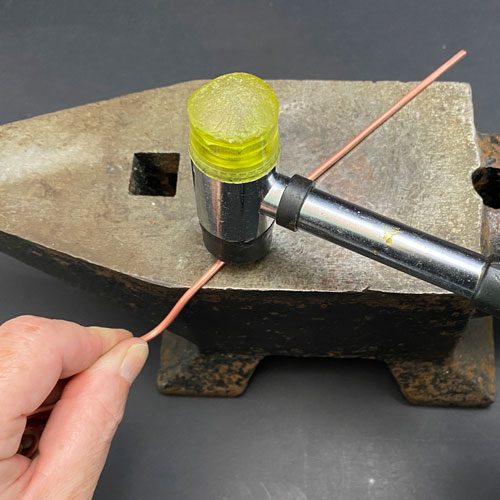
Using a rubber mallet, straighten out the wire (fig. 4b, 4c). Place the swirl head on the anvil or bench and start hammering (fig. 4d, 4e). I like to flatten out the outside of the swirl more than the inside.
Prefer this tutorial in a PRINTABLE FORMAT?
Click here for the PDF version of “How to Wire-Wrap a Hair Pin”

Step 5
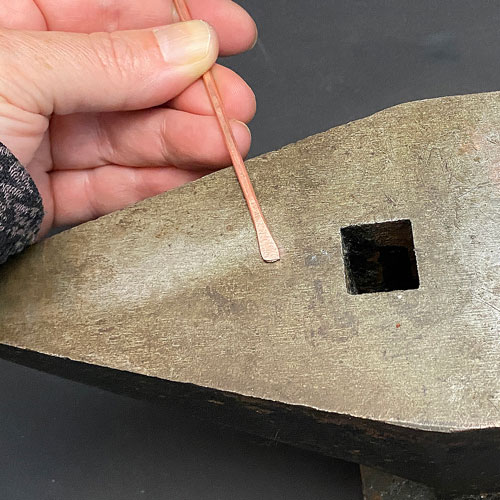
Place the pin on the anvil or bench block and hammer the rest of the pin (fig. 5a). Straighten out the pin with a rubber mallet if necessary (fig. 5b, 5c). Place the tip of pin on anvil or bench block – hammer until paddle is formed (fig. 5d, 5e).
KEEP READING…
