Learning how to anneal copper wire is an essential skill to have if you’re working with thicker wire.
Annealing your wire basically means heating it with a torch to make it softer. This makes it A LOT easier to work with when you are wire-wrapping or doing any type of wire work.
As usual, make sure to take all necessary safety precautions – wear safety glasses.
Looking for simple wire-wrapping techniques?
Click here to see all PRINTABLE wire-wrapping tutorials for beginners

FREE WIRE-WRAPPING GUIDE TO YOUR EMAIL!
JOIN NEWSLETTER
We respect your privacy. Unsubscribe at anytime.
RELATED CONTENT
- Wire-Wrapping for Beginners
- Wire-Wrapping Tools & Supplies for Beginners
- How to Make a Spiral Bead Cage Pendant
- Wire-Wrapping Tutorials: 13 DIY Wire-Wrapped Pendants
- Wire-Wrapped Ring Tutorials – How to Wire-Wrap Rings
MATERIALS
- Torch
- Heat-resistant surface
- Bucket of water for quenching
- Safety glasses
- Metal tongs
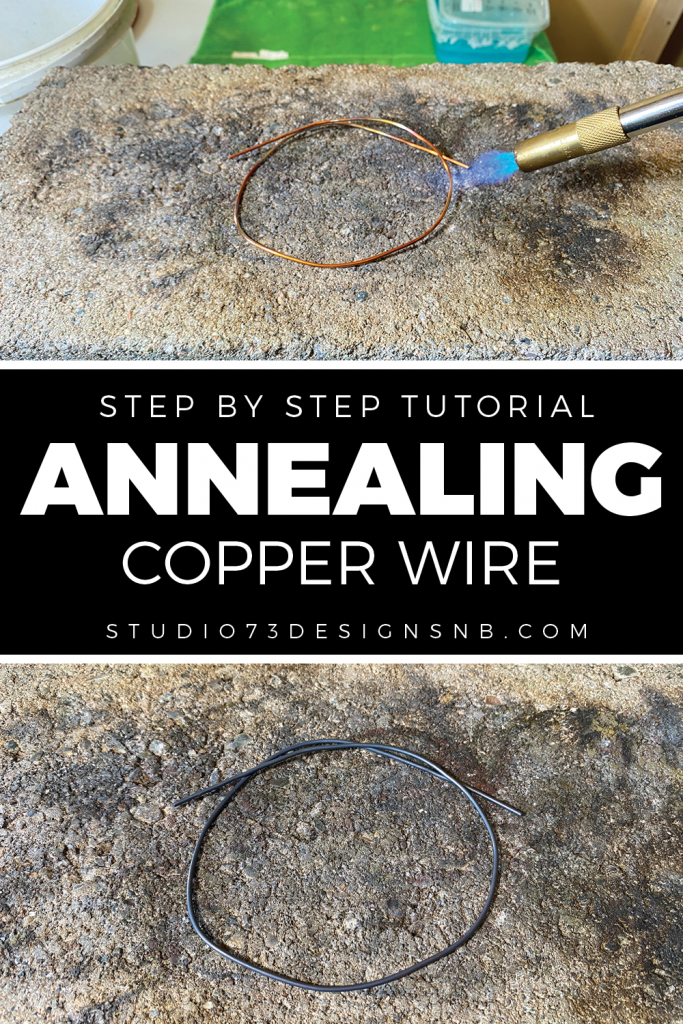
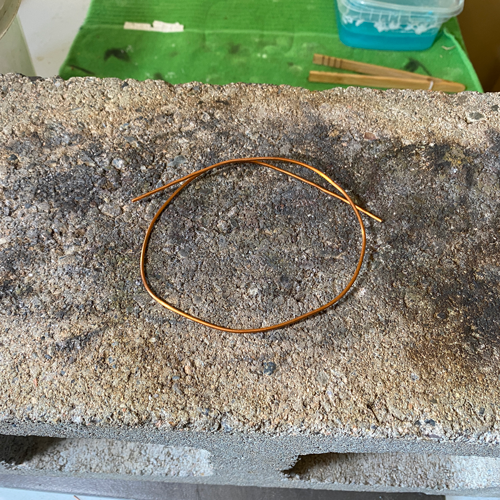
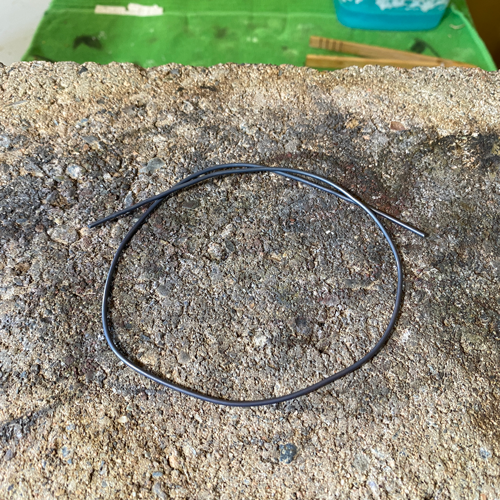
Step 1 – Make sure you are wearing safety glasses. Set your wire on a charcoal block or other surface suitable for soldering. I use an old concrete block which works perfectly.
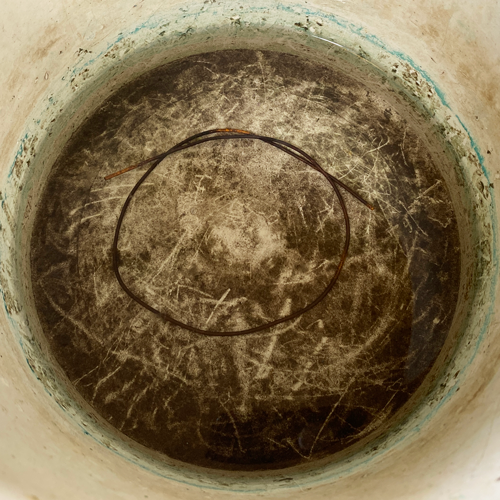
Step 2 – Light your torch and heat the wire, slowly moving the flame up and down the wire. As you heat it, you’ll notice that the wire will start changing different colors. If the wire turns bright red, pull torch away because you don’t want to melt it.
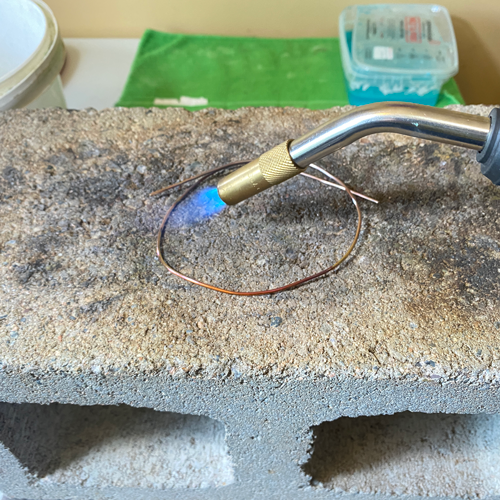
Step 3 – Keep slowly heating the wire in a circular motion. The amount of time that it takes will vary – smaller gauge wire will heat much faster than thicker gauge wire. It really shouldn’t take more than a minute.
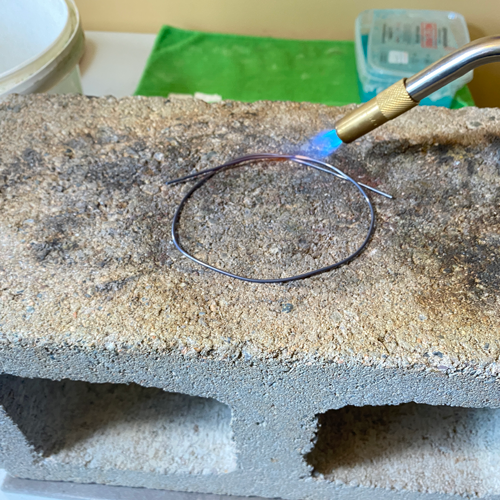
Once you’re done heating, your wire will be black. This is called firescale.
Looking for simple wire-wrapping techniques?
Click here to see all PRINTABLE wire-wrapping tutorials for beginners
Step 4 – Your wire will be very hot so using a pair of tongs, quench the wire in a bucket of water.
RELATED CONTENT
- Wire-Wrapping Tutorials: 17 DIY Wire-Wrapped Earrings
- Wire-Wrapped Ring Tutorials – How to Wire-Wrap Rings
- Wire-Wrapping Tutorial DIY Jewelry Kits on Etsy
- Wire-Wrapping Tools & Supplies for Beginners
- Wire-Wrapped Crescent Moon Tutorial
At this point, your wire will be super dirty so you’ll need to clean it first before you can start working with it.
In order to clean the wire, we will have to “pickle” the wire – this will remove the firescale.
NEXT: How to Pickle Copper Wire to Remove Firescale
If you’d like to see my work and follow my wire-wrapping journey, you can find me here:
Etsy
Facebook
Instagram
Twitter
Pinterest
YouTube

