• Skip to main content
  • Skip to secondary menu
  • Skip to primary sidebar
  • Skip to footer
Studio 73 Designs

Studio 73 Designs

Wire Jewelry Making & Wire Wrapping Techniques

  • Start Here!
  • Get Your FREE Wire-Wrapping Guides
  • Shop Tutorials
    • Cart
    • Checkout
  • Blog
  • About
  • Contact Me

How to Make Jump Rings

DISCLAIMER:  This post may contain affiliate links, meaning I get a commission if you decide to make a purchase through my links, at no cost to you.  Please read my disclaimer for more info.

Want to Support my Work?

If you are enjoying my content, please consider support me on Patreon :). This helps me to create more AMAZING FREE content to share with you :)

May 23, 2020 by Madelynn

This is a beginner wire tutorial that shows you how to make jump rings.

By making your own jump rings, you can make them when you need them, in whatever size you want.


Looking for simple wire-wrapping techniques?

Click here to see all PRINTABLE wire-wrapping tutorials for beginners


RELATED CONTENT

wire wrap jewelry

FREE WIRE-WRAPPING GUIDE TO YOUR EMAIL! 

JOIN NEWSLETTER

SEND GUIDE TO EMAIL

We respect your privacy. Unsubscribe at anytime.

  • How to Make a Wire-Wrapped Bead Link
  • How to Make a Wrapped Eye Pin Wire Loop
  • How to Make Jump Rings
  • How to Wire-Wrap a Bead Pendant
  • How to Make a Spiral Bead Pendant
 

LEVEL: BEGINNER

Materials & Tools

  • Wire of your choice (I’m using 18 gauge)
  • 6-Barrel pliers
  • Flush cutters
  • Needle Nose pliers
 

Step 1

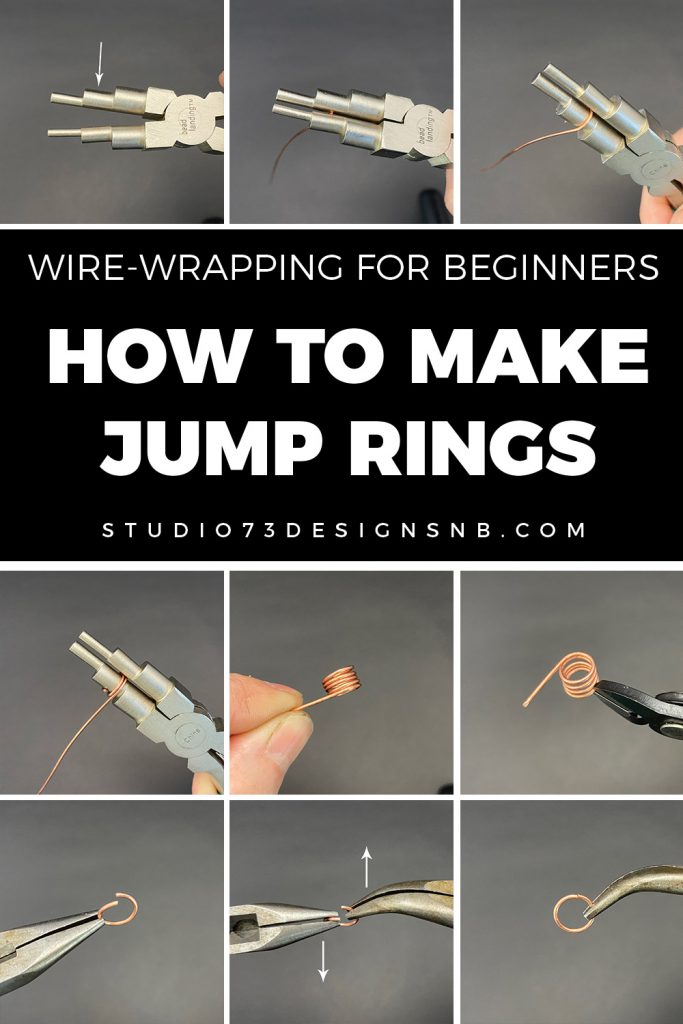
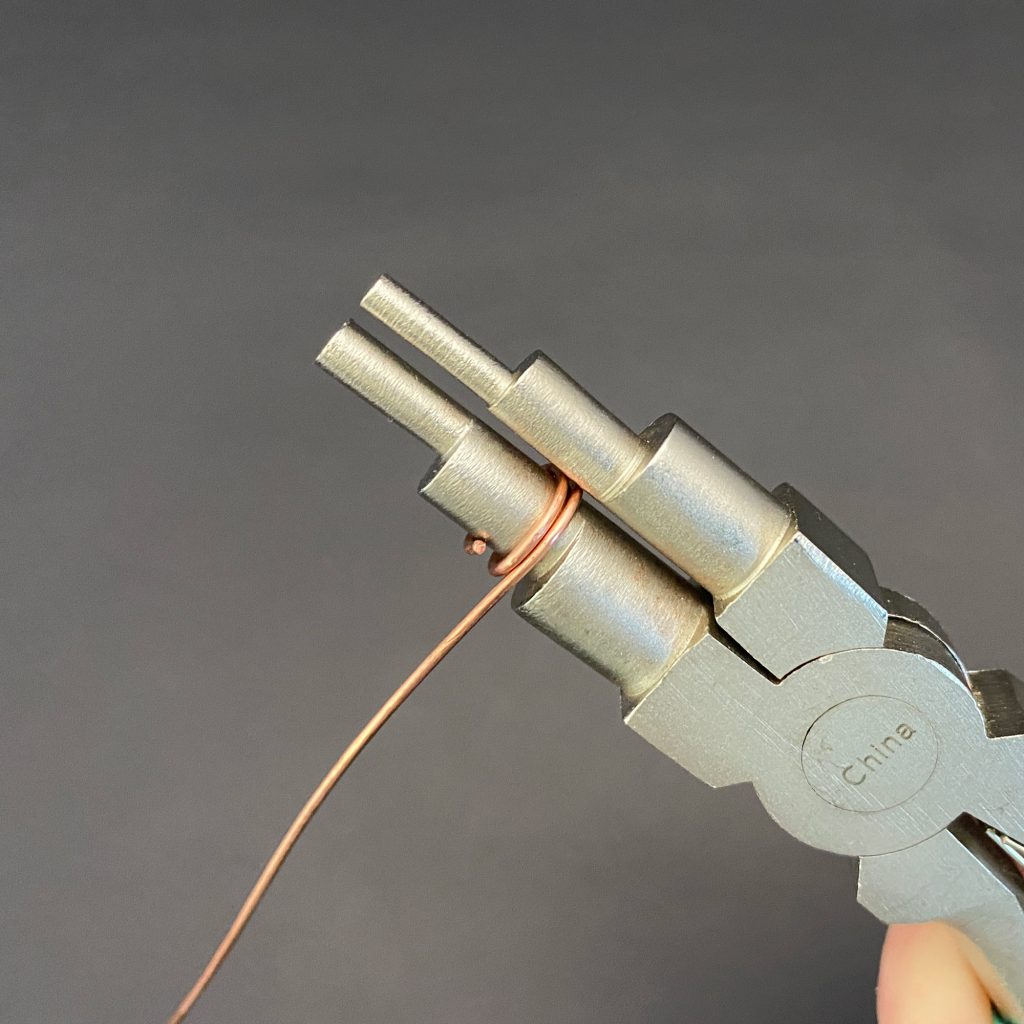
Pick what size jump ring you want to make. I’m using a pair of 6-barrel pliers for this. If you don’t have a pair, you can use round nose pliers but it make be trickier to keep the jump ring size consistent.

How to make jump rings
Step 1
 

Step 2

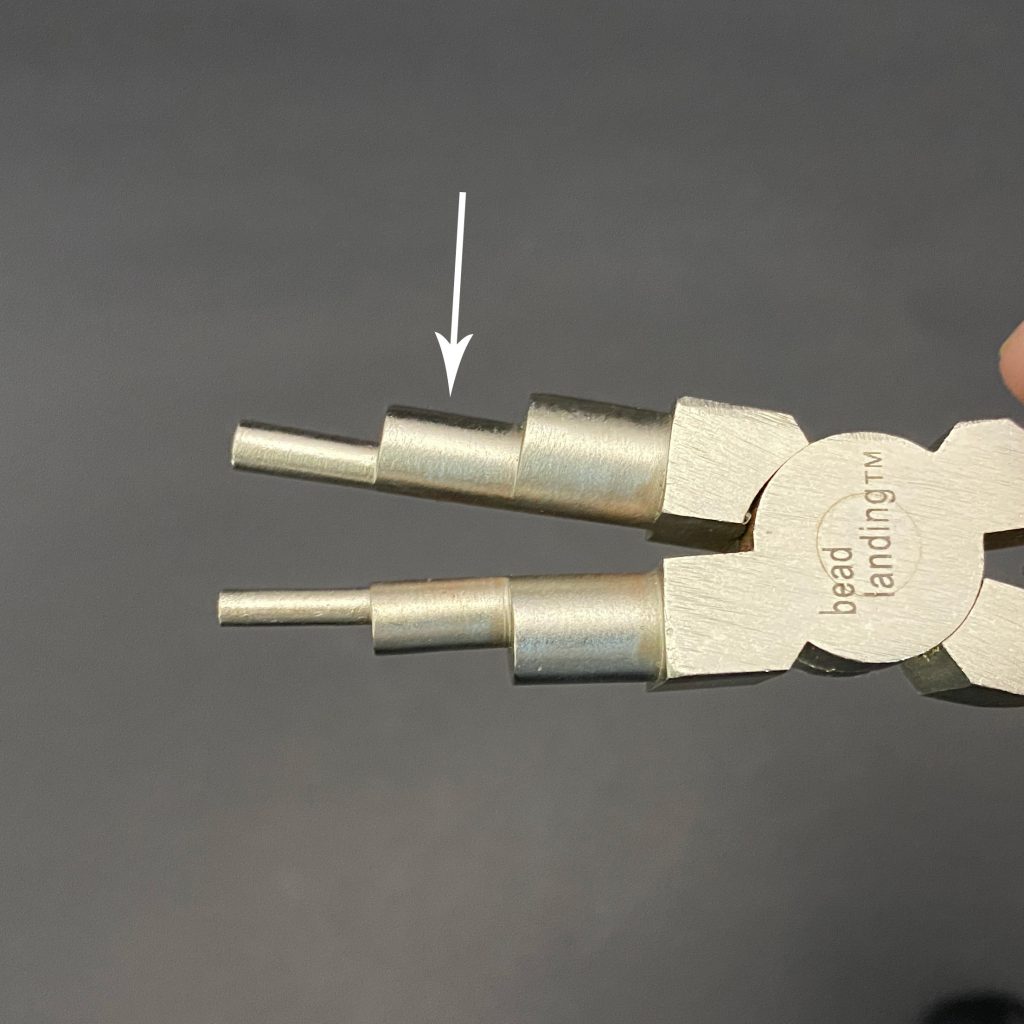
Grasp the wire at the very end as shown.

How to make jump rings
Step 2
 

Step 3

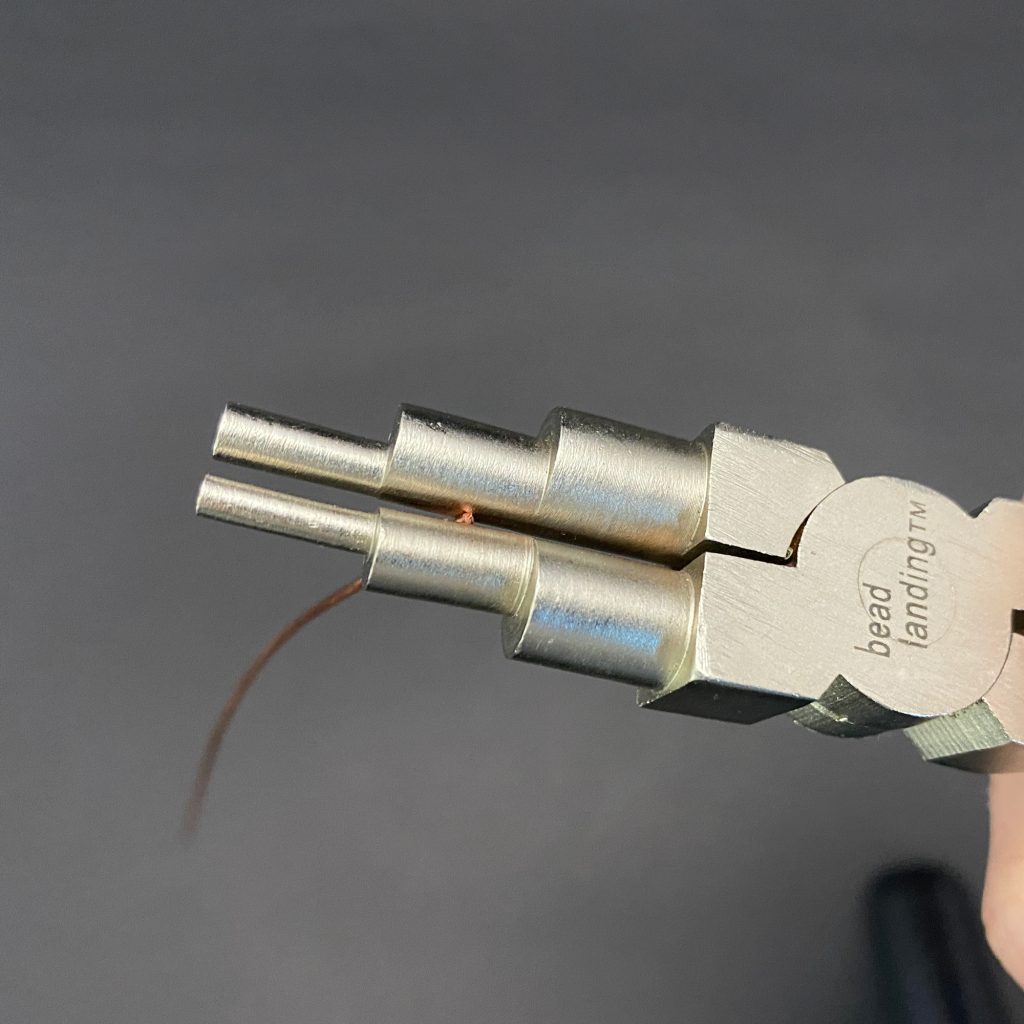
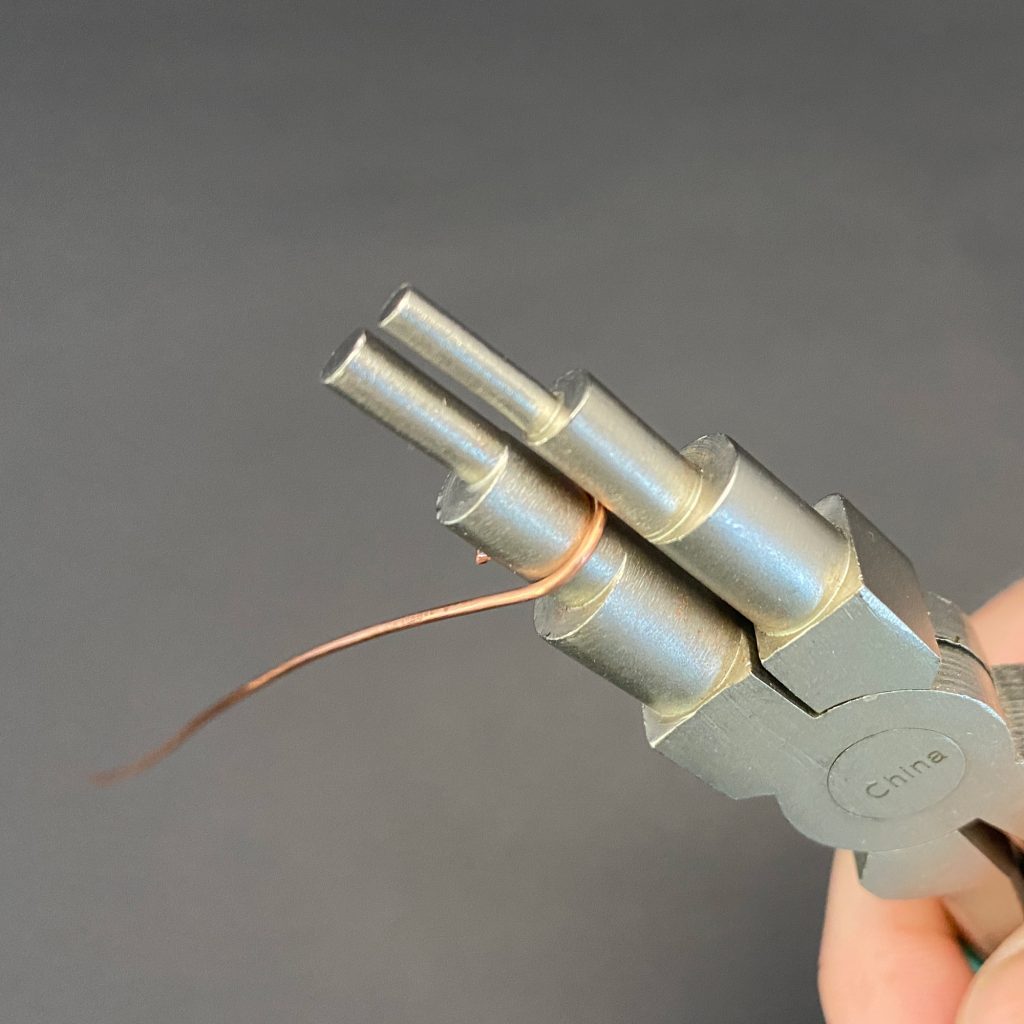
Rotate your wrist away from you to start forming a loop.

How to make jump rings
Step 3
 

Looking for simple wire-wrapping techniques?

Click here to see all PRINTABLE wire-wrapping tutorials for beginners


Step 4

Using to wrist, keep twisting wire around the pliers.
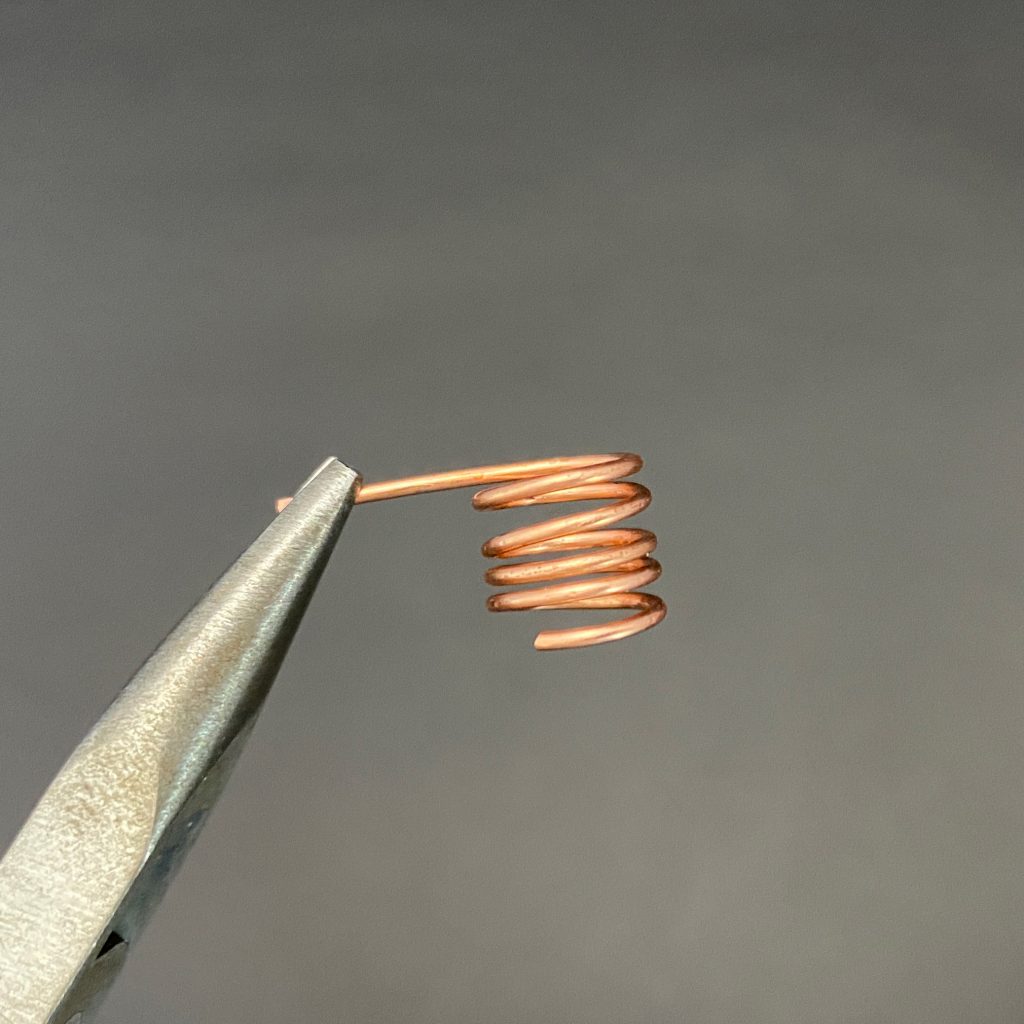
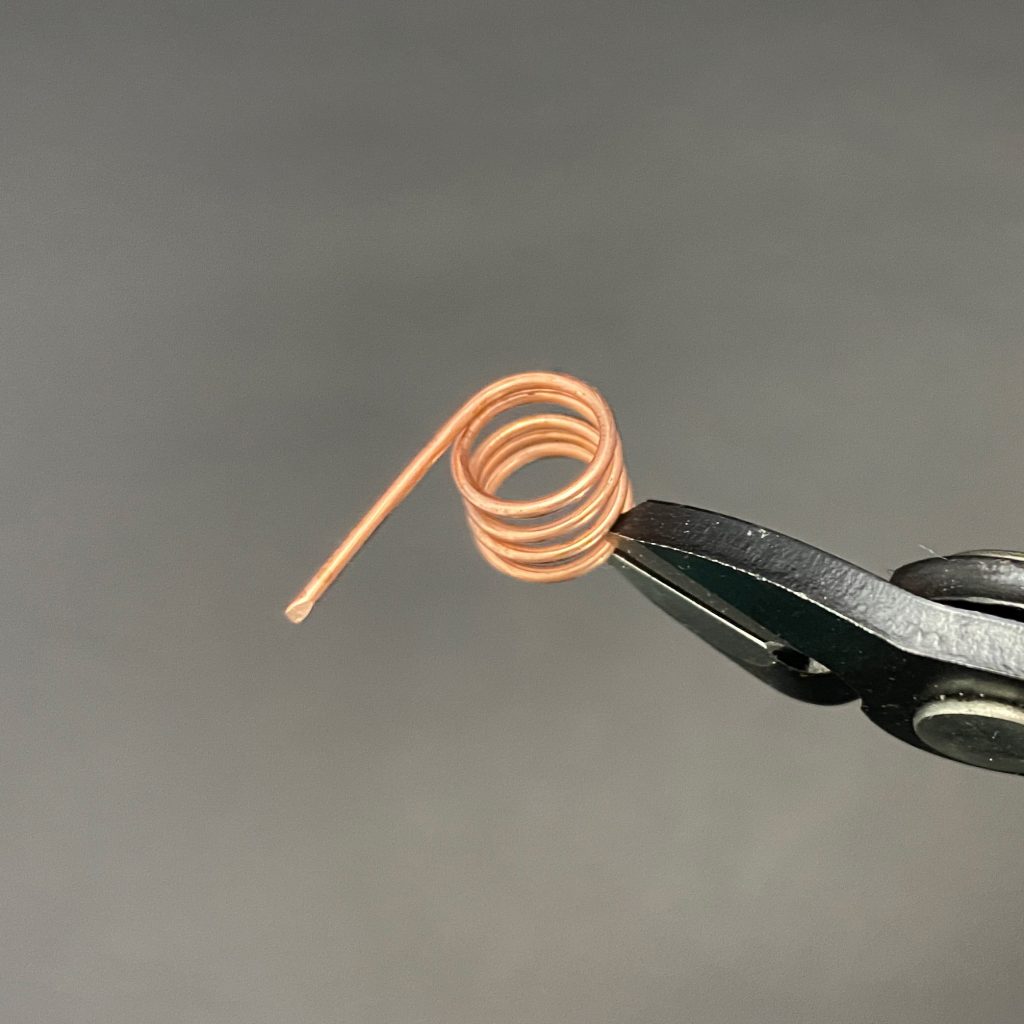
How to make jump rings
Step 4
 

Step 5

Keep going until you have a coil.
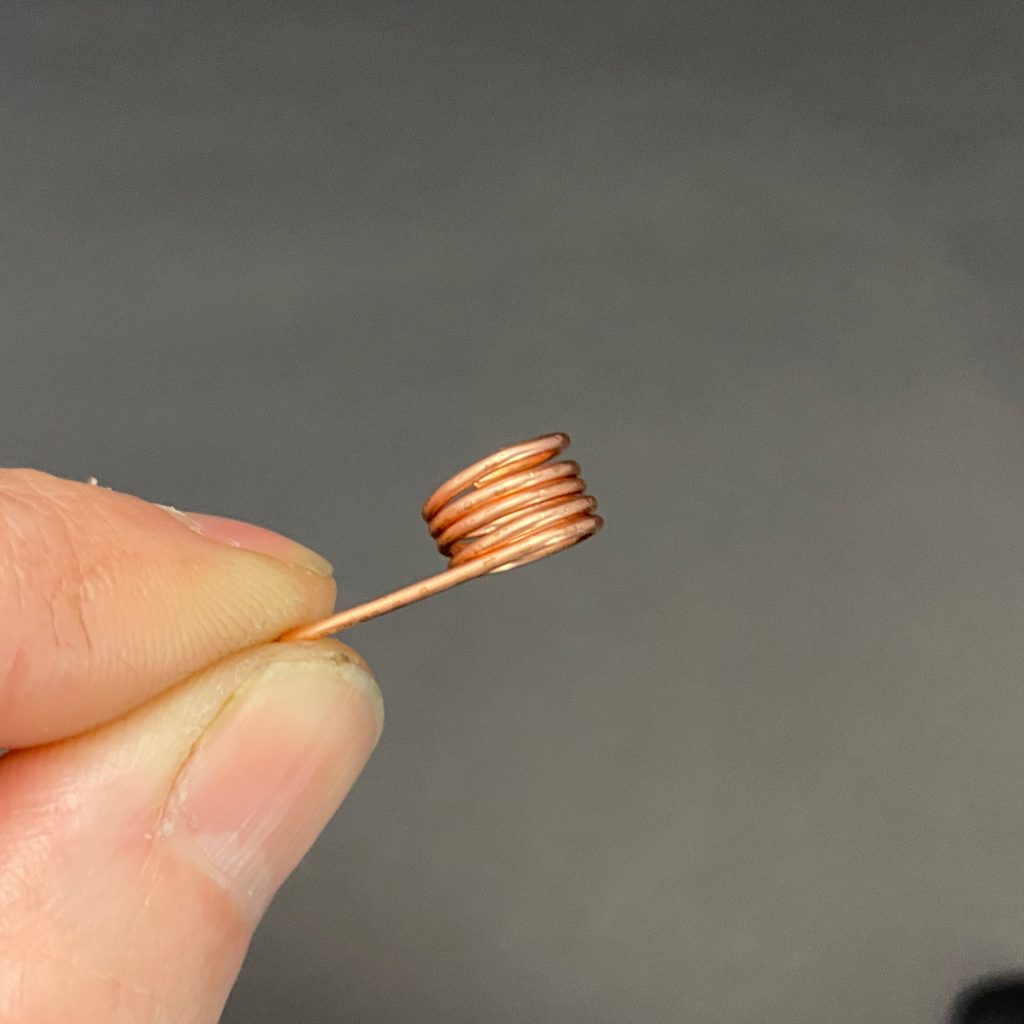
How to make jump rings
Step 5
 

Step 6

Using your finger nails, try to space the coil apart. This makes it easier to cut.
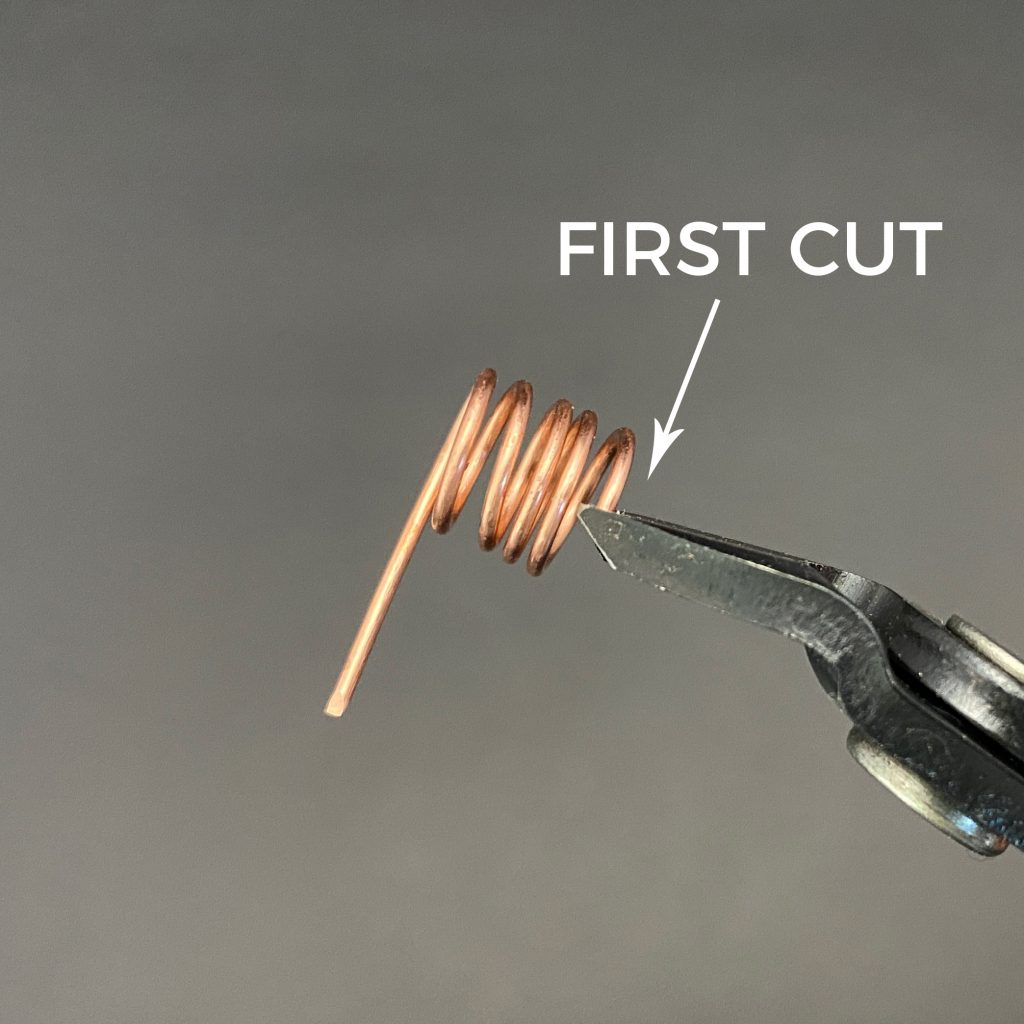
How to make jump rings
Step 6
 

Step 7

Place the flush cutters on the wire as shown. Make sure the flat side of the flush cutters is facing the side you want a flush cut. This is the first cut (for the first side of the jump ring end).

How to make jump rings
Step 7
 

Step 8

Flip your flush cutters so they are facing the other way and cut the opposite side.
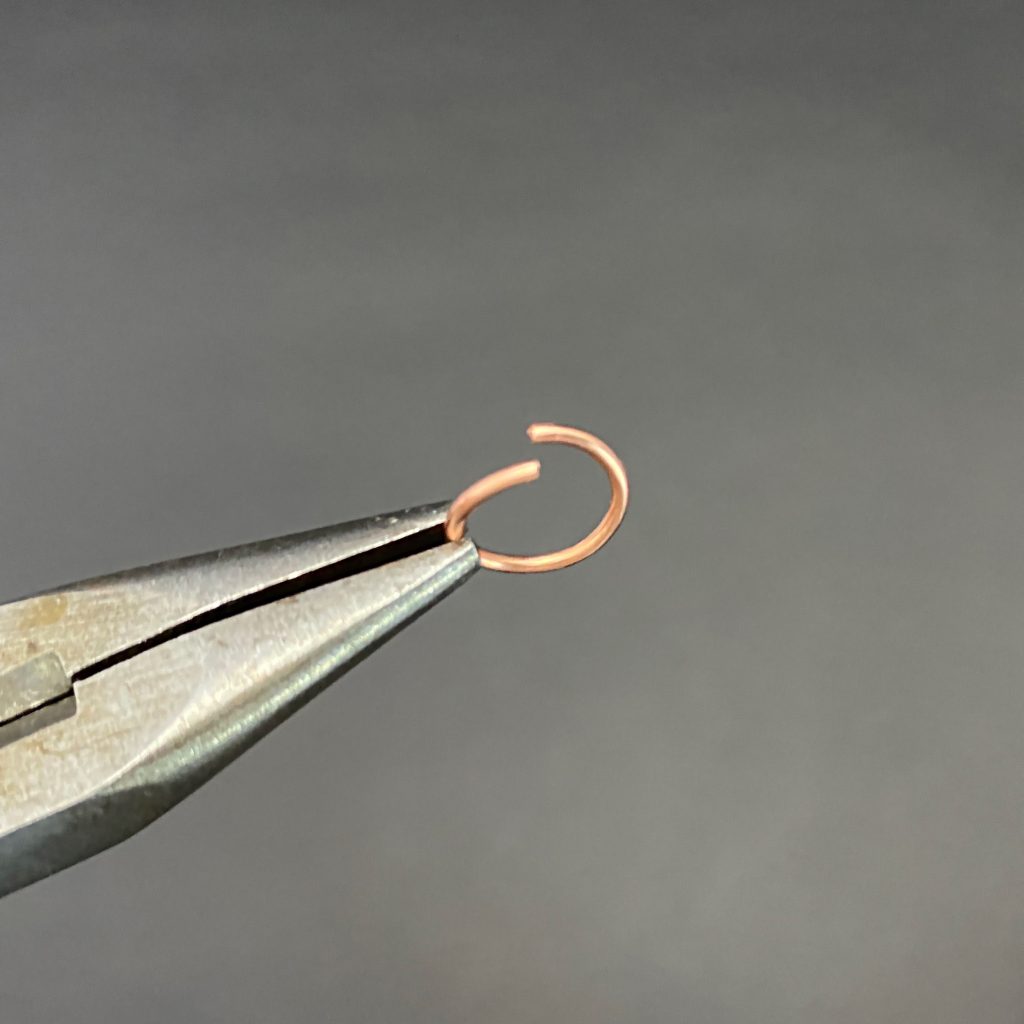
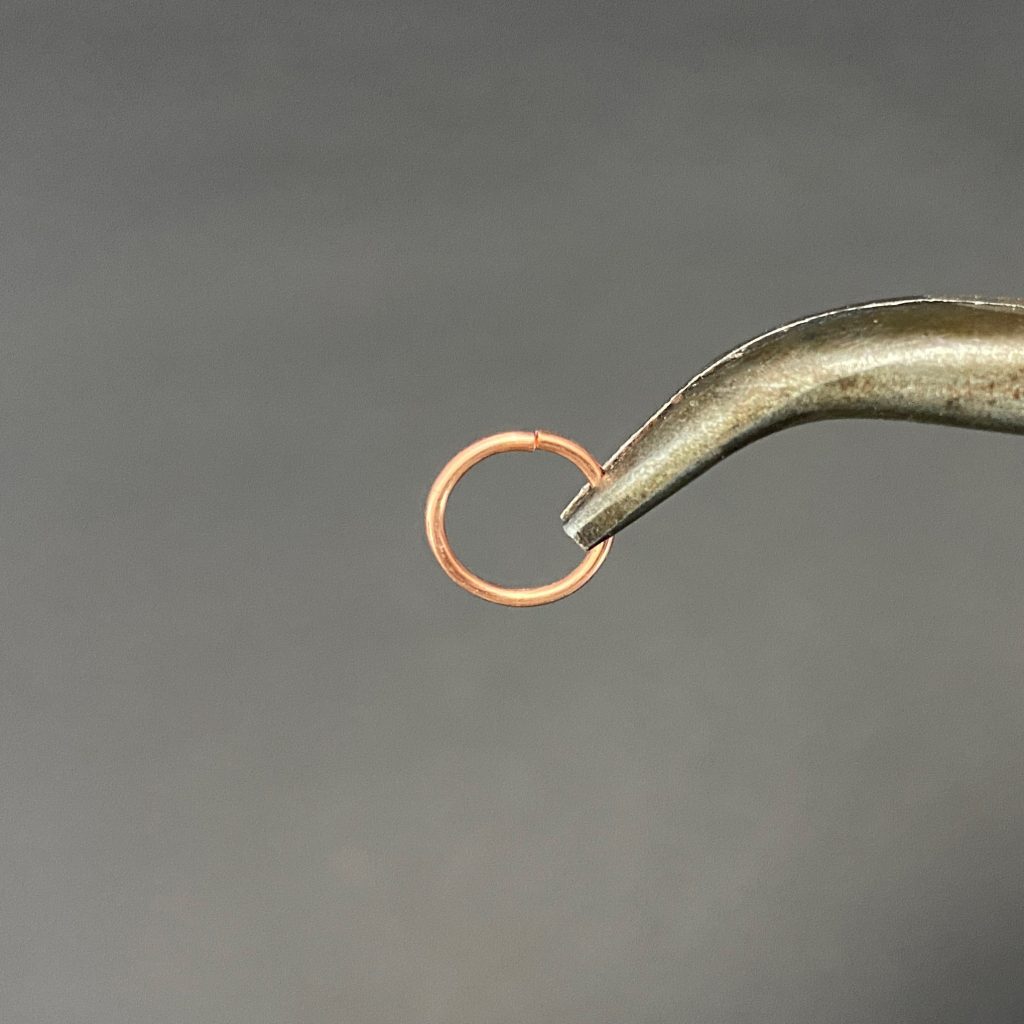
How to make jump rings
Step 8
 

Finished Jump Ring

How to make jump rings
 

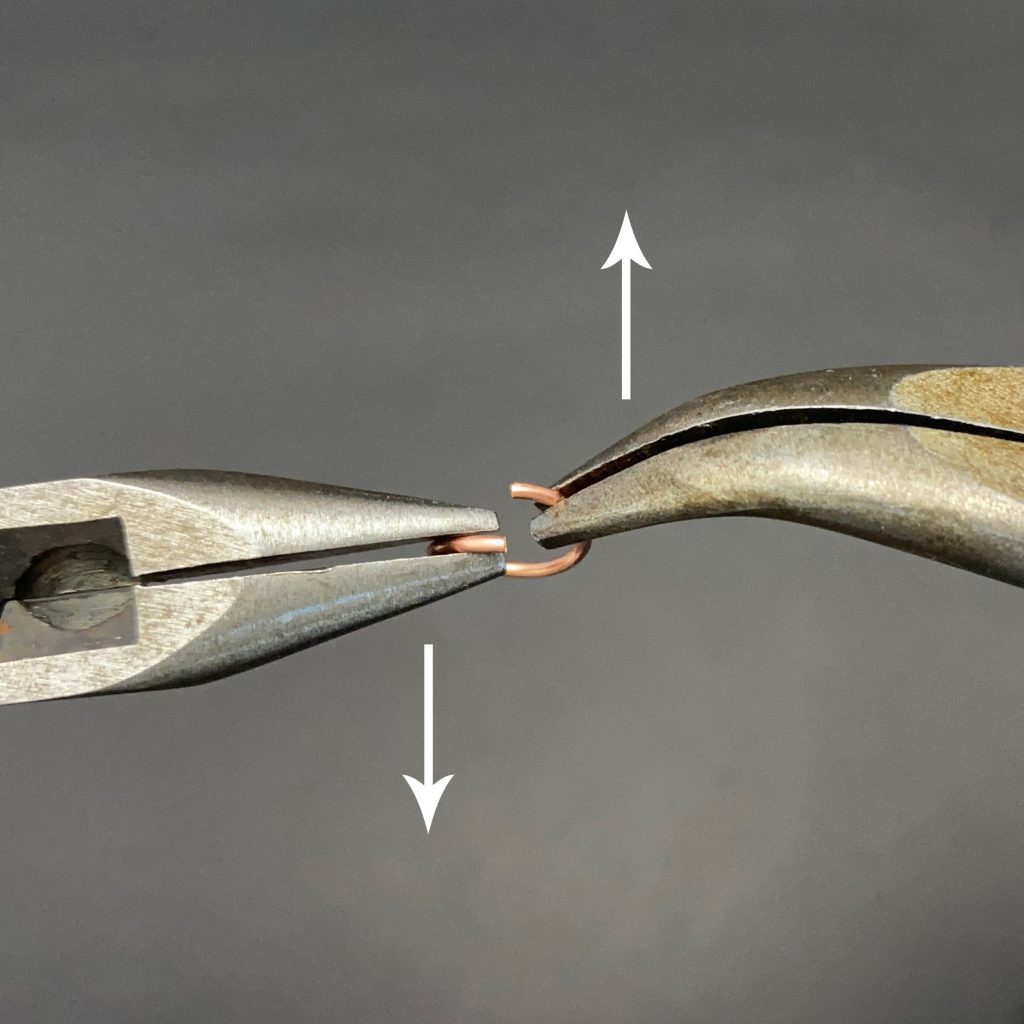
How to close a jump ring

Using a set of pliers for each side, wiggle ends back and forth.
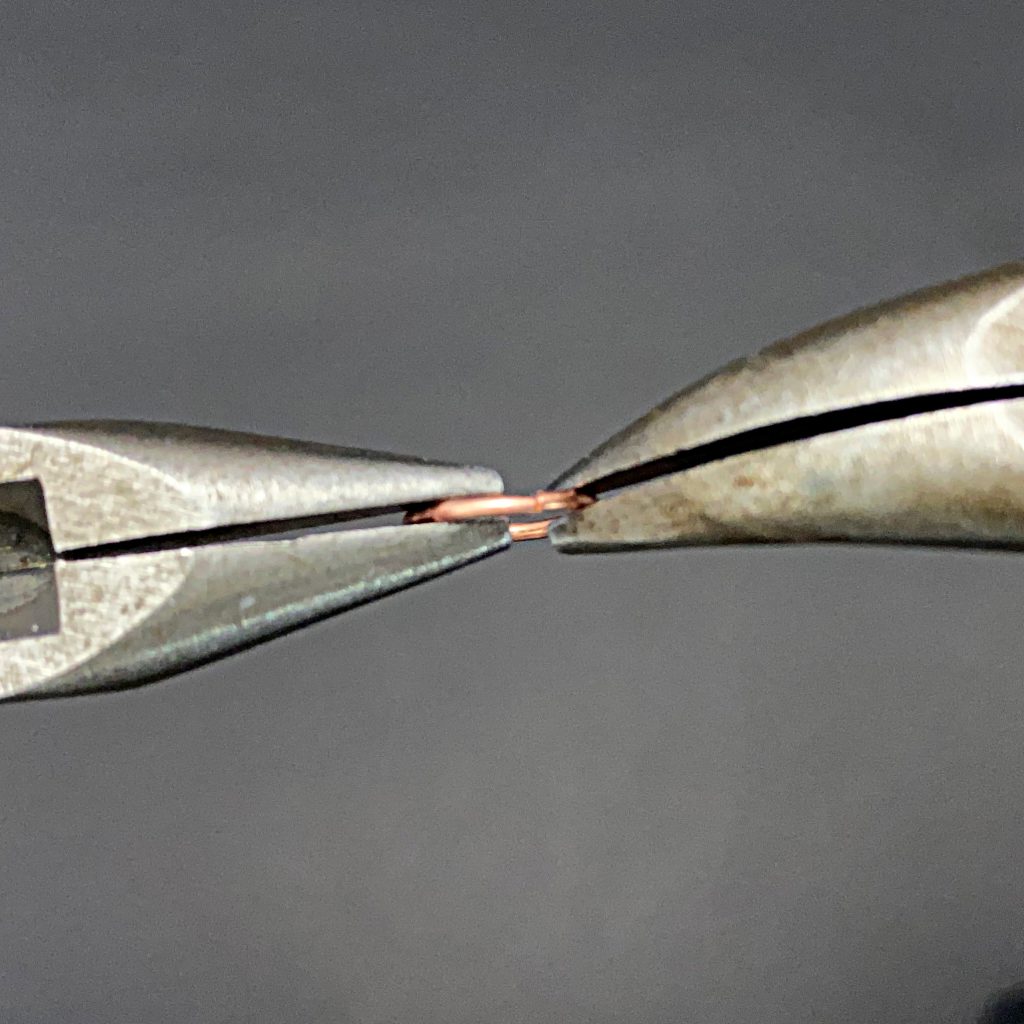
How to make jump rings
 

Closed Jump Ring

How to make jump rings
 

If you’re a newbie, check out Wire-Wrapping for Beginners for lots of resources.

If you’d like to see my work and follow my wire journey, you can find me here:

Facebook
Instagram
Twitter
Pinterest
YouTube
Etsy

madelynn signature

Filed Under: Tutorials/DIY Tagged With: beginner

Primary Sidebar

MadelynnHey there! Thanks for visiting 🙂

My name is Madelynn and I’m the owner of Studio 73 Designs.

Studio 73 Designs is managed by a team of wire wrapping jewelry enthusiasts.

If you enjoy my content, you can support me on Patreon 🙂 Cheers!

Follow Me

  • Facebook
  • Instagram
  • Pinterest
  • Twitter
  • YouTube

ARE YOU INTERESTED IN WIRE-WRAPPING?

Sign up below and get access to my FREE wire-wrapping guides!

Sign Up
Wire Wrapping Tutorials
Wire Wrapping for Beginners Start Here
Beginner's Guide to Jewelry Wire for Wire-Wrapping
Wire Wrapping Tools and Supplies for Beginners
How to wire wrap stones without holes wire-wrapping tutorial for beginners
Wire Wrapping Tutorials DIY Jewelry Kits

Footer

ARE YOU INTERESTED IN WIRE-WRAPPING?

Sign up below and get access to my FREE wire-wrapping guides!

Sign Up

Site Navigation

Home
About
Contact
Blog
Privacy Policy
Disclaimer
Terms & Conditions

Follow Me

  • Facebook
  • Instagram
  • Pinterest
  • Twitter
  • YouTube

© 2023 · Studio 73 Designs