• Skip to main content
  • Skip to secondary menu
  • Skip to primary sidebar
  • Skip to footer
Studio 73 Designs

Studio 73 Designs

Wire Jewelry Making & Wire Wrapping Techniques

  • Start Here!
  • FREE Wire-Wrapping Guides
  • Shop Tutorials
    • Cart
    • Checkout
  • Contact
  • Join Member
  • Member Login
Join PREMIUM MEMBERSHIP (FREE-TRIAL): 70+ Wire Wrapping Tutorials: Gain access to ALL step-by-step tutorials with high-quality images, no ads, plus all future tutorials. Check it out HERE.

Wire-Wrapping Whimsical Woven Two Tree Handmade Pendant Tutorial

September 1, 2025 by Madelynn

Step 3 of 15

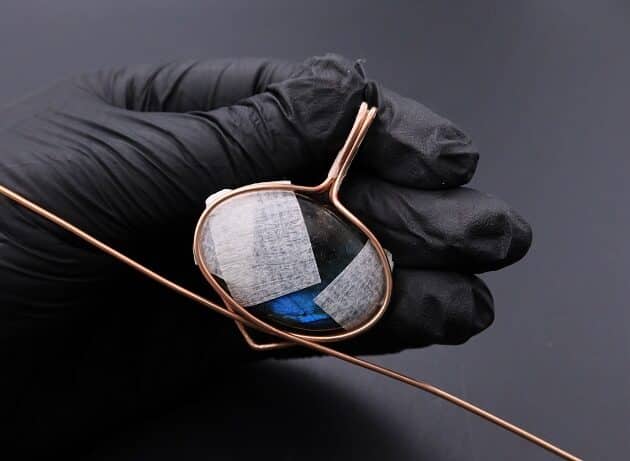
Moving on, let’s frame the back of your pendant.

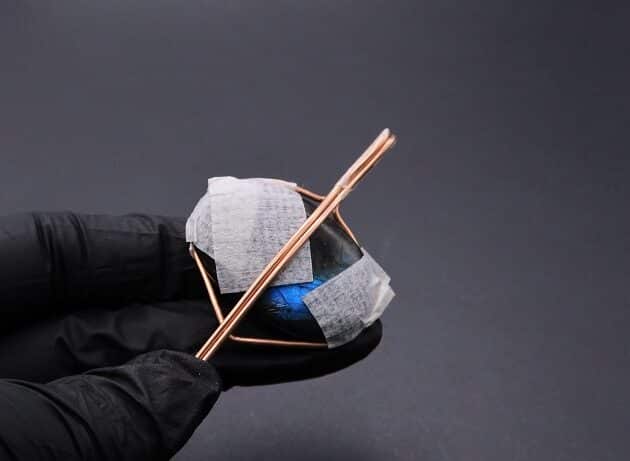
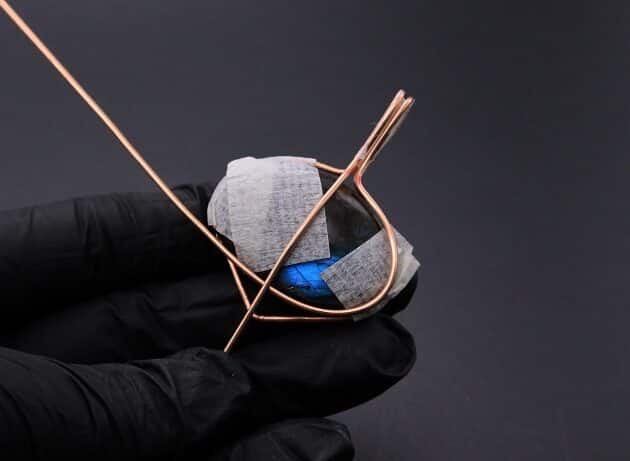
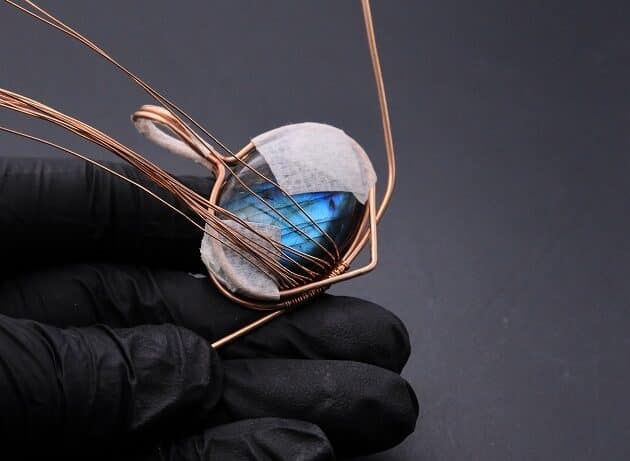
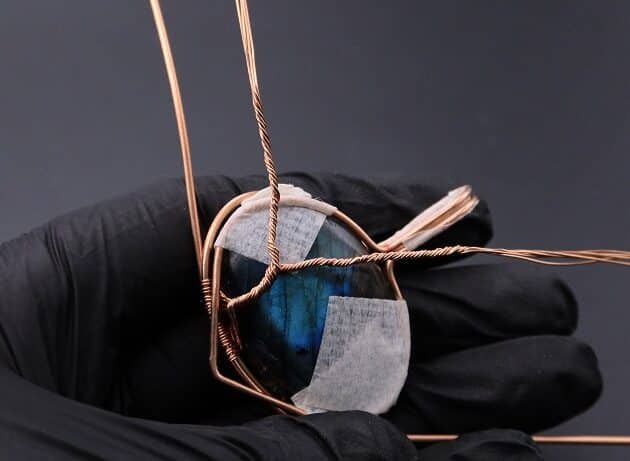
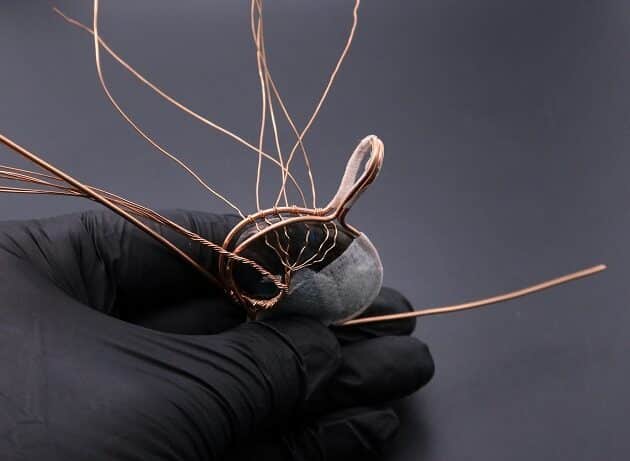
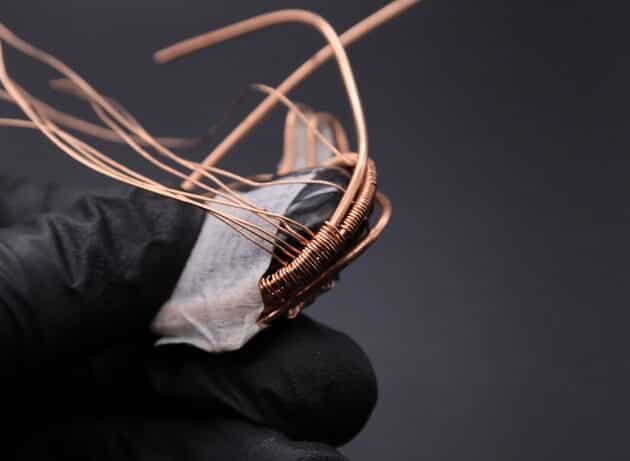
Wrap the remaining straight 16-gauge copper wires around your stone (fig. 3a, 3b, 3c).

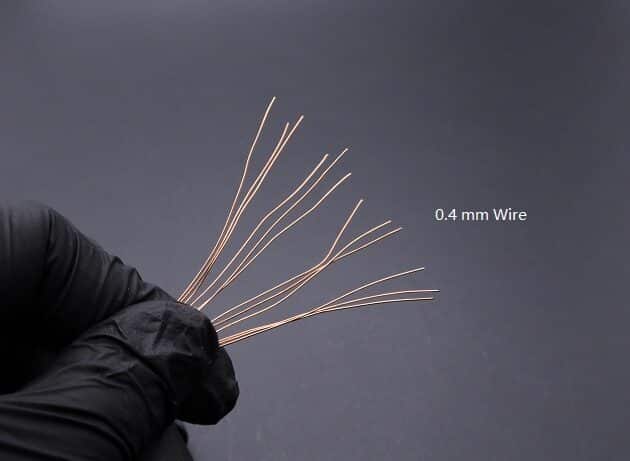
Then, take 12 strings of 26-gauge copper wire, and slip them in between your stone and back frame (fig. 3d, 3e).

wire wrap jewelry

FREE WIRE-WRAPPING GUIDE TO YOUR EMAIL! 

JOIN NEWSLETTER

SEND GUIDE TO EMAIL

We respect your privacy. Unsubscribe at anytime.

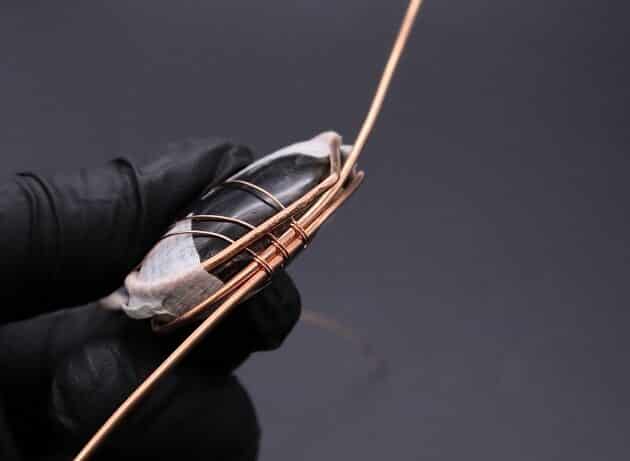
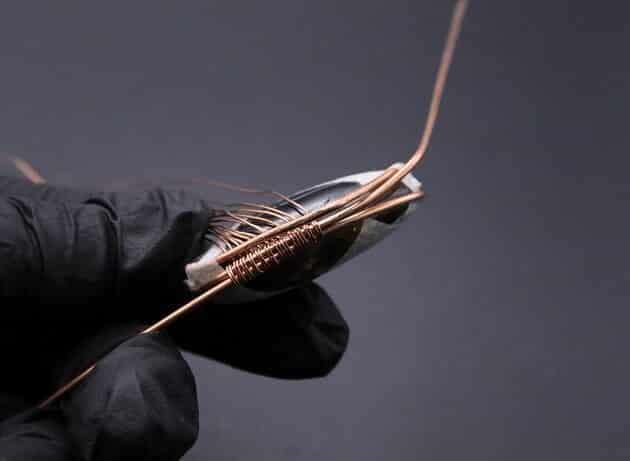
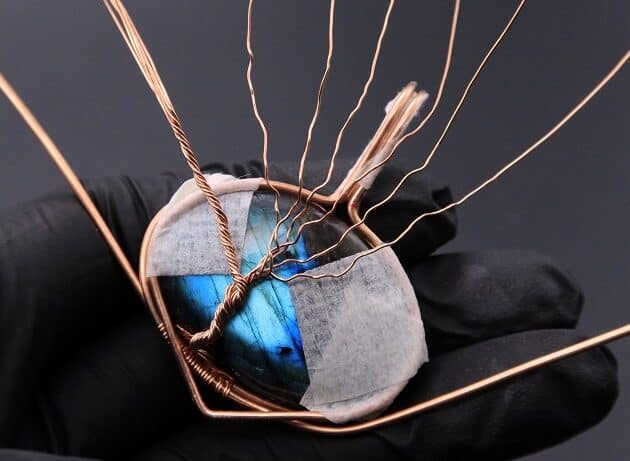
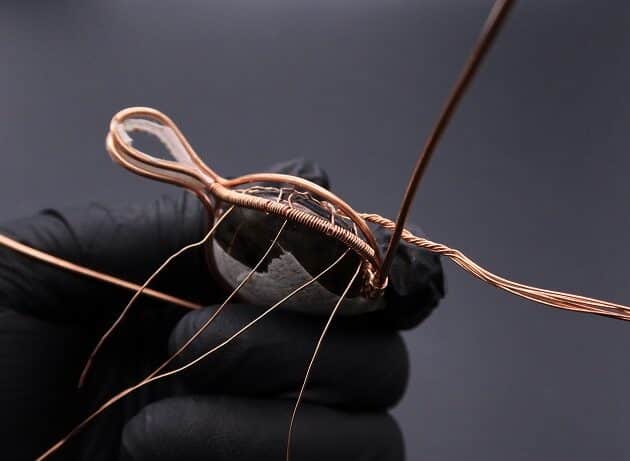
Facing the front, anchor the 26-gauge copper wire strings onto the bottom left of the back frame with 2 coils each (fig. 3f, 3g).

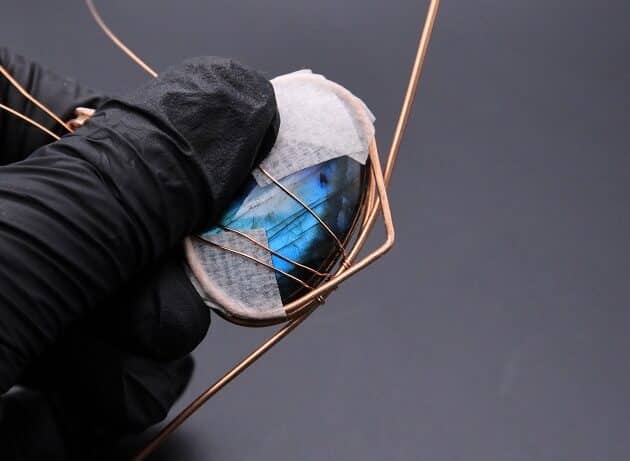
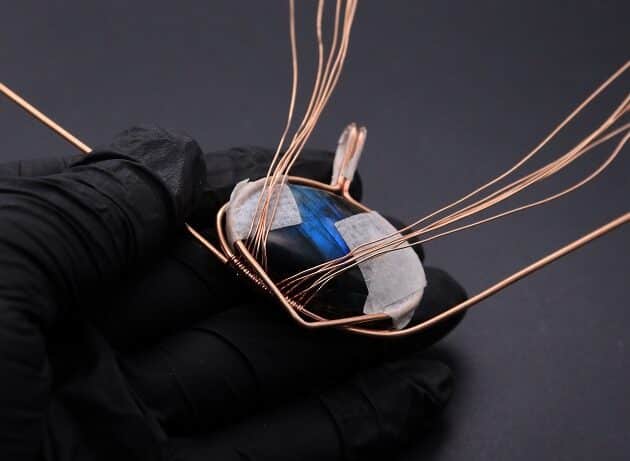
Line the remaining 26-gauge copper strings along the front of your stone as shown (fig. 3h).

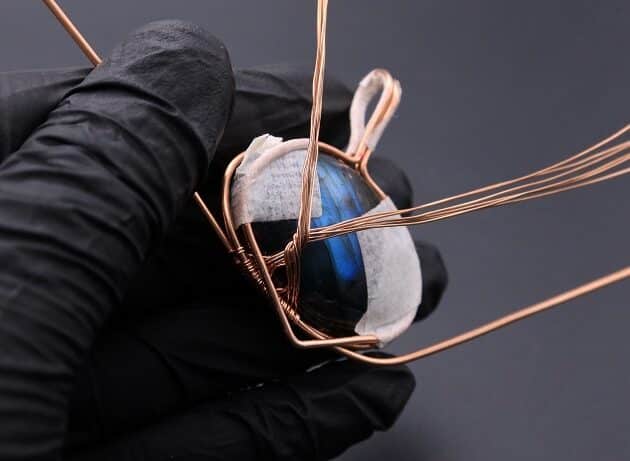
Checkpoint: This is how the bottom left woven frame should look (fig. 3i).

Wire-Wrapping Whimsical Woven Two Tree Handmade Pendant Tutorial 20
fig. 3a

Wire-Wrapping Whimsical Woven Two Tree Handmade Pendant Tutorial 21
fig. 3b

Wire-Wrapping Whimsical Woven Two Tree Handmade Pendant Tutorial 22
fig. 3c

Wire-Wrapping Whimsical Woven Two Tree Handmade Pendant Tutorial 23
fig. 3d

Wire-Wrapping Whimsical Woven Two Tree Handmade Pendant Tutorial 24
fig. 3e

Wire-Wrapping Whimsical Woven Two Tree Handmade Pendant Tutorial 25
fig. 3f

Wire-Wrapping Whimsical Woven Two Tree Handmade Pendant Tutorial 26
fig. 3g

Wire-Wrapping Whimsical Woven Two Tree Handmade Pendant Tutorial 27
fig. 3h

Wire-Wrapping Whimsical Woven Two Tree Handmade Pendant Tutorial 28
fig. 3i

Step 4 of 15

Now, let’s create the first tree of life design on the left side of your pendant.

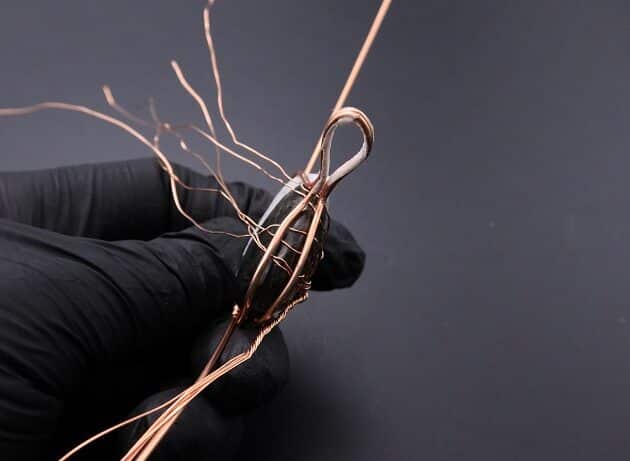
Split the 26-gauge copper wire strings into two bundles of 6 wires (fig. 4a).

Then, twist the wire bundles together to form the tree trunk (fig. 4b, 4c).

After that, form two tree branches by twisting the wire bundles separately (fig. 4d).

Wire-Wrapping Whimsical Woven Two Tree Handmade Pendant Tutorial 29
fig. 4a

Wire-Wrapping Whimsical Woven Two Tree Handmade Pendant Tutorial 30
fig. 4b

Wire-Wrapping Whimsical Woven Two Tree Handmade Pendant Tutorial 31
fig. 4c

Wire-Wrapping Whimsical Woven Two Tree Handmade Pendant Tutorial 32
fig. 4d

Step 5 of 15

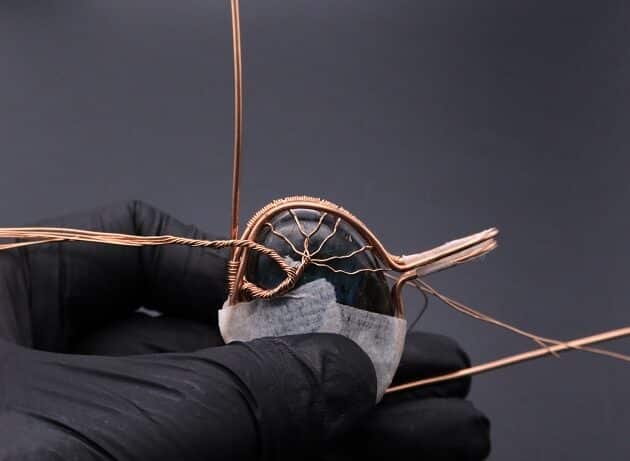
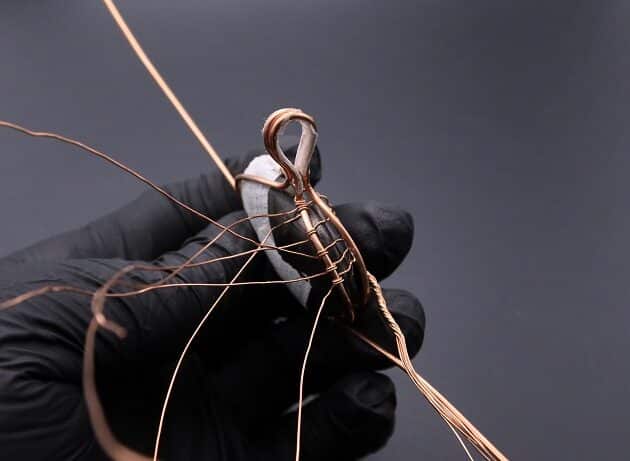
Next, undo the twist on the right tree branch to spread out the tree twigs (fig. 5a).

Coil the ends of your tree twigs onto the 16-gauge back wire frame (fig. 5b, 5c, 5d).

And then, use the remaining loose 26-gauge copper wires to coil the naked 16-gauge back wire frame (fig. 5e, 5f).

Wire-Wrapping Whimsical Woven Two Tree Handmade Pendant Tutorial 33
fig. 5a

Wire-Wrapping Whimsical Woven Two Tree Handmade Pendant Tutorial 34
fig. 5b

Wire-Wrapping Whimsical Woven Two Tree Handmade Pendant Tutorial 35
fig. 5c

Wire-Wrapping Whimsical Woven Two Tree Handmade Pendant Tutorial 36
fig. 5d

Wire-Wrapping Whimsical Woven Two Tree Handmade Pendant Tutorial 37
fig. 5e

Wire-Wrapping Whimsical Woven Two Tree Handmade Pendant Tutorial 38
fig. 5f

Step 6 of 15

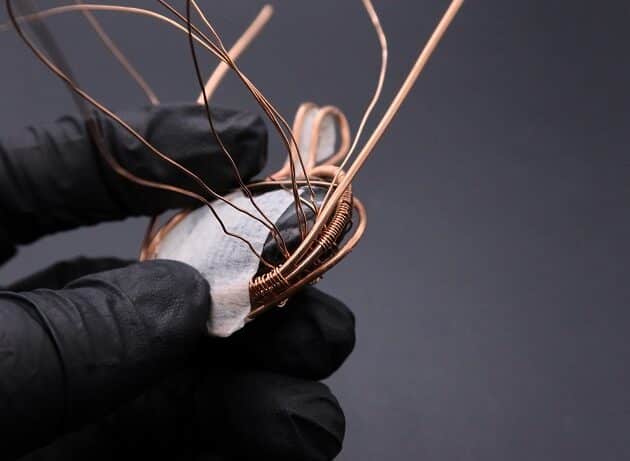
Similarly, undo the twist on the left tree branch and spread out the tree twigs (fig. 6a, 6b).

Coil the tree twigs on the bottom left side of the back frame (fig. 6c, 6d).

Wire-Wrapping Whimsical Woven Two Tree Handmade Pendant Tutorial 39
fig. 6a

Wire-Wrapping Whimsical Woven Two Tree Handmade Pendant Tutorial 40
fig. 6b

Wire-Wrapping Whimsical Woven Two Tree Handmade Pendant Tutorial 41
fig. 6c

Wire-Wrapping Whimsical Woven Two Tree Handmade Pendant Tutorial 42
fig. 6d

Pages: Page 1 Page 2 Page 3 Page 4 Page 5

Filed Under: Tutorials/DIY

Primary Sidebar

MadelynnHey there! Thanks for visiting 🙂

My name is Madelynn and I’m the owner of Studio 73 Designs.

Studio 73 Designs is managed by a team of wire wrapping jewelry enthusiasts 🙂 Cheers!

Follow Me

  • Facebook
  • Instagram
  • Pinterest
  • Twitter
  • YouTube

ARE YOU INTERESTED IN WIRE-WRAPPING?

Sign up below and get access to my FREE wire-wrapping guides!

Sign Up
Wire Wrapping Tutorials
Wire Wrapping for Beginners Start Here
Beginner's Guide to Jewelry Wire for Wire-Wrapping
Wire Wrapping Tools and Supplies for Beginners
How to wire wrap stones without holes wire-wrapping tutorial for beginners
Wire Wrapping Tutorials DIY Jewelry Kits

Footer

ARE YOU INTERESTED IN WIRE-WRAPPING?

Sign up below and get access to my FREE wire-wrapping guides!

Sign Up

Site Navigation

Home
About
Contact
Blog
Privacy Policy
Disclaimer
Terms & Conditions

Follow Me

  • Facebook
  • Instagram
  • Pinterest
  • Twitter
  • YouTube

© 2026 · Studio 73 Designs

wire-wrapping tutorials

Learn Wire-Wrapping

Want to create beautiful wire-wrapped jewelry? Join membership today and get access to 70+ step-by-step wire-wrapping tutorials with high-quality images

Learn More
x