• Skip to main content
  • Skip to secondary menu
  • Skip to primary sidebar
  • Skip to footer
Studio 73 Designs

Studio 73 Designs

Wire Jewelry Making & Wire Wrapping Techniques

  • Start Here!
  • Get Your FREE Wire-Wrapping Guides
  • Shop Tutorials
    • Cart
    • Checkout
  • Blog
  • About
  • Contact Me

Wire-Wrapping Tutorial: Simple Wire Brooch

DISCLAIMER:  This post may contain affiliate links, meaning I get a commission if you decide to make a purchase through my links, at no cost to you.  Please read my disclaimer for more info.

Want to Support my Work?

If you are enjoying my content, please consider support me on Patreon :). This helps me to create more AMAZING FREE content to share with you :)

March 11, 2023 by Madelynn

Page 1
Page 2
Page 3


Prefer this tutorial in a PRINTABLE FORMAT?

Click here for the PDF version of “How to Wire-Wrap a Simple Wire Brooch”


Step 4

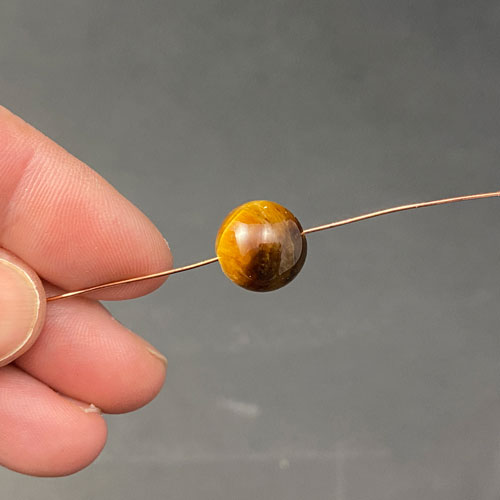
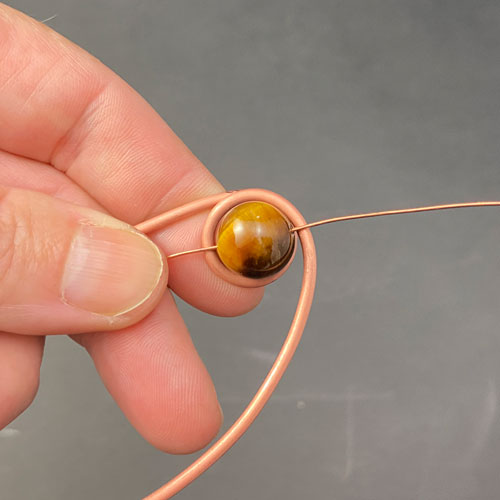
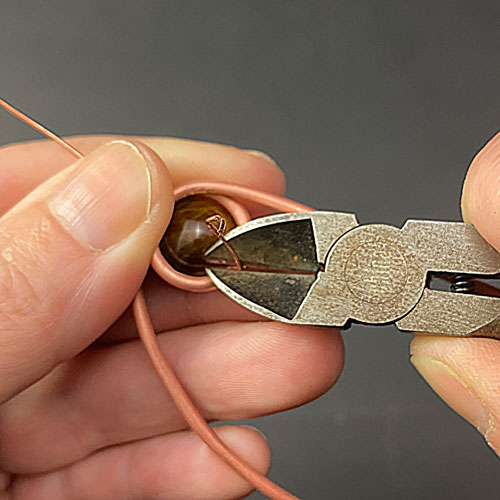
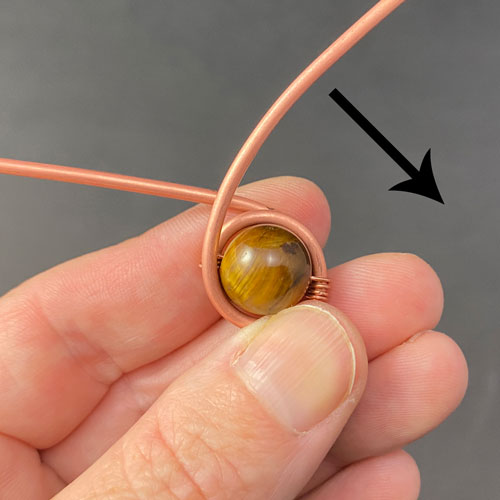
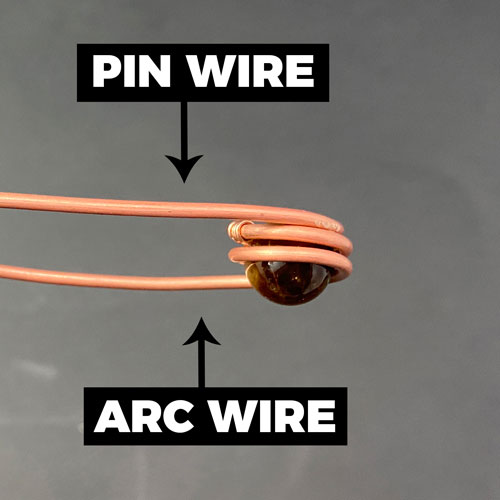
Feed your 24 gauge wire through your bead and place it on first loop as shown (fig. 4a, 4b). Wrap the wire around the loop a few times (fig. 4c, 4d). Bring wire to back and snip end with wire cutters (fig. 4e).

 
Wire Wrapping Tutorial Simple Wire Brooch
fig. 4a
 
Wire Wrapping Tutorial Simple Wire Brooch
fig. 4b
 
Wire Wrapping Tutorial Simple Wire Brooch
fig. 4c
 
Wire Wrapping Tutorial Simple Wire Brooch
fig. 4d
 
Wire Wrapping Tutorial Simple Wire Brooch
fig. 4e
 
Wire-Wrapping Tools for Beginners
 

Step 5

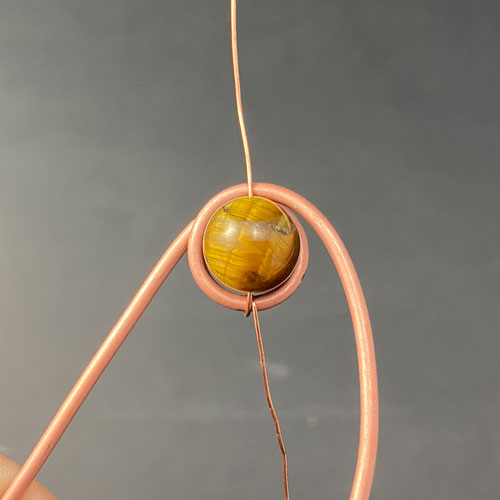
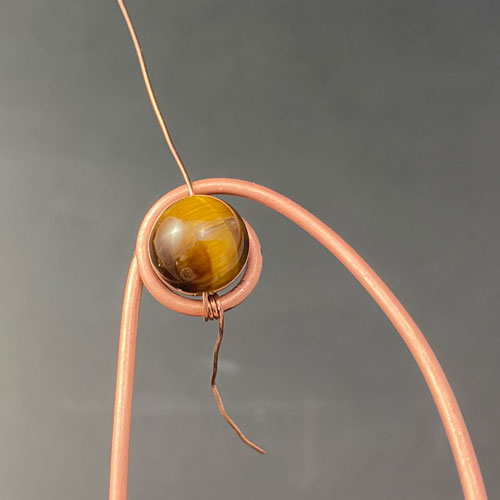
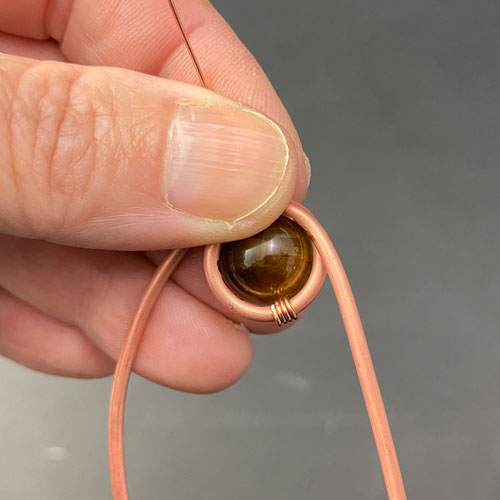
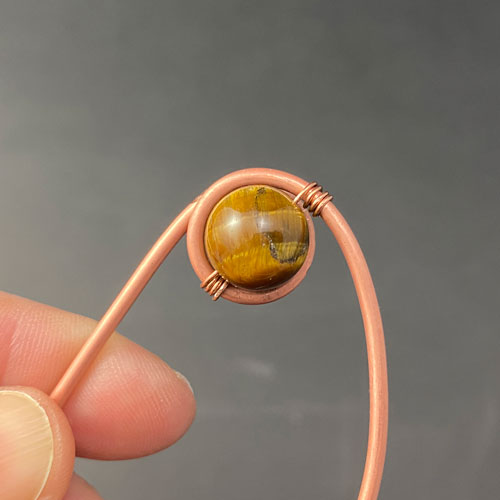
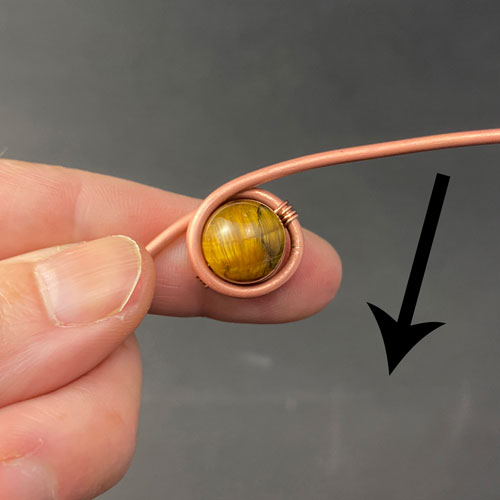
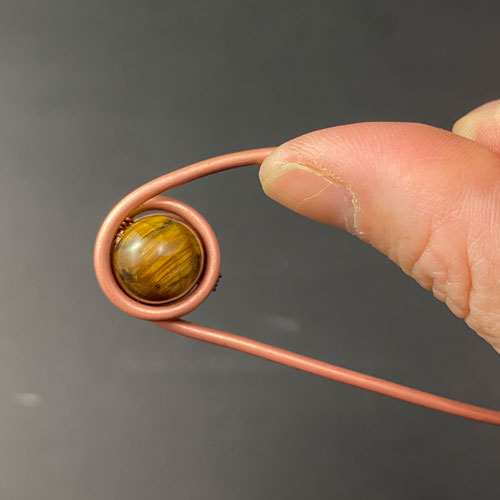
Using a pair of pliers, tuck the end in so it doesn’t stick out. This is the back side of the brooch (fig. 5a). Repeat on other side of wire to secure bead (fig. 5b). Once the bead is secured to the first loop, hold the bead + loop tightly and start forming your second loop tightly around the bead (fig. 5c, 5d, 5e).

 
Wire Wrapping Tutorial Simple Wire Brooch
fig. 5a
 
Wire Wrapping Tutorial Simple Wire Brooch
fig. 5b
 
Wire Wrapping Tutorial Simple Wire Brooch
fig. 5c
 
Wire Wrapping Tutorial Simple Wire Brooch
fig. 5d
 
Wire Wrapping Tutorial Simple Wire Brooch
fig. 5e
 

Prefer this tutorial in a PRINTABLE FORMAT?

Click here for the PDF version of “How to Wire-Wrap a Simple Wire Brooch”


Step 6

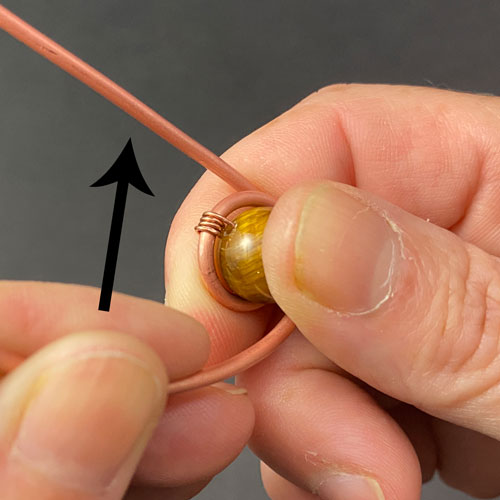
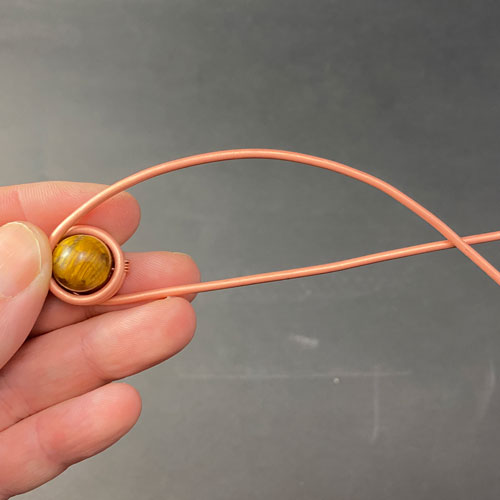
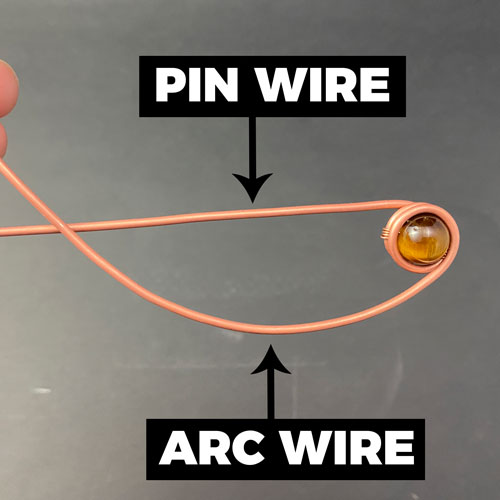
Keep wrapping the wire around the bead to complete your second loop (fig. 6a). Using your thumb, form the wire in an arc shape and cross over the pin wire (fig. 6b, 6c, 6d). This is a view from the top of the brooch (fig. 6e).

 
Wire Wrapping Tutorial Simple Wire Brooch
fig. 6a
 
Wire Wrapping Tutorial Simple Wire Brooch
fig. 6b
 
Wire Wrapping Tutorial Simple Wire Brooch
fig. 6c
 
Wire Wrapping Tutorial Simple Wire Brooch
fig. 6d
 
Wire Wrapping Tutorial Simple Wire Brooch
fig. 6e
 

KEEP READING…

Page 1
Page 2
Page 3

Pages: Page 1 Page 2 Page 3

Filed Under: Tutorials/DIY

Primary Sidebar

MadelynnHey there! Thanks for visiting 🙂

My name is Madelynn and I’m the owner of Studio 73 Designs.

Studio 73 Designs is managed by a team of wire wrapping jewelry enthusiasts.

If you enjoy my content, you can support me on Patreon 🙂 Cheers!

Follow Me

  • Facebook
  • Instagram
  • Pinterest
  • Twitter
  • YouTube
Wire Wrapping Tutorials
Wire Wrapping for Beginners Start Here
Beginner's Guide to Jewelry Wire for Wire-Wrapping
Wire Wrapping Tools and Supplies for Beginners
How to wire wrap stones without holes wire-wrapping tutorial for beginners
Wire Wrapping Tutorials DIY Jewelry Kits

Footer

Are you interested in wire-wrapping?

Sign up below and get access to my FREE wire-wrapping guides!

    Built with ConvertKit

    Site Navigation

    Home
    About
    Contact
    Blog
    Privacy Policy
    Disclaimer
    Terms & Conditions

    Follow Me

    • Facebook
    • Instagram
    • Pinterest
    • Twitter
    • YouTube

    © 2023 · Studio 73 Designs