• Skip to main content
  • Skip to secondary menu
  • Skip to primary sidebar
  • Skip to footer
Studio 73 Designs

Studio 73 Designs

Wire Jewelry Making & Wire Wrapping Techniques

  • Start Here!
  • FREE Wire-Wrapping Guides
  • Shop Tutorials
    • Cart
    • Checkout
  • Contact
  • Join Member
  • Member Login
Join PREMIUM MEMBERSHIP (FREE-TRIAL): 70+ Wire Wrapping Tutorials: Gain access to ALL step-by-step tutorials with high-quality images, no ads, plus all future tutorials. Check it out HERE.

Wire-Wrapping Red Oval Shape Pendant Tutorials

October 8, 2023 by Madelynn

Step 3 of 9

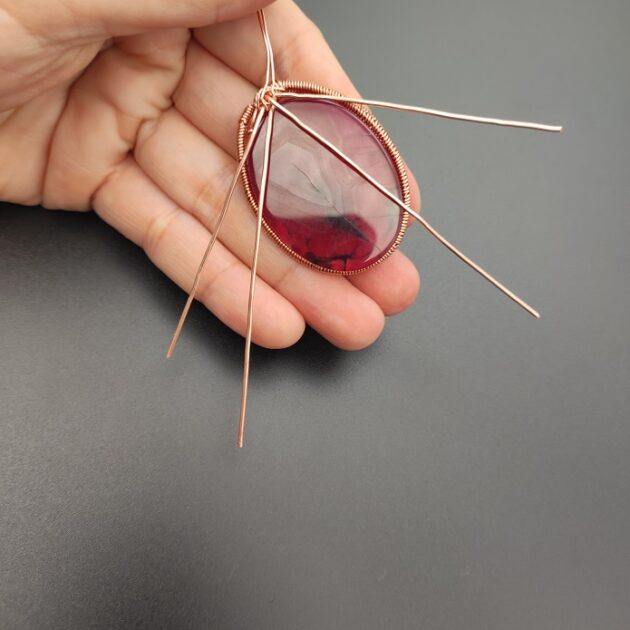
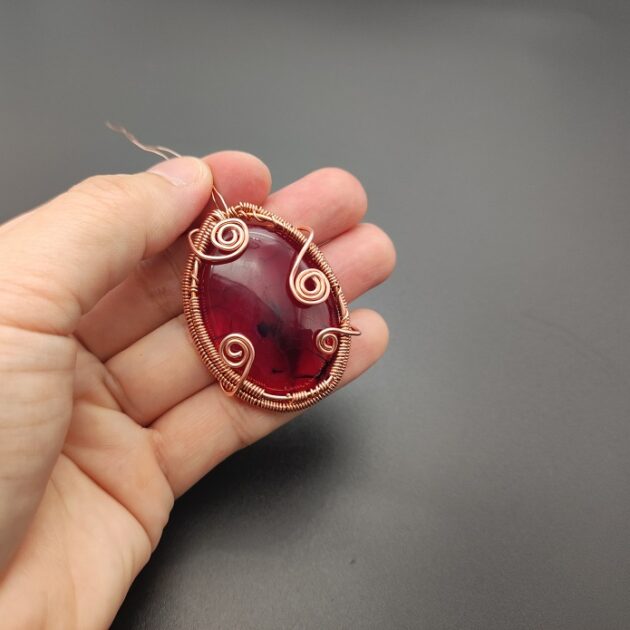
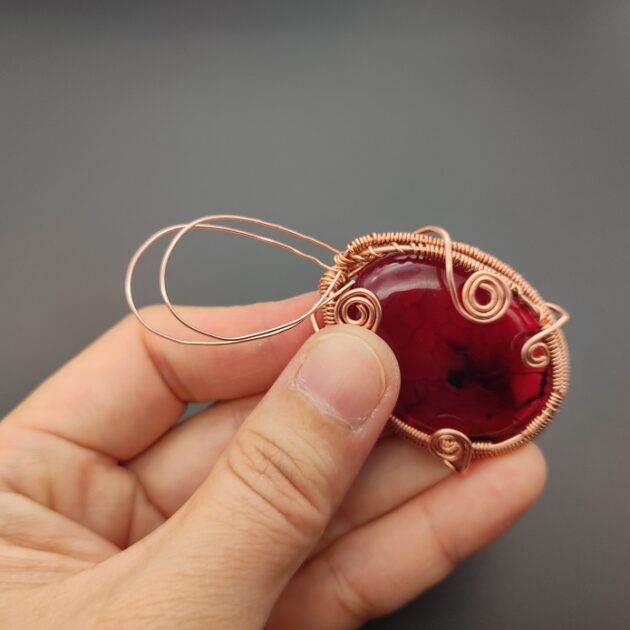
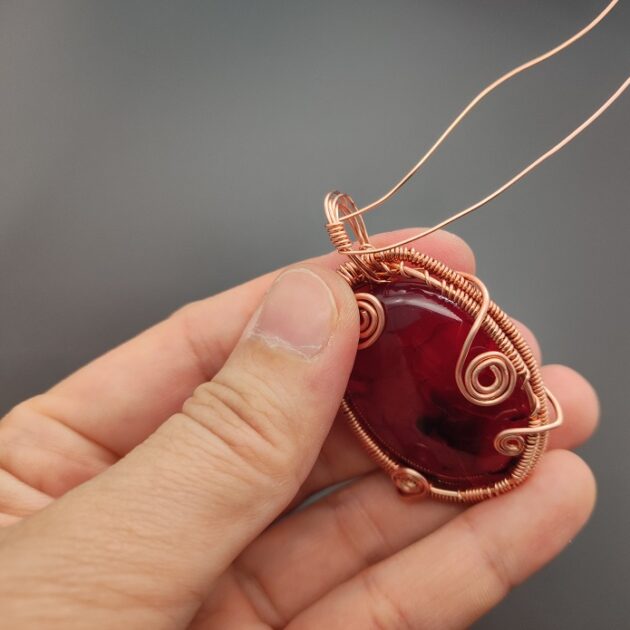
Thirdly, bend the remaining 20 gauge frame wires onto the back flat side of your red oval gemstone into four directions (fig. 3a).

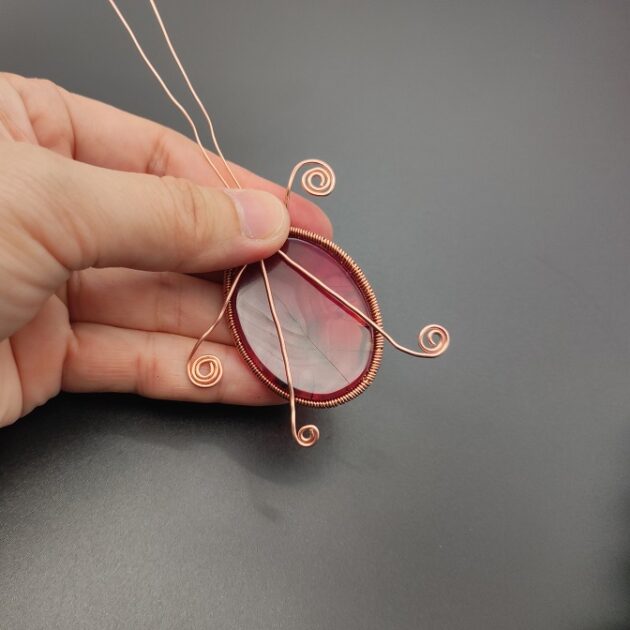
Then, make a vine structure by coiling each end of the wires (fig. 3b) and bend it towards the front like to hold the red oval gemstone in place (fig. 3c).

Wire-Wrapping Red Oval Shape Pendant Tutorials
fig. 3a

Wire-Wrapping Red Oval Shape Pendant Tutorials
fig. 3b

Wire-Wrapping Red Oval Shape Pendant Tutorials
fig. 3c

wire wrap jewelry

FREE WIRE-WRAPPING GUIDE TO YOUR EMAIL! 

JOIN NEWSLETTER

SEND GUIDE TO EMAIL

We respect your privacy. Unsubscribe at anytime.

Step 4 of 9

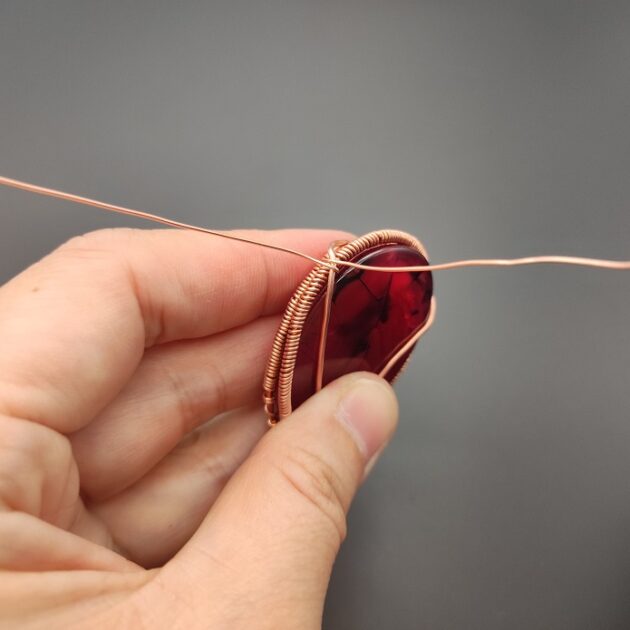
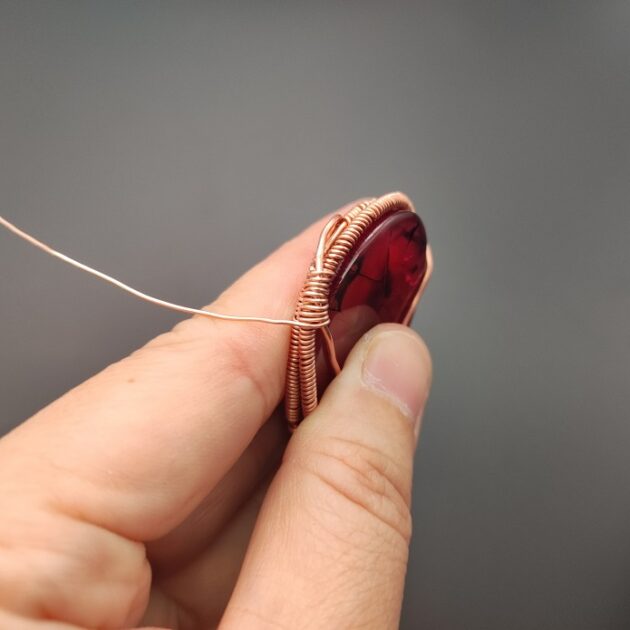
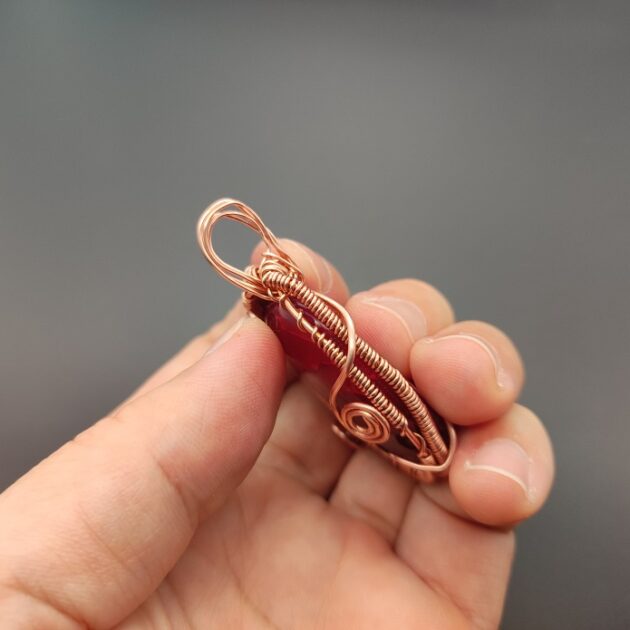
Next, form a jump ring from the excess 26 gauge wire by making at least two loops for sturdiness (fig. 4a. 4b).

Tidy up the jump ring structure using the coiling technique (fig. 4c, 4d, 4e).

Wire-Wrapping Red Oval Shape Pendant Tutorials
fig. 4a

Wire-Wrapping Red Oval Shape Pendant Tutorials
fig. 4b

Wire-Wrapping Red Oval Shape Pendant Tutorials
fig. 4c

Wire-Wrapping Red Oval Shape Pendant Tutorials
fig. 4d

Wire-Wrapping Red Oval Shape Pendant Tutorials
fig. 4e

Step 5 of 9

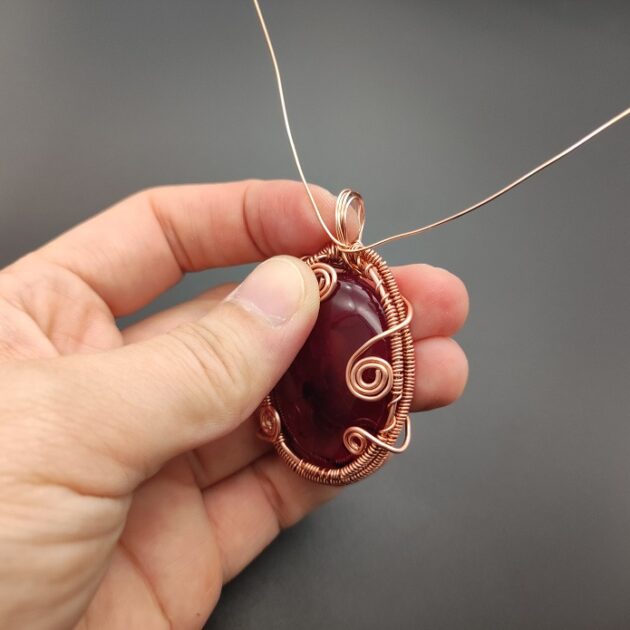
Moving on, start with a new 26 gauge copper wire and weave the lowest vine to the back frame (fig. 5a, 5b).

Then, leave a length of copper wire and slit it between the frames (fig.5c).

Wire-Wrapping Red Oval Shape Pendant Tutorials
fig. 5a

Wire-Wrapping Red Oval Shape Pendant Tutorials
fig. 5b

Wire-Wrapping Red Oval Shape Pendant Tutorials
fig. 5c

Pages: Page 1 Page 2 Page 3 Page 4

Filed Under: Tutorials/DIY

Primary Sidebar

MadelynnHey there! Thanks for visiting 🙂

My name is Madelynn and I’m the owner of Studio 73 Designs.

Studio 73 Designs is managed by a team of wire wrapping jewelry enthusiasts 🙂 Cheers!

Follow Me

  • Facebook
  • Instagram
  • Pinterest
  • Twitter
  • YouTube

ARE YOU INTERESTED IN WIRE-WRAPPING?

Sign up below and get access to my FREE wire-wrapping guides!

Sign Up
Wire Wrapping Tutorials
Wire Wrapping for Beginners Start Here
Beginner's Guide to Jewelry Wire for Wire-Wrapping
Wire Wrapping Tools and Supplies for Beginners
How to wire wrap stones without holes wire-wrapping tutorial for beginners
Wire Wrapping Tutorials DIY Jewelry Kits

Footer

ARE YOU INTERESTED IN WIRE-WRAPPING?

Sign up below and get access to my FREE wire-wrapping guides!

Sign Up

Site Navigation

Home
About
Contact
Blog
Privacy Policy
Disclaimer
Terms & Conditions

Follow Me

  • Facebook
  • Instagram
  • Pinterest
  • Twitter
  • YouTube

© 2026 · Studio 73 Designs

wire-wrapping tutorials

Learn Wire-Wrapping

Want to create beautiful wire-wrapped jewelry? Join membership today and get access to 70+ step-by-step wire-wrapping tutorials with high-quality images

Learn More
x