• Skip to main content
  • Skip to secondary menu
  • Skip to primary sidebar
  • Skip to footer
Studio 73 Designs

Studio 73 Designs

Wire Jewelry Making & Wire Wrapping Techniques

  • Start Here!
  • FREE Wire-Wrapping Guides
  • Shop Tutorials
    • Cart
    • Checkout
  • Contact
  • Join Member
  • Member Login
Join PREMIUM MEMBERSHIP (FREE-TRIAL): 70+ Wire Wrapping Tutorials: Gain access to ALL step-by-step tutorials with high-quality images, no ads, plus all future tutorials. Check it out HERE.

Wire-Wrapping Gleaming Filigree Butterfly Statement Pendant Tutorial

July 22, 2026 by michelle

Step 10 of 15

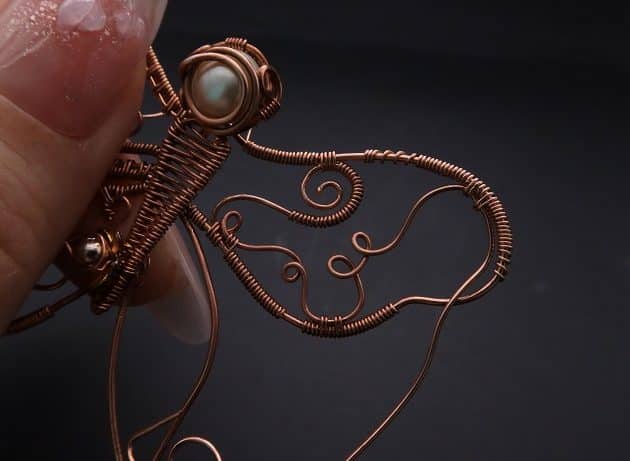
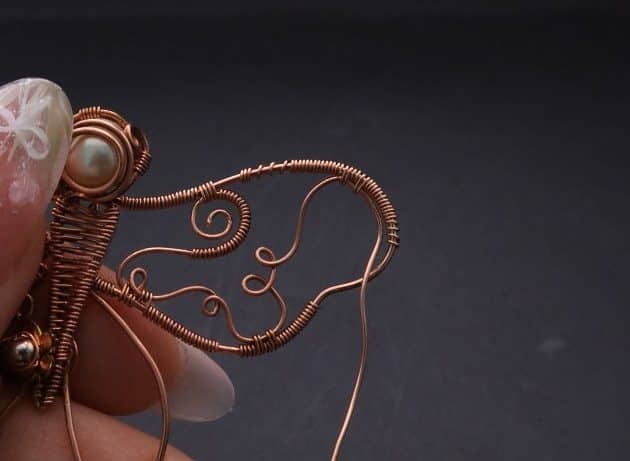
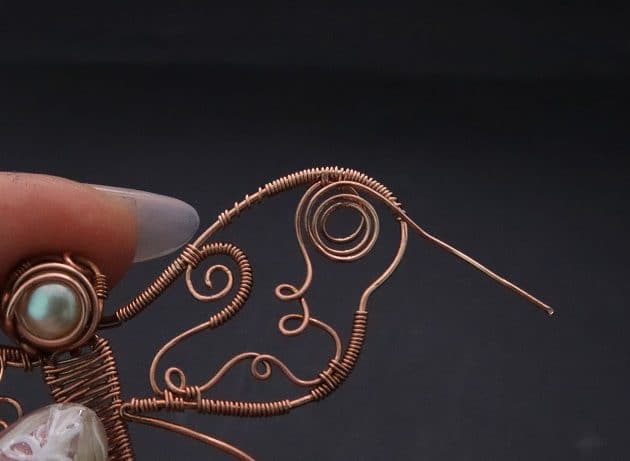
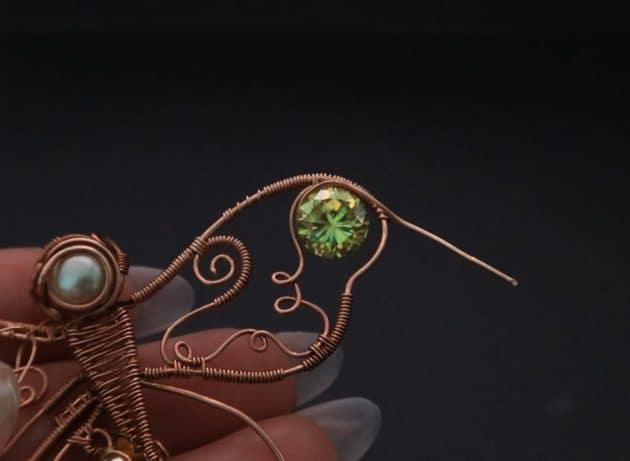
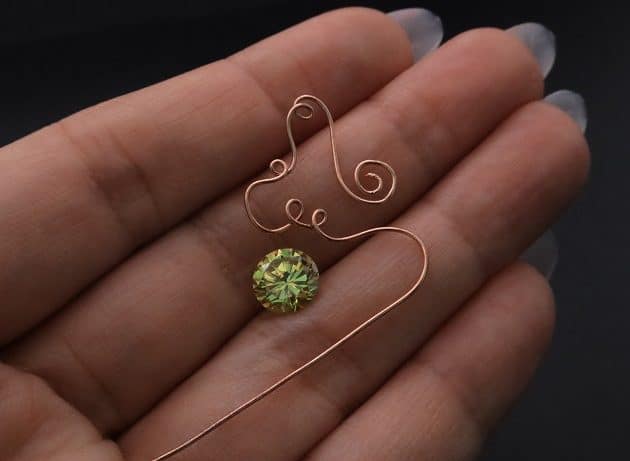
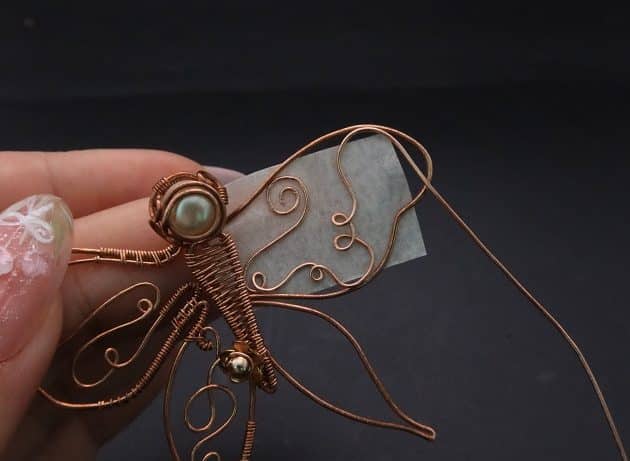
Trace the right wing filigree design with a 22 gauge copper wire, and ready one piece of yellow round diamond (fig. 10a).

(Tips: You can swap it to your preferred gemstone.)

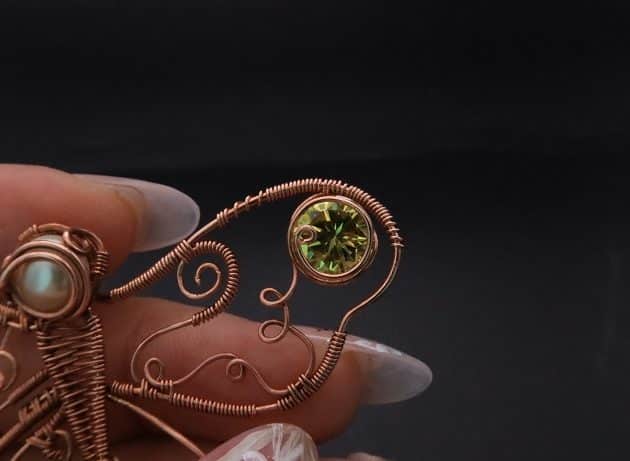
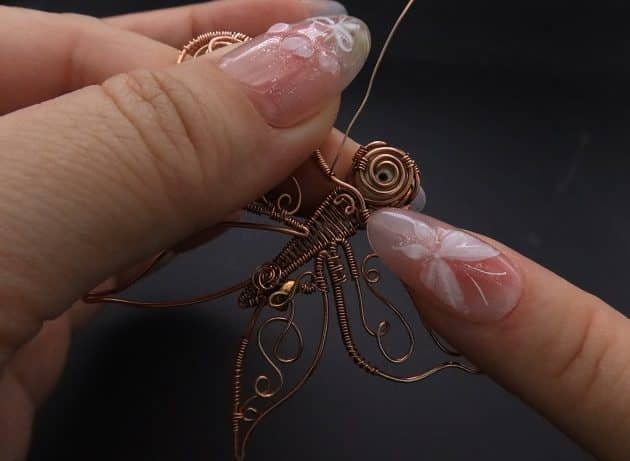
Coil the filigree design onto the top right wing frame using a 26 gauge copper wire (fig. 10b, 10c, 10d).
wire wrap jewelry

FREE WIRE-WRAPPING GUIDE TO YOUR EMAIL! 

JOIN NEWSLETTER

SEND GUIDE TO EMAIL

We respect your privacy. Unsubscribe at anytime.

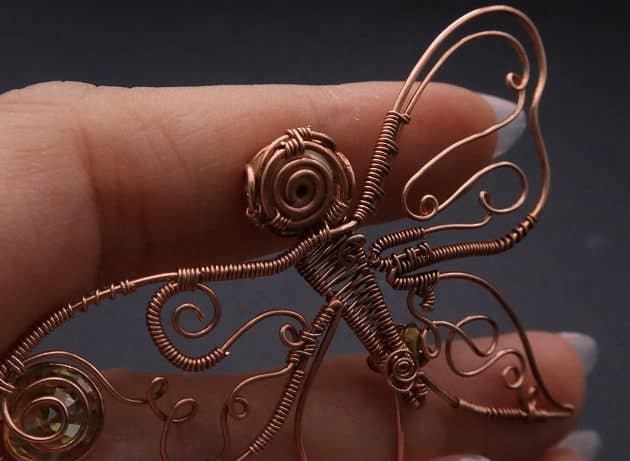
At the top right frame, make a spiral seat for the yellow round diamond and frame the front with the loose 22 gauge wire (fig. 10e, 10f, 10g, 10h, 10i).

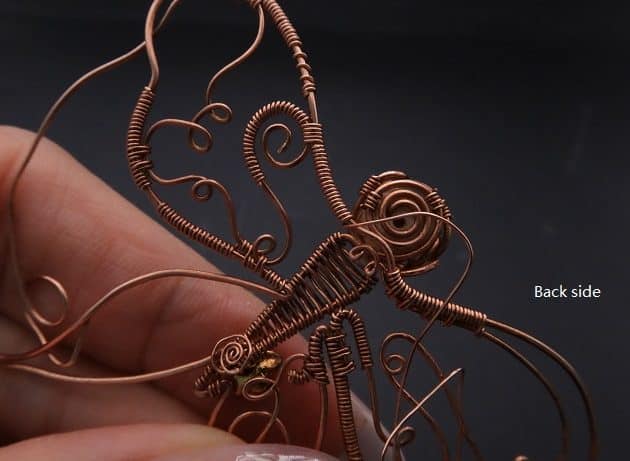
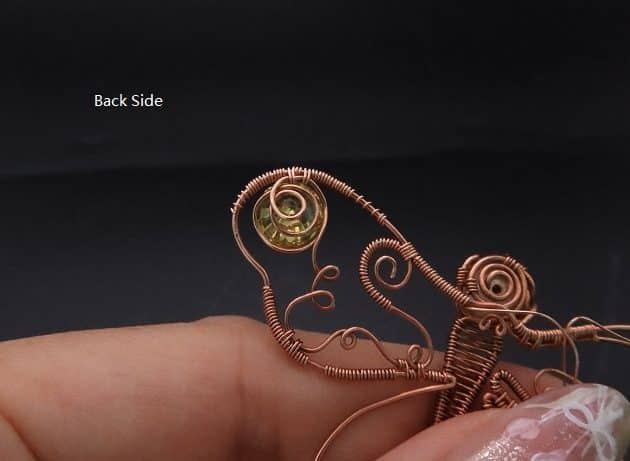
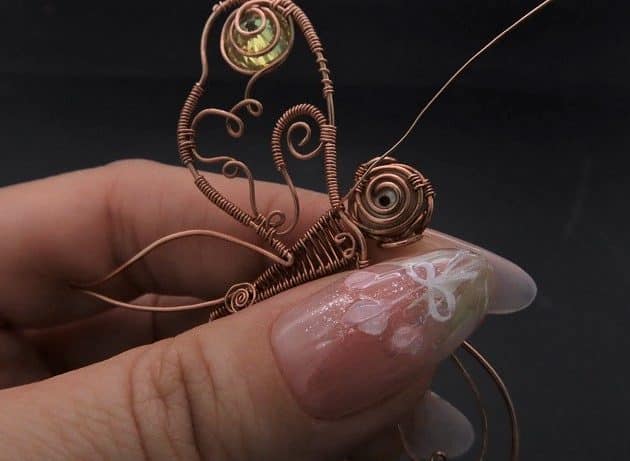
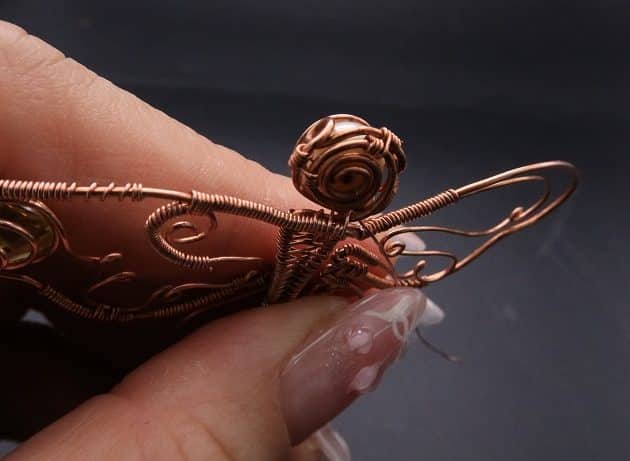
On the back side, combine the wing and head frames by coiling the remaining 26 gauge copper wire (fig. 10j, 10k, 10l, 10m).
Wire-Wrapping Gleaming Filigree Butterfly Statement Pendant Tutorial 72
fig. 10a

Wire-Wrapping Gleaming Filigree Butterfly Statement Pendant Tutorial 73
fig. 10b

Wire-Wrapping Gleaming Filigree Butterfly Statement Pendant Tutorial 74
fig. 10c

Wire-Wrapping Gleaming Filigree Butterfly Statement Pendant Tutorial 75
fig. 10d

Wire-Wrapping Gleaming Filigree Butterfly Statement Pendant Tutorial 76
fig. 10e

Wire-Wrapping Gleaming Filigree Butterfly Statement Pendant Tutorial 77
fig. 10f

Wire-Wrapping Gleaming Filigree Butterfly Statement Pendant Tutorial 78
fig. 10g

Wire-Wrapping Gleaming Filigree Butterfly Statement Pendant Tutorial 79
fig. 10h

Wire-Wrapping Gleaming Filigree Butterfly Statement Pendant Tutorial 80
fig. 10i

Wire-Wrapping Gleaming Filigree Butterfly Statement Pendant Tutorial 81
fig. 10j

Wire-Wrapping Gleaming Filigree Butterfly Statement Pendant Tutorial 82
fig. 10k

Wire-Wrapping Gleaming Filigree Butterfly Statement Pendant Tutorial 83
fig. 10l

Wire-Wrapping Gleaming Filigree Butterfly Statement Pendant Tutorial 84
fig. 10m


Prefer this wire-wrapping tutorial in a PRINTABLE FORMAT? (High Resolution Photos)

Click here for the PDF version of ” Wire-Wrapping Gleaming Filigree Butterfly Statement Pendant Tutorial”


Step 11 of 15

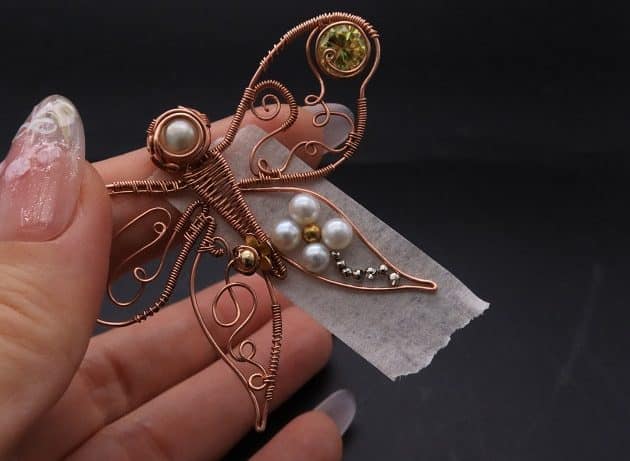
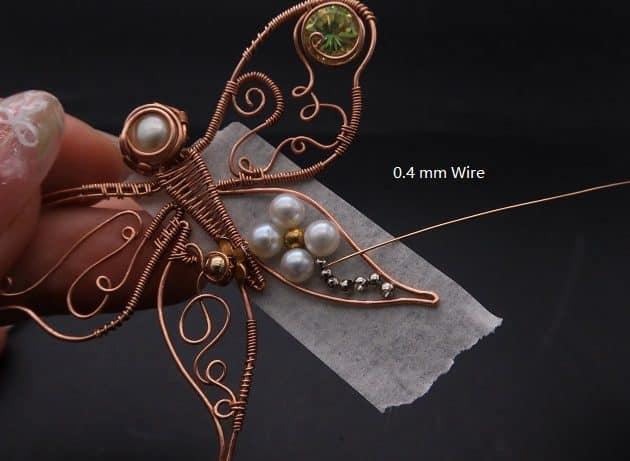
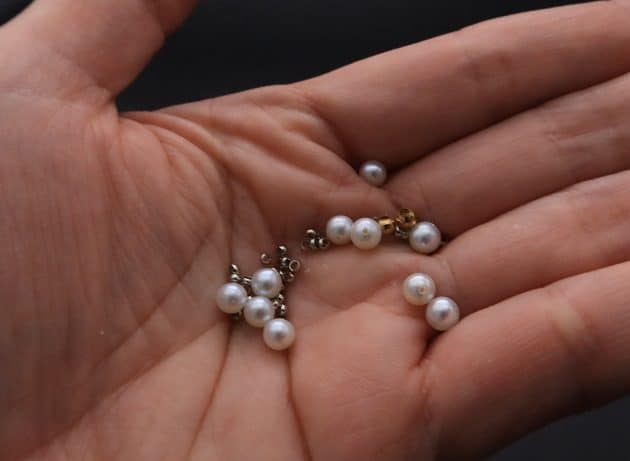
After that, let’s add a big flower on the bottom right wing frame with pearl beads, golden spacer bead and silver mini beads (fig. 11a, 11b).

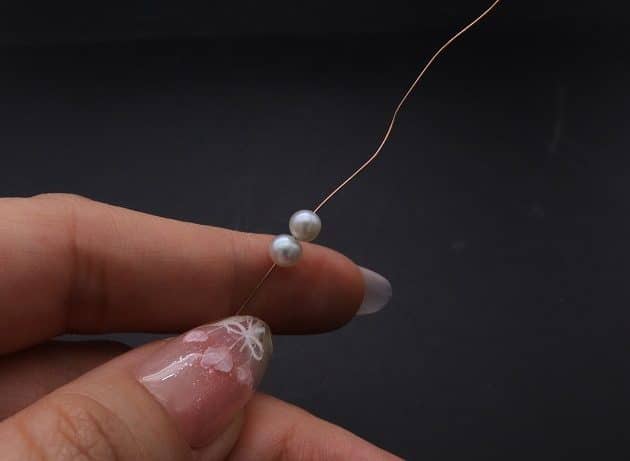
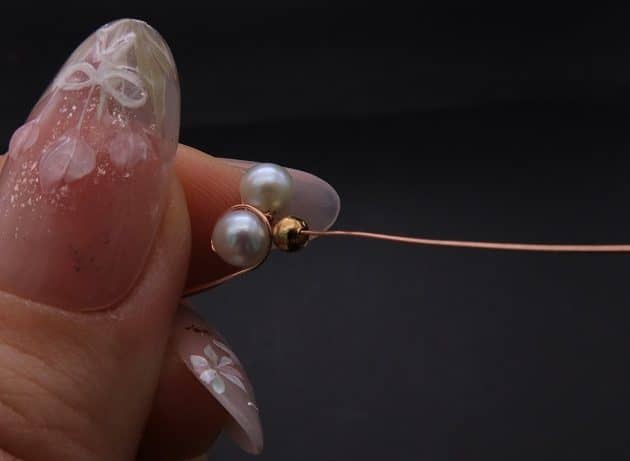
Then, take a 26 gauge copper wire to string up the beads (fig. 11c).

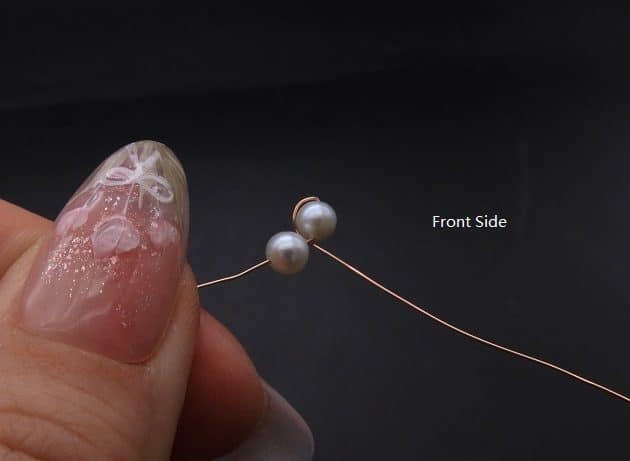
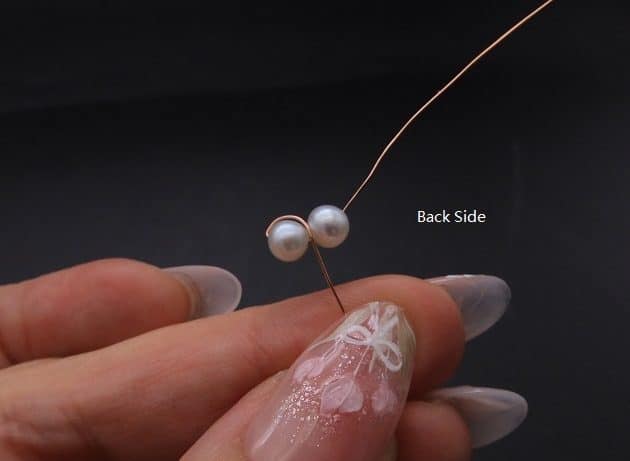
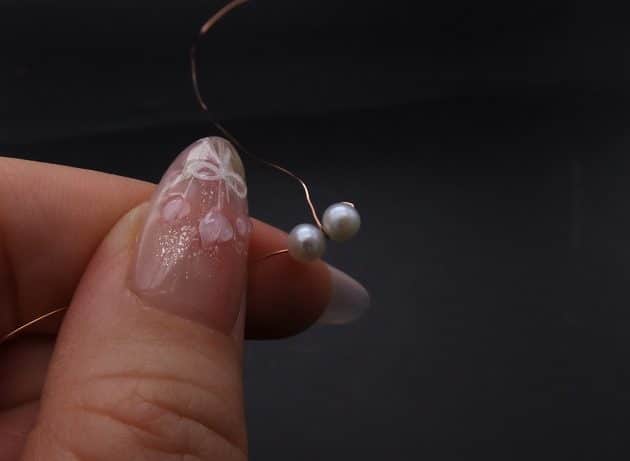
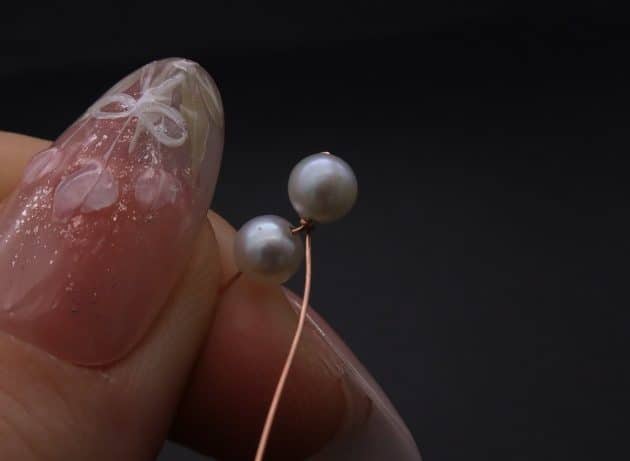
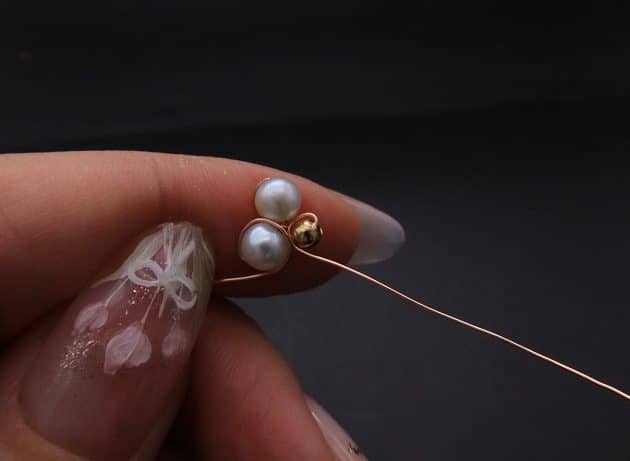
For the top petals, slide two pearl beads, and make one half wrap in the anti-clockwise direction on the right bead (fig. 11d, 11e, 11f).

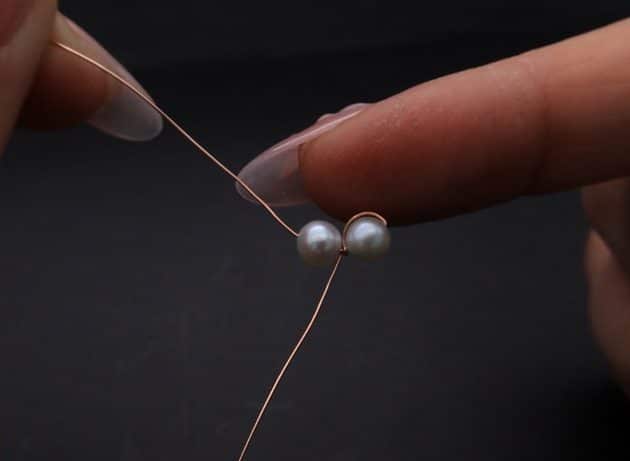
Make a coil at the center to separate the beads (fig. 11g, 11h).

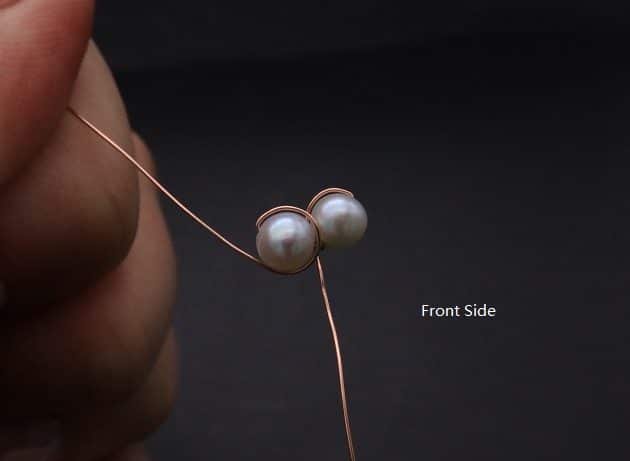
On the left bead, wrap the loose wire in the clockwise direction (fig. 11i, 11j).
Wire-Wrapping Gleaming Filigree Butterfly Statement Pendant Tutorial 85
fig. 11a

Wire-Wrapping Gleaming Filigree Butterfly Statement Pendant Tutorial 86
fig. 11b

Wire-Wrapping Gleaming Filigree Butterfly Statement Pendant Tutorial 87
fig. 11c

Wire-Wrapping Gleaming Filigree Butterfly Statement Pendant Tutorial 88
fig. 11d

Wire-Wrapping Gleaming Filigree Butterfly Statement Pendant Tutorial 89
fig. 11e

Wire-Wrapping Gleaming Filigree Butterfly Statement Pendant Tutorial 90
fig. 11f

Wire-Wrapping Gleaming Filigree Butterfly Statement Pendant Tutorial 91
fig. 11g

Wire-Wrapping Gleaming Filigree Butterfly Statement Pendant Tutorial 92
fig. 11h

Wire-Wrapping Gleaming Filigree Butterfly Statement Pendant Tutorial 93
fig. 11i

Wire-Wrapping Gleaming Filigree Butterfly Statement Pendant Tutorial 94
fig. 11j

Step 12 of 15

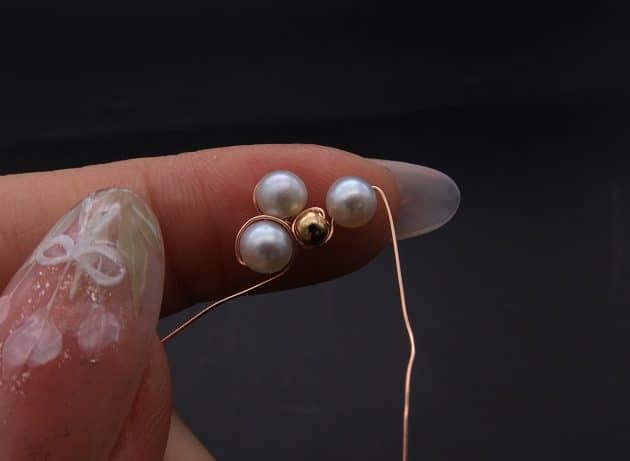
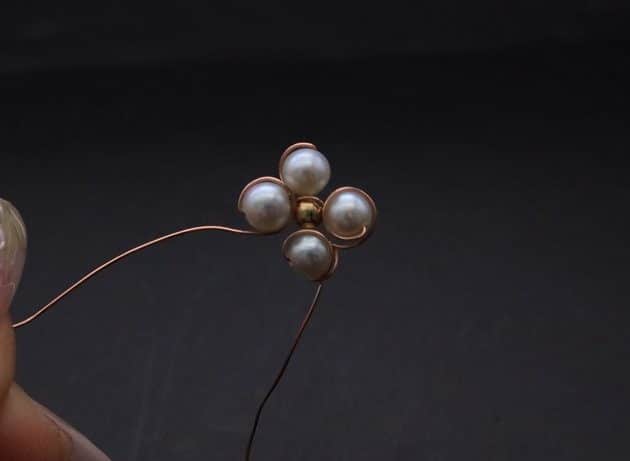
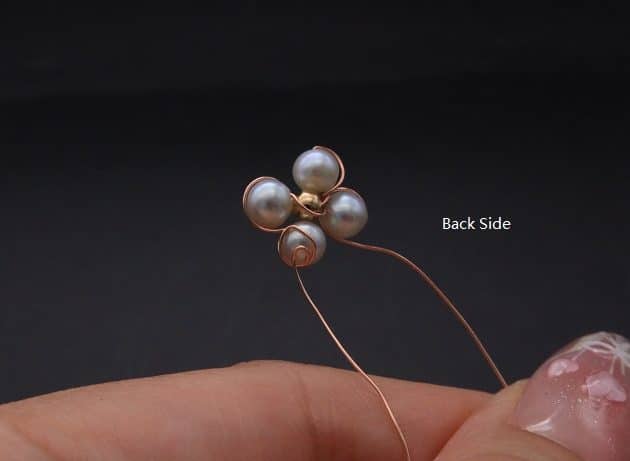
For the flower seed, slide one golden spacer bead onto the right loose wire and wrap it (fig. 12a, 12b).

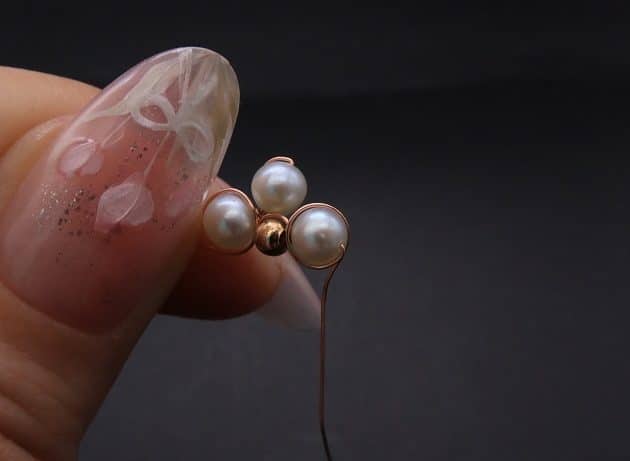
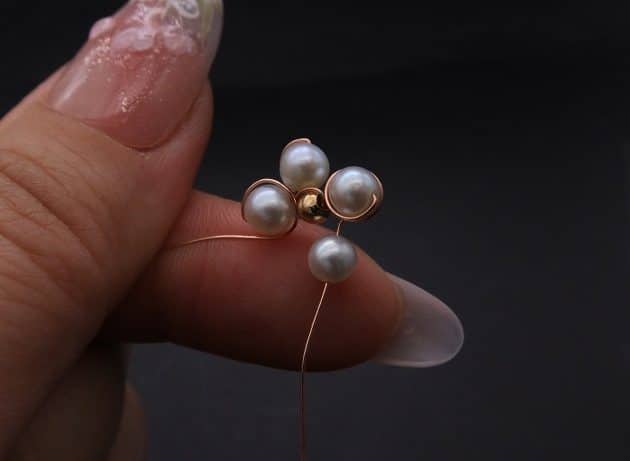
Similarly, add two more pearl beads and wrap them to finish the flower design (fig. 12c, 12d, 12e, 12f).

Make a wire spiral at the back side of the last flower bead to work harden the wire (fig. 12g).
Wire-Wrapping Gleaming Filigree Butterfly Statement Pendant Tutorial 95
fig. 12a

Wire-Wrapping Gleaming Filigree Butterfly Statement Pendant Tutorial 96
fig. 12b

Wire-Wrapping Gleaming Filigree Butterfly Statement Pendant Tutorial 97
fig. 12c

Wire-Wrapping Gleaming Filigree Butterfly Statement Pendant Tutorial 98
fig. 12d

Wire-Wrapping Gleaming Filigree Butterfly Statement Pendant Tutorial 99
fig. 12e

Wire-Wrapping Gleaming Filigree Butterfly Statement Pendant Tutorial 100
fig. 12f

Wire-Wrapping Gleaming Filigree Butterfly Statement Pendant Tutorial 101
fig. 12g

Pages: Page 1 Page 2 Page 3 Page 4 Page 5

Filed Under: Tutorials/DIY

Primary Sidebar

MadelynnHey there! Thanks for visiting 🙂

My name is Madelynn and I’m the owner of Studio 73 Designs.

Studio 73 Designs is managed by a team of wire wrapping jewelry enthusiasts 🙂 Cheers!

Follow Me

  • Facebook
  • Instagram
  • Pinterest
  • Twitter
  • YouTube

ARE YOU INTERESTED IN WIRE-WRAPPING?

Sign up below and get access to my FREE wire-wrapping guides!

Sign Up
Wire Wrapping Tutorials
Wire Wrapping for Beginners Start Here
Beginner's Guide to Jewelry Wire for Wire-Wrapping
Wire Wrapping Tools and Supplies for Beginners
How to wire wrap stones without holes wire-wrapping tutorial for beginners
Wire Wrapping Tutorials DIY Jewelry Kits

Footer

ARE YOU INTERESTED IN WIRE-WRAPPING?

Sign up below and get access to my FREE wire-wrapping guides!

Sign Up

Site Navigation

Home
About
Contact
Blog
Privacy Policy
Disclaimer
Terms & Conditions

Follow Me

  • Facebook
  • Instagram
  • Pinterest
  • Twitter
  • YouTube

© 2026 · Studio 73 Designs

wire-wrapping tutorials

Learn Wire-Wrapping

Want to create beautiful wire-wrapped jewelry? Join membership today and get access to 70+ step-by-step wire-wrapping tutorials with high-quality images

Learn More
x