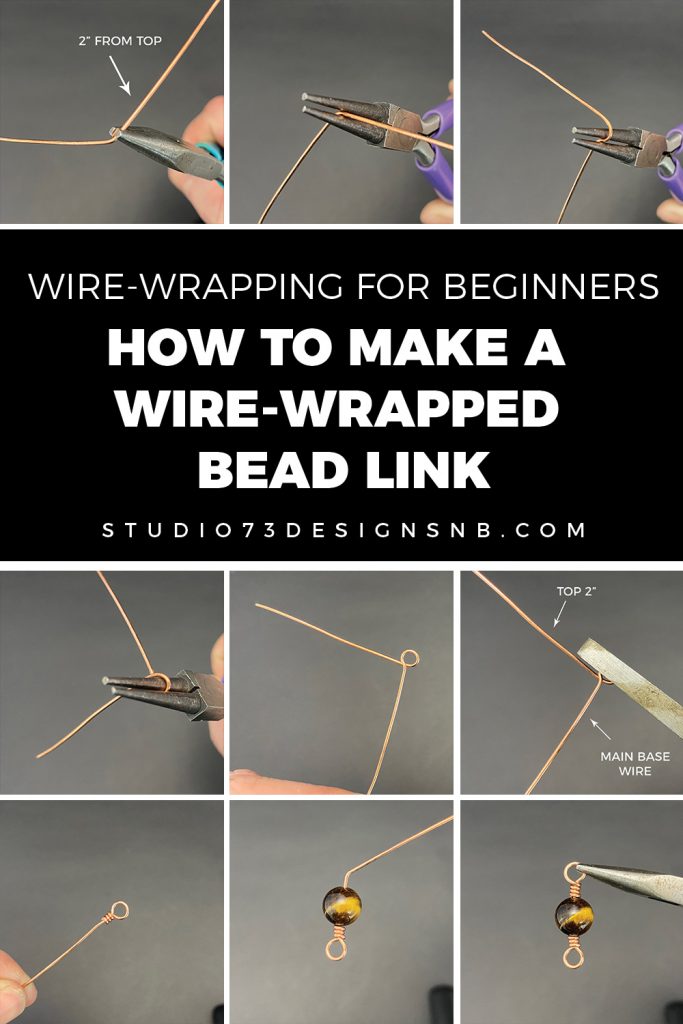
In this tutorial, I’ll show you how to make a wire-wrapped bead link.
Wire -wrapped bead links are secure because they are wrapped, so they CAN NOT be pulled open like the simple eye pin wire loop.
These bead links can be used as components for bracelets, necklaces, etc…
Looking for simple wire-wrapping techniques?
Click here to see all PRINTABLE wire-wrapping tutorials

FREE WIRE-WRAPPING GUIDE TO YOUR EMAIL!
JOIN NEWSLETTER
We respect your privacy. Unsubscribe at anytime.
RELATED CONTENT
- Wire-Wrapping for Beginners – Tools & Supplies You’ll Need
- How to Make Jump Rings
- How to Wire-Wrap a Bead Pendant
LEVEL: BEGINNER
Materials & Tools
- 1 – 14” piece of wire – 18 Gauge Round Wire
- Stone or bead
- Needle Nose Pliers
- Round Nose Pliers
- Wire Cutters
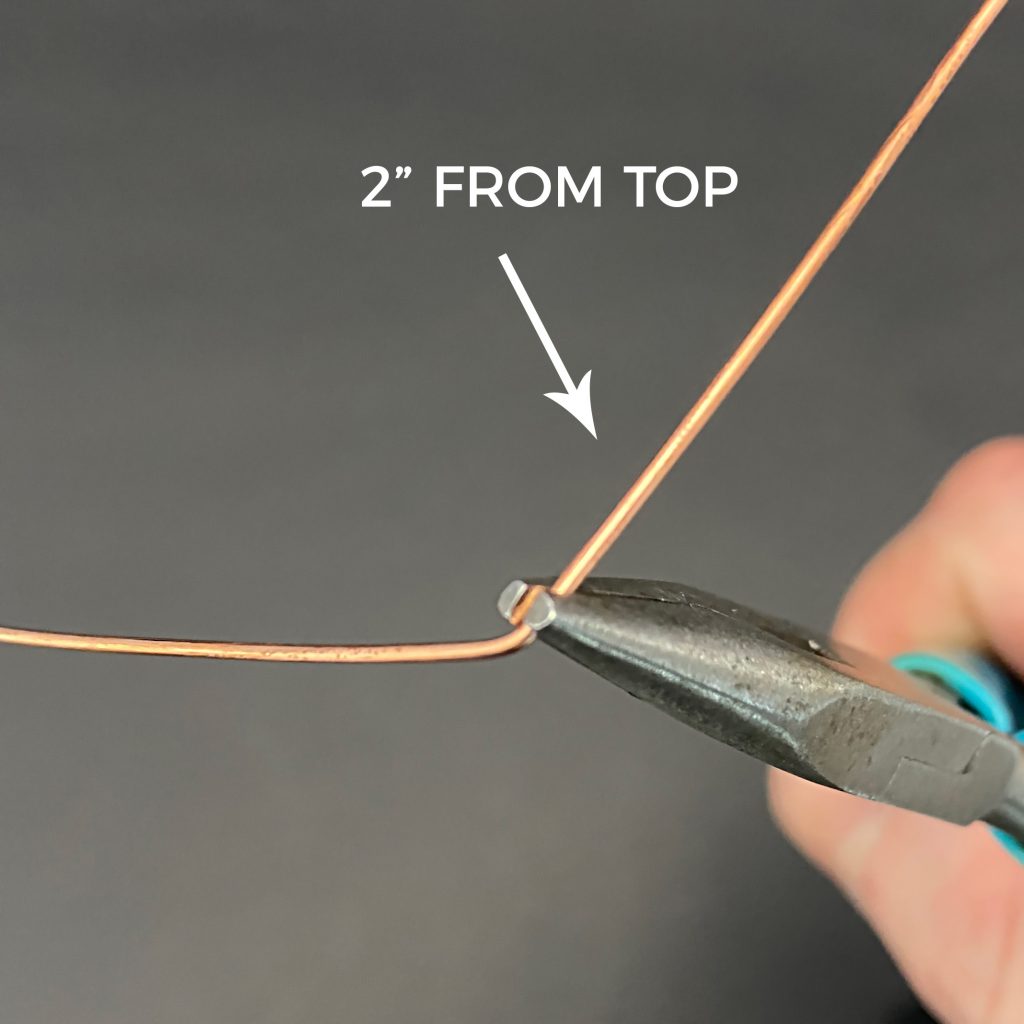
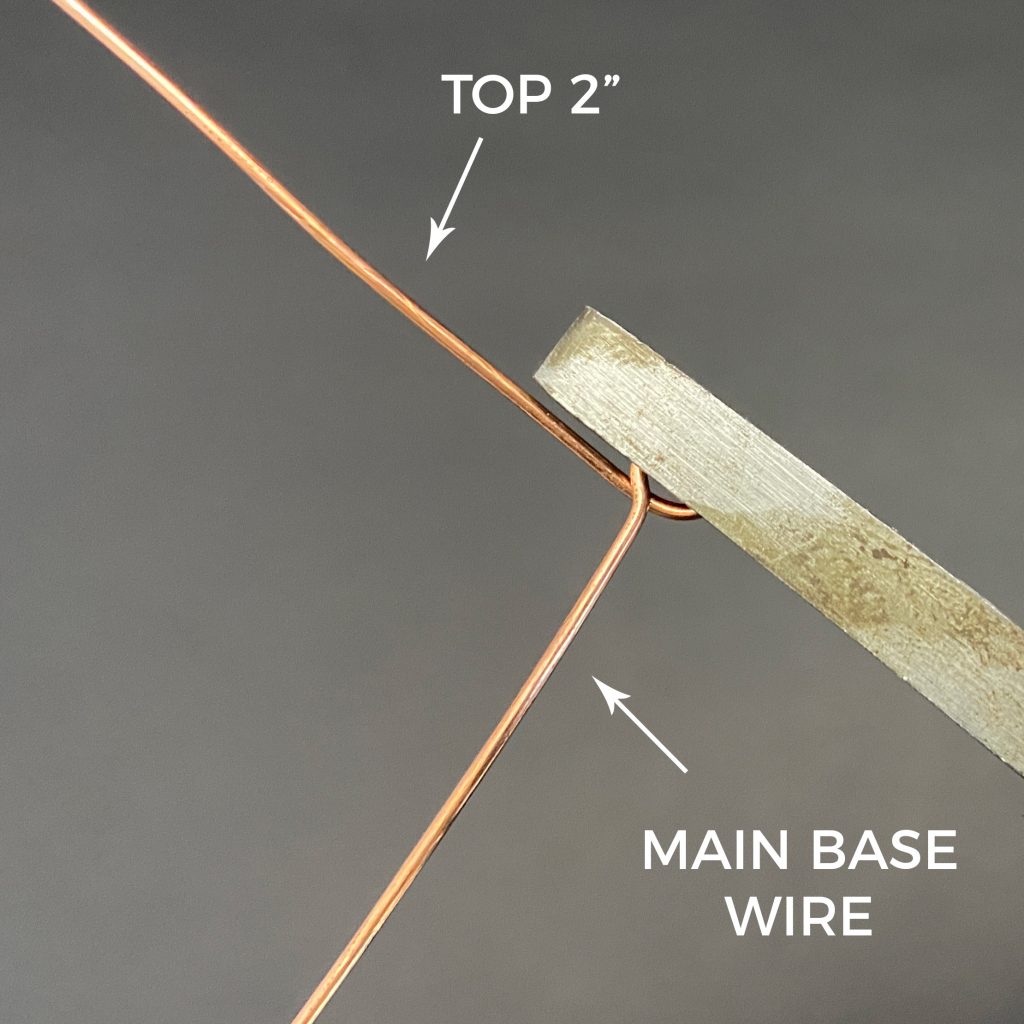
Step 1
Using your needle nose pliers, make a bend in the wire about 2″ from top.
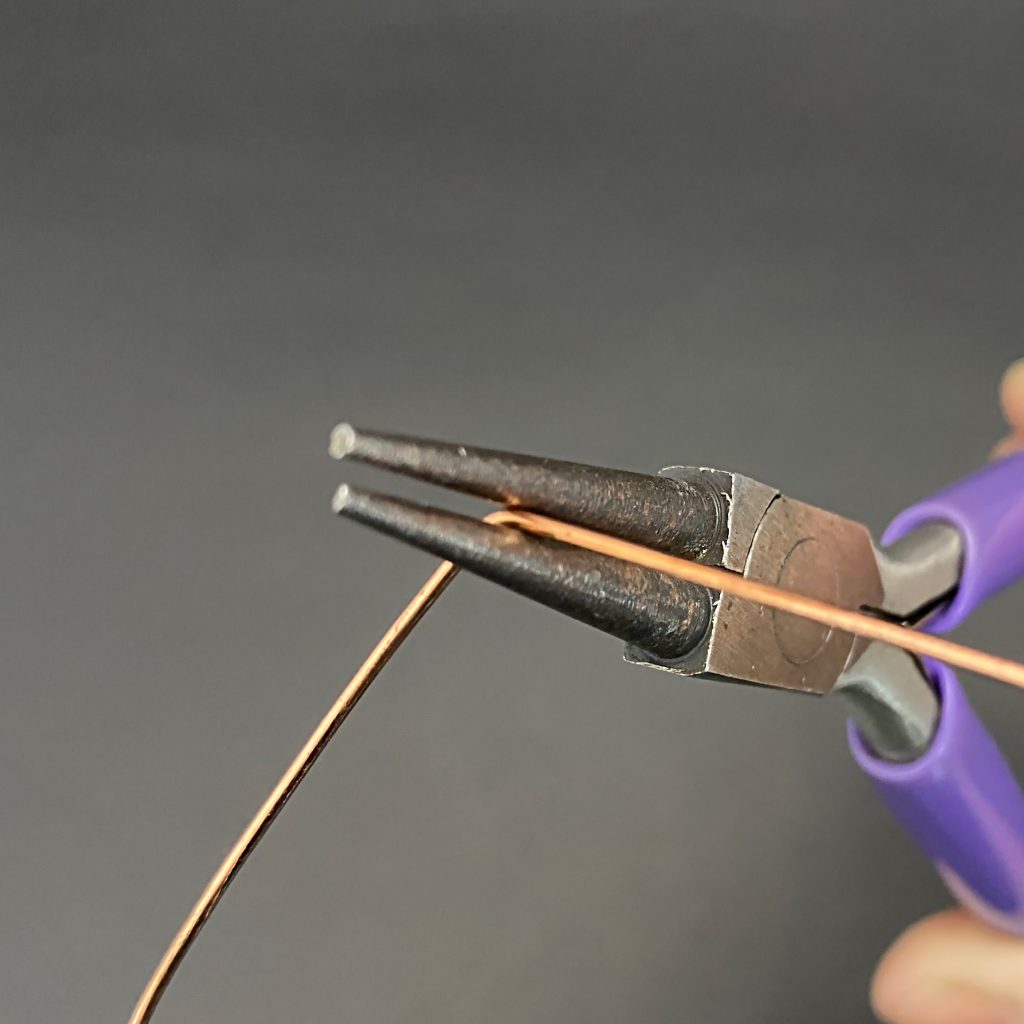
Step 2
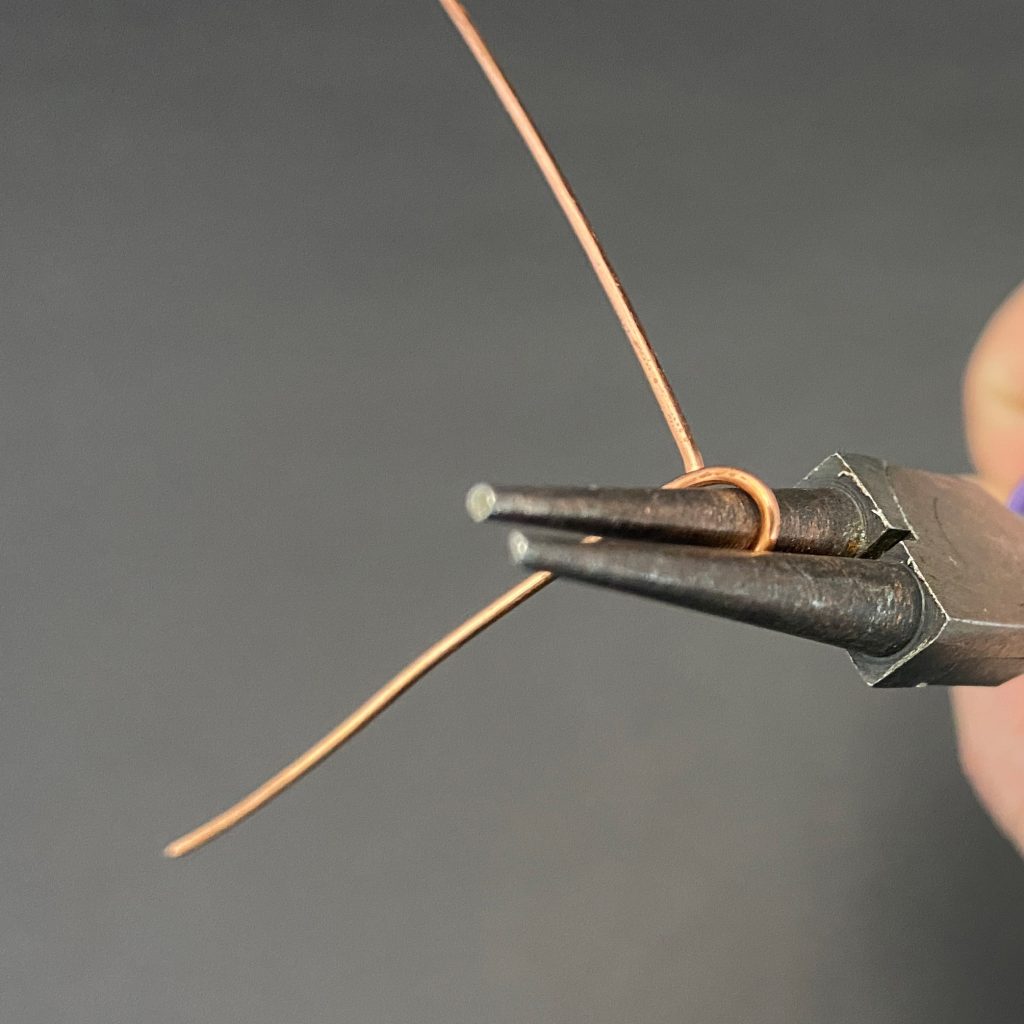
Place your round nose pliers as shown.
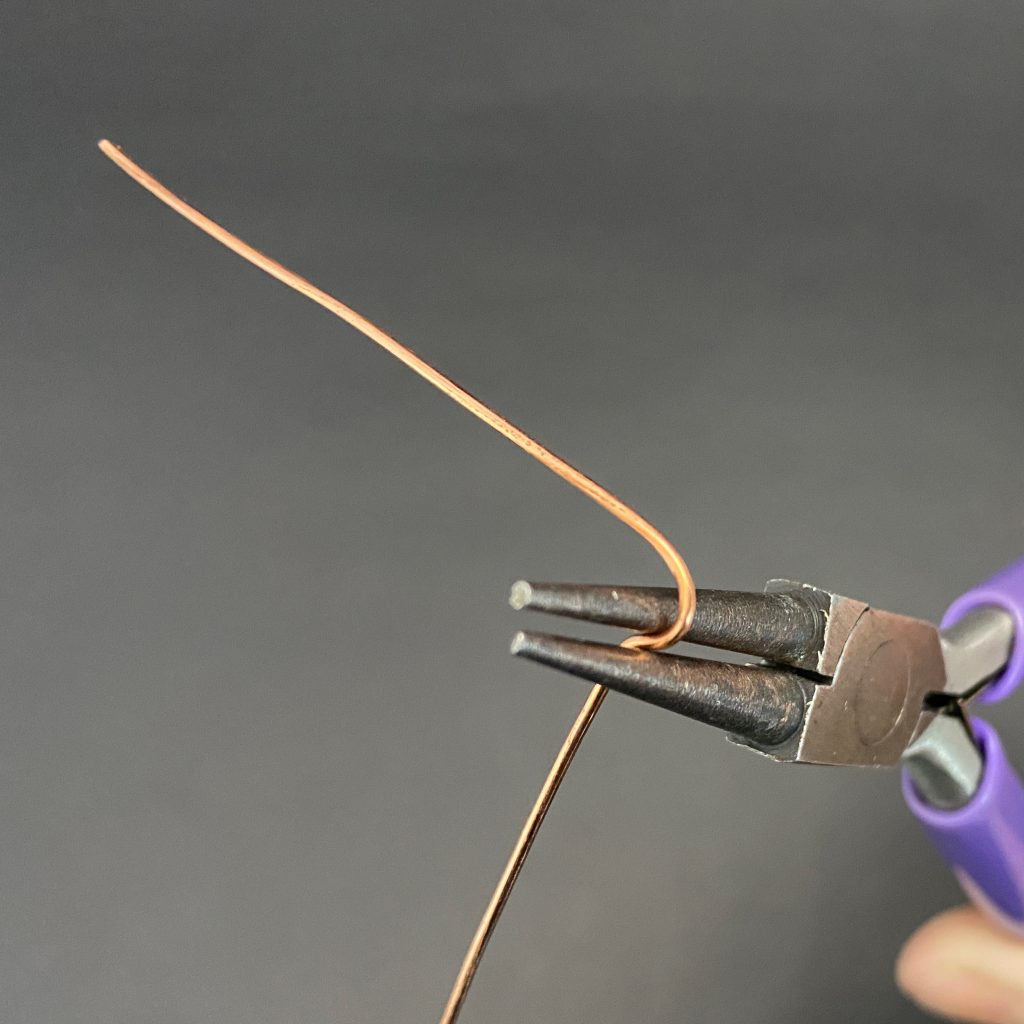
Step 3
Bring the 2″ piece up and around the top barrel of the round nose pliers.
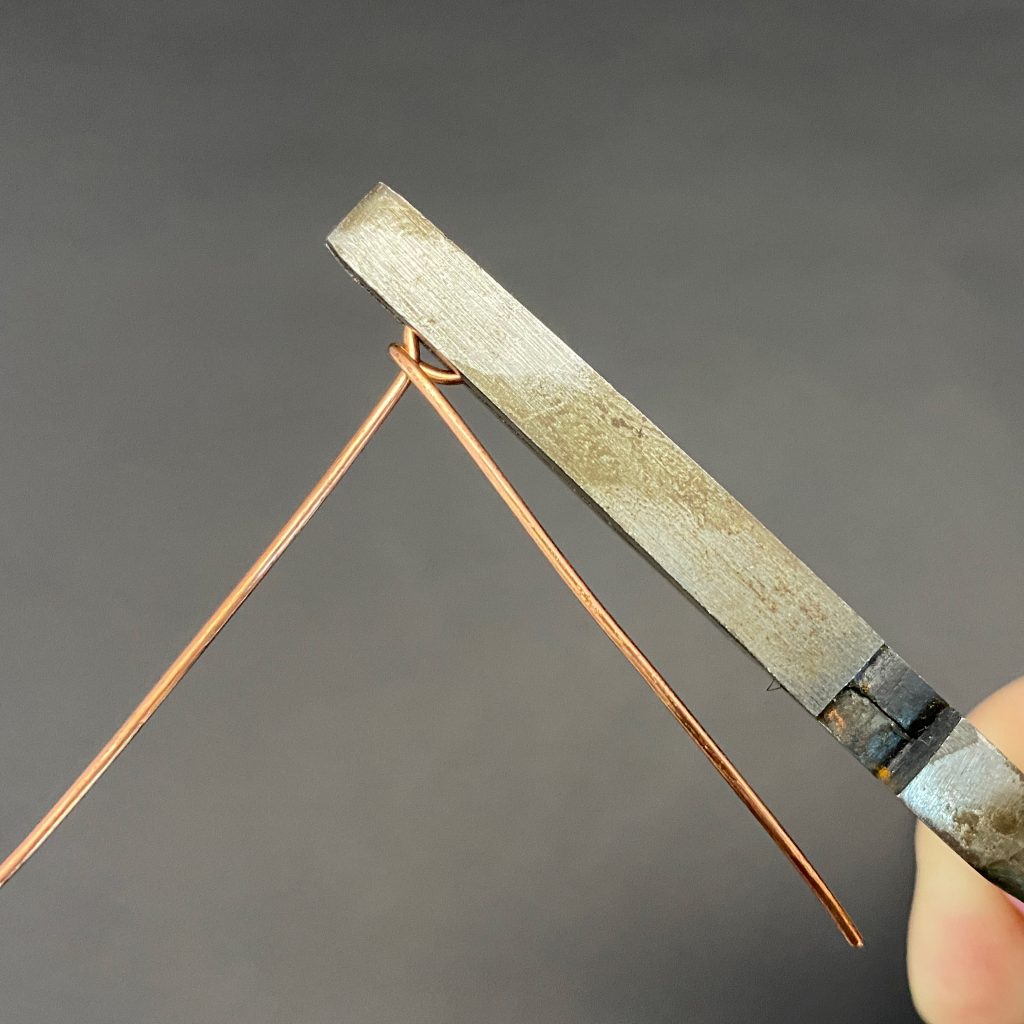
Step 4
Complete the loop as shown by performing a twisting motion with your wrist.
Looking for simple wire-wrapping techniques?
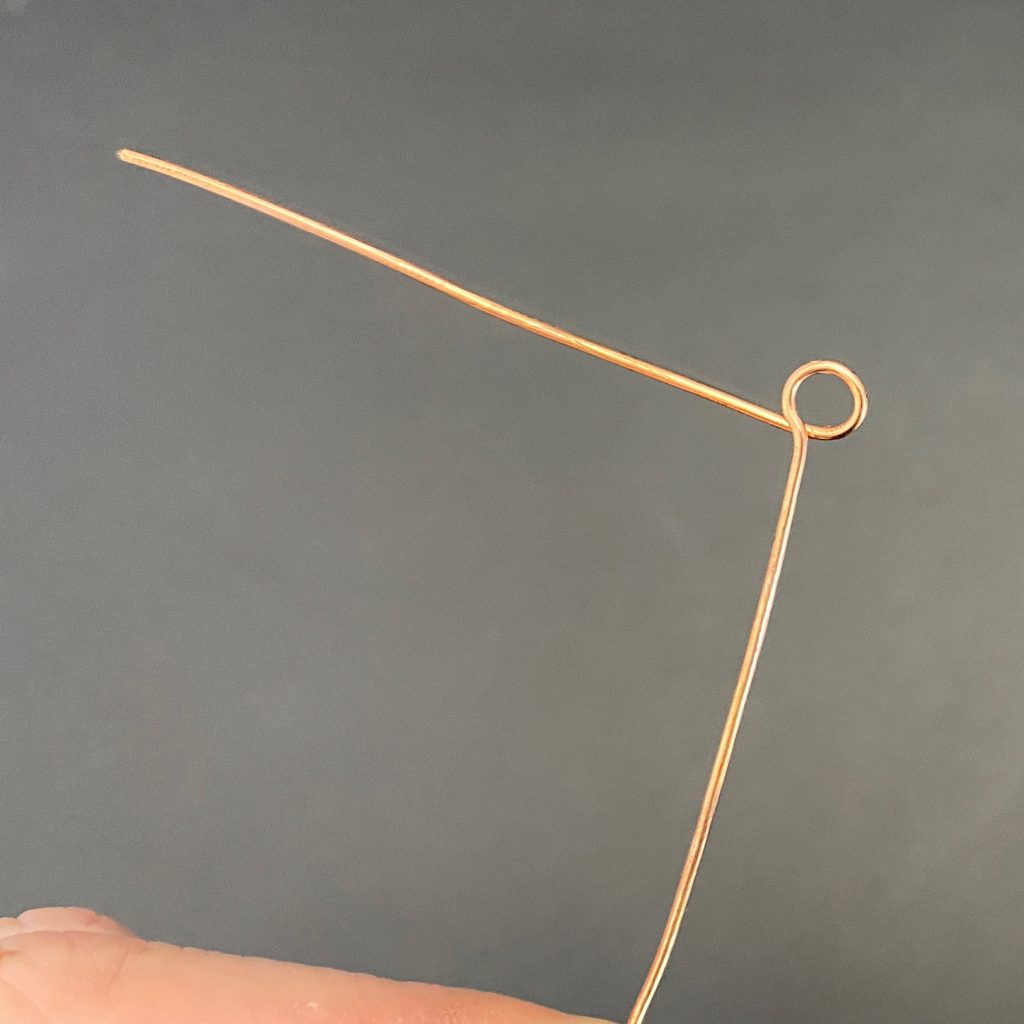
Step 5
This is what the wire loop should look like.
Step 6
Position a pair of pliers over the loop as shown (preferably nylon jaw pliers – mine were broken so I used flat nose pliers).
This is to keep the loop and the base wire steady while you are wrapping
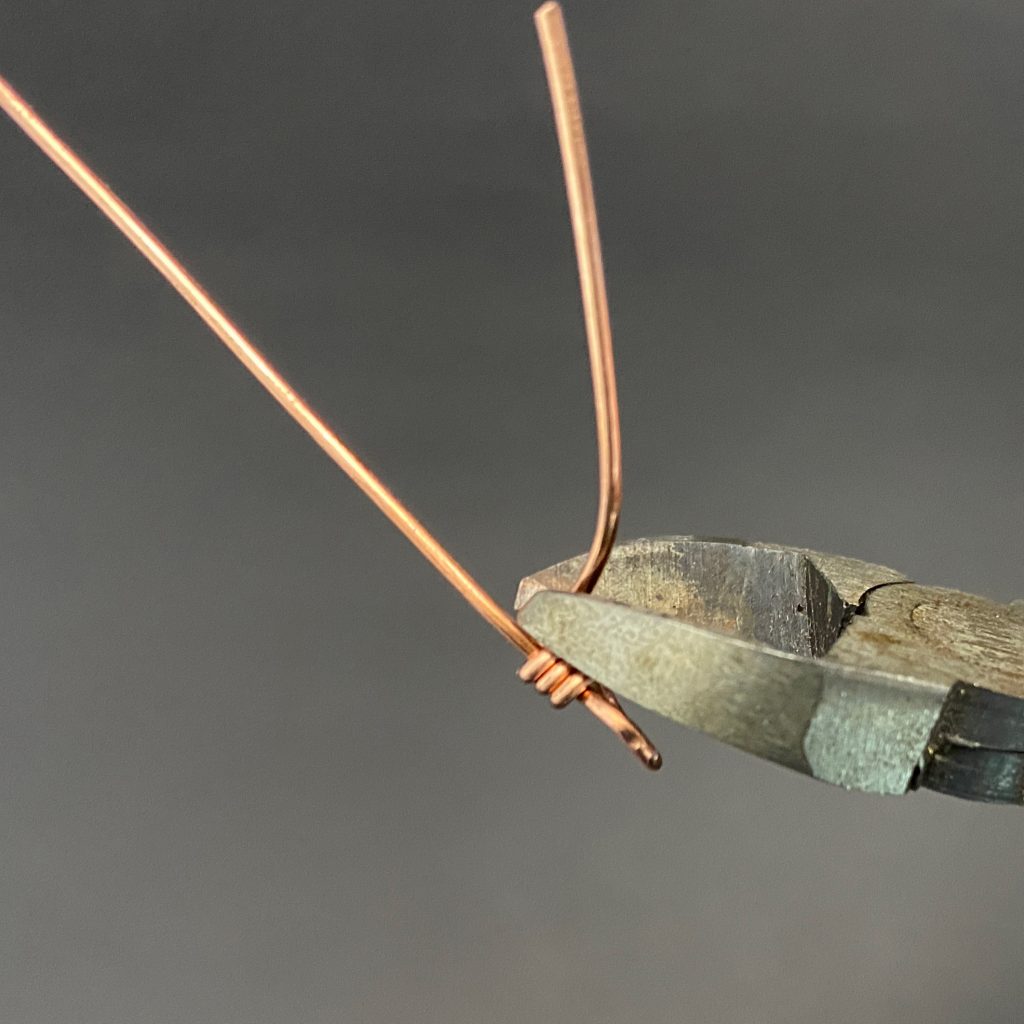
Step 7
Using the pliers to keep everything secure, start wrapping.
Step 8
Make 2-3 wraps and use your cutters to cut excess wire off at base.
RELATED CONTENT
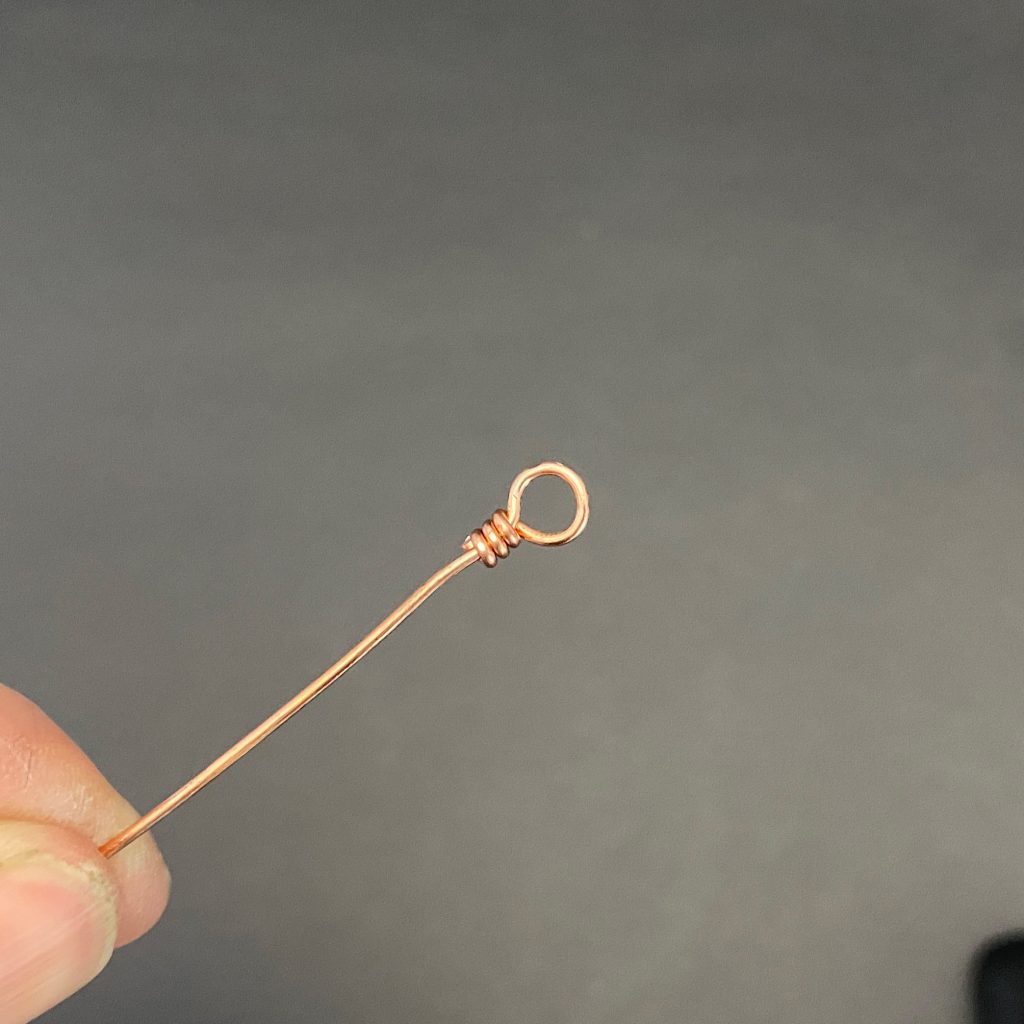
Step 9
Use a pair of needle nose pliers to squeeze the end so it’s not sticking out.
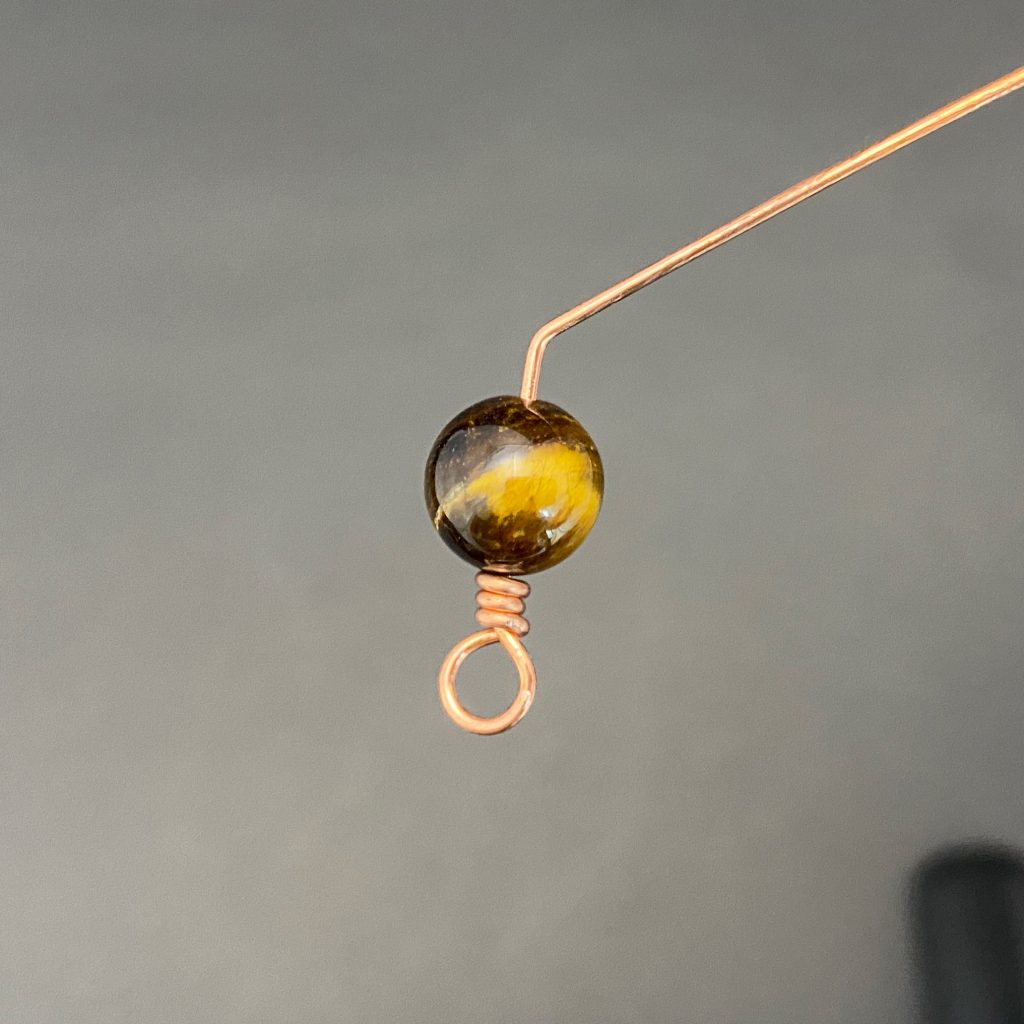
Step 10
Feed wire through bead. Using your needle nose pliers, bend wire as shown. Make sure to leave enough room for the wrap.
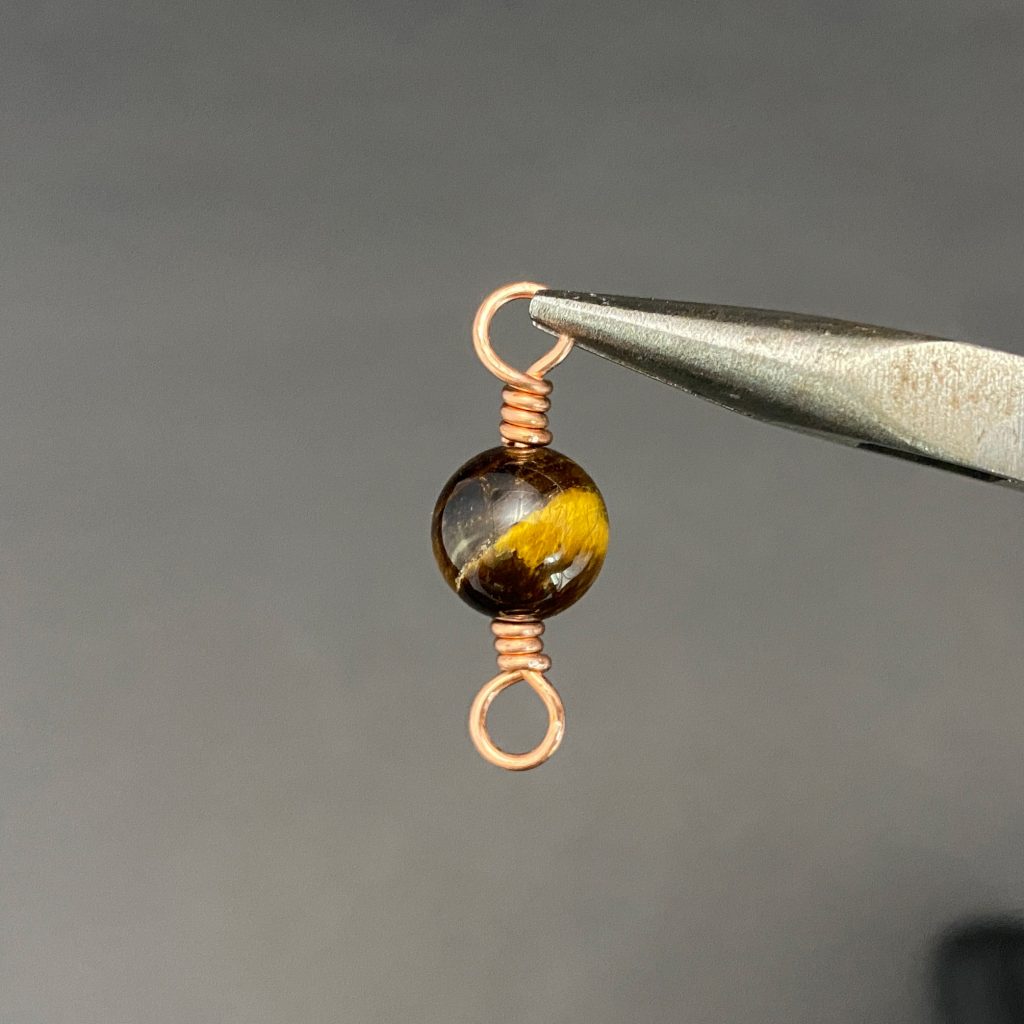
Step 11
Repeat steps 2-9 for other side.
If you’re a newbie, check out Wire-Wrapping for Beginners for lots of resources.
If you’d like to see my work and follow my wire journey, you can find me here:
Facebook
Instagram
Twitter
Pinterest
YouTube
Etsy

