• Skip to main content
  • Skip to secondary menu
  • Skip to primary sidebar
  • Skip to footer
Studio 73 Designs

Studio 73 Designs

Wire Jewelry Making & Wire Wrapping Techniques

  • Start Here!
  • FREE Wire-Wrapping Guides
  • Shop Tutorials
    • Cart
    • Checkout
  • Contact
  • Join Member
  • Member Login
Join PREMIUM MEMBERSHIP (FREE-TRIAL): 70+ Wire Wrapping Tutorials: Gain access to ALL step-by-step tutorials with high-quality images, no ads, plus all future tutorials. Check it out HERE.

Wire-Wrapping Eugene Oval Diamond Woven Ring Band Tutorial

March 22, 2025 by Madelynn

Step 8 of 9

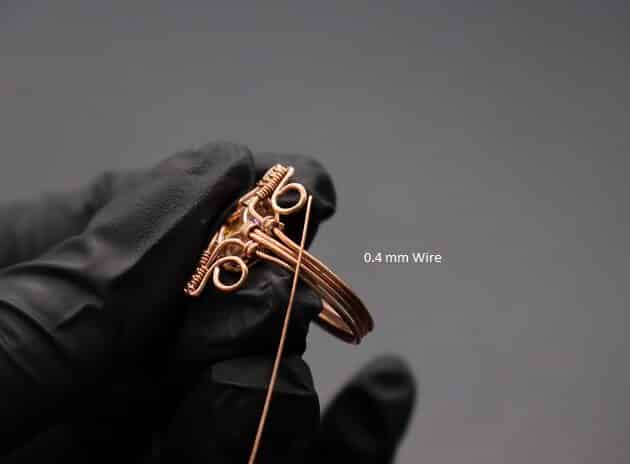
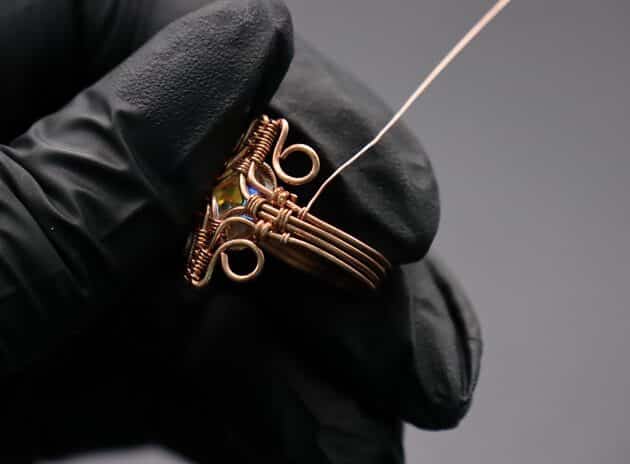
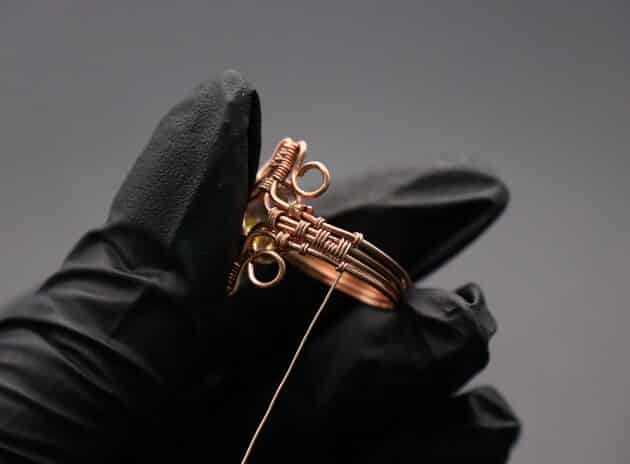
Now, let’s weave a beautiful texture on the wire ring band using a 26-gauge copper wire (fig. 8a, 8b).

Start by making 3 big coils on the two inner wires (fig. 8c).

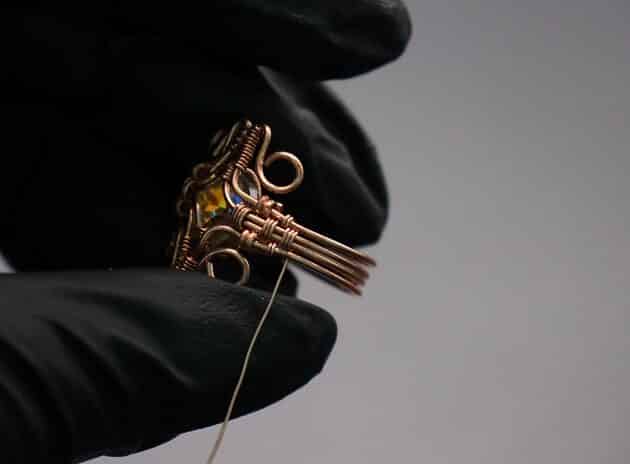
Then, make 2 small coils on the bottom wire (fig. 8d).

wire wrap jewelry

FREE WIRE-WRAPPING GUIDE TO YOUR EMAIL! 

JOIN NEWSLETTER

SEND GUIDE TO EMAIL

We respect your privacy. Unsubscribe at anytime.

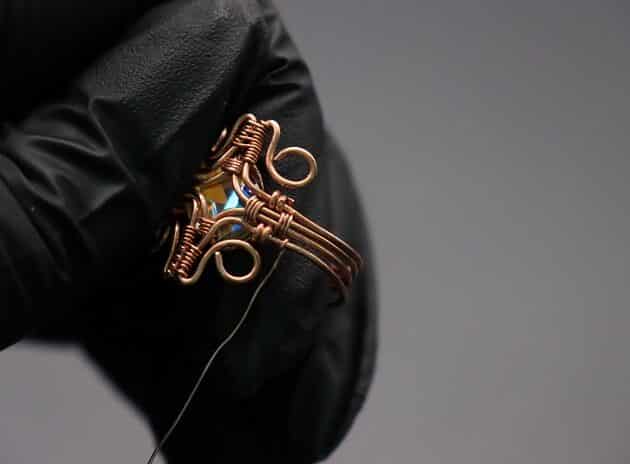
After that, pull the 26-gauge copper wire across the back of the ring band and make 2 small coils on the top wire (fig.  8e, 8f, 8g).

Wire-Wrapping Eugene Oval Diamond Woven Ring Band Tutorial 47
fig. 8a
Wire-Wrapping Eugene Oval Diamond Woven Ring Band Tutorial 48
fig. 8b
Wire-Wrapping Eugene Oval Diamond Woven Ring Band Tutorial 49
fig. 8c
Wire-Wrapping Eugene Oval Diamond Woven Ring Band Tutorial 50
fig. 8d
Wire-Wrapping Eugene Oval Diamond Woven Ring Band Tutorial 51
fig. 8e
Wire-Wrapping Eugene Oval Diamond Woven Ring Band Tutorial 52
fig. 8f
Wire-Wrapping Eugene Oval Diamond Woven Ring Band Tutorial 53
fig. 8g


Prefer this wire-wrapping tutorial in a PRINTABLE FORMAT? (High Resolution Photos)

Click here for the PDF version of “Wire-Wrapping Eugene Oval Diamond Woven Ring Band Tutorial”


Step 9 of 9

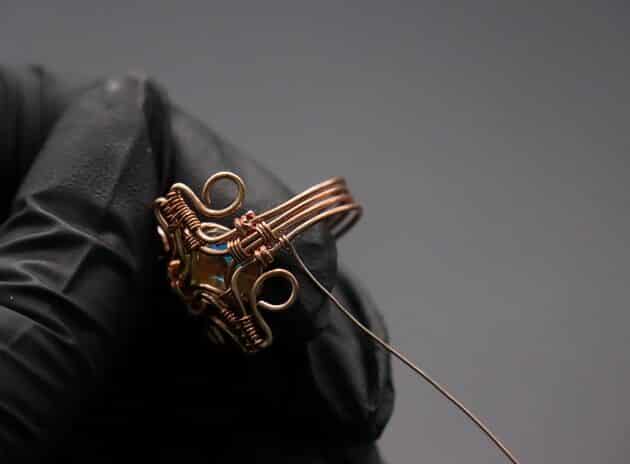
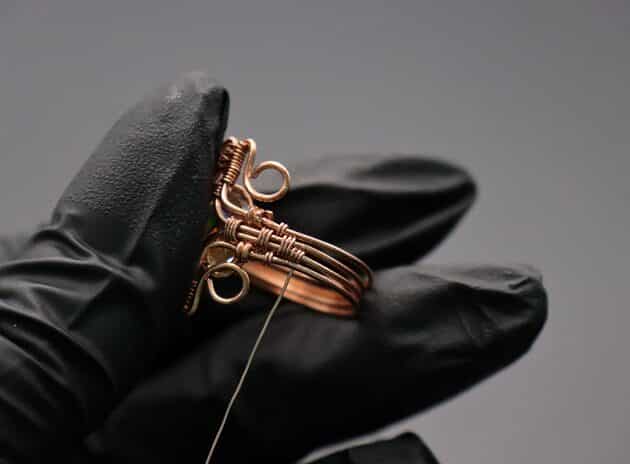
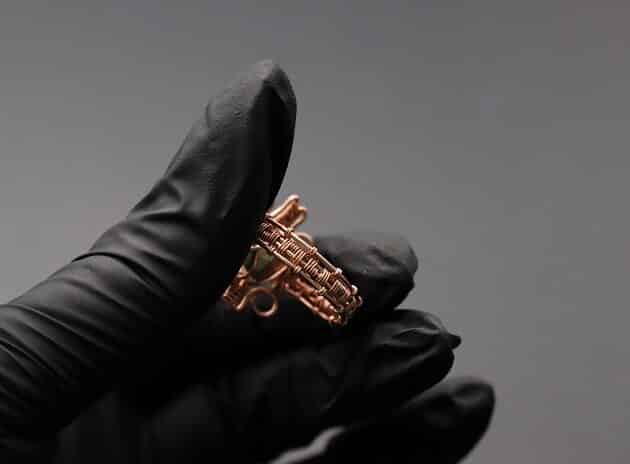
Moving on, let’s work on the repetitive weave combo that covers your entire ring band:

  • Make 3 big coils on the inner wires (fig. 9a).
  • Then, make 3 small coils on the *second bottom wire (fig. 9b).
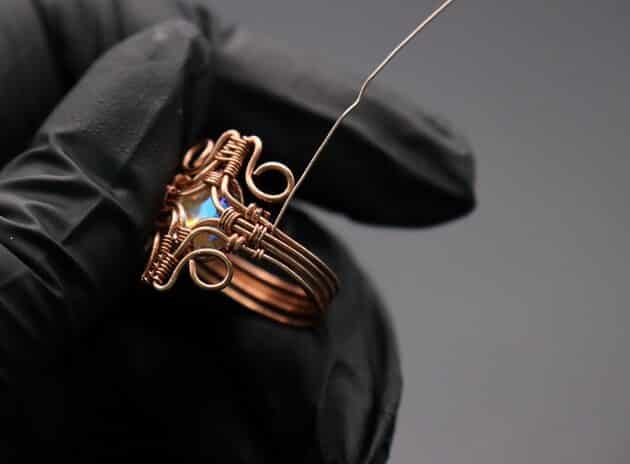
  • Make another 3 big coils on the inner wires (fig. 9c).
  • Make 2 small coils on the top and bottom wires (fig. 9d, 9e).

*Note: Alternate the 3 small coils between the second top wire and second bottom wire.

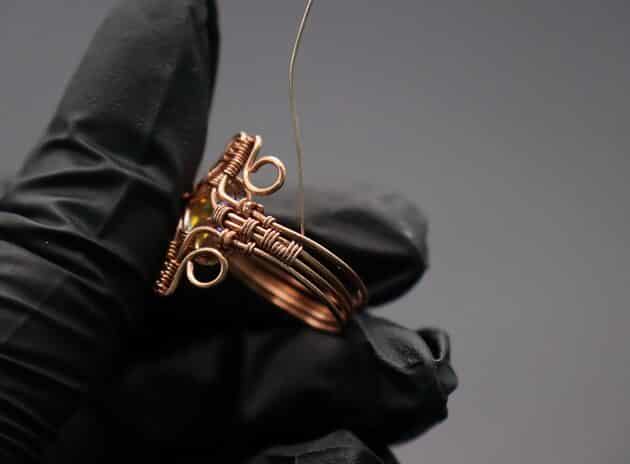
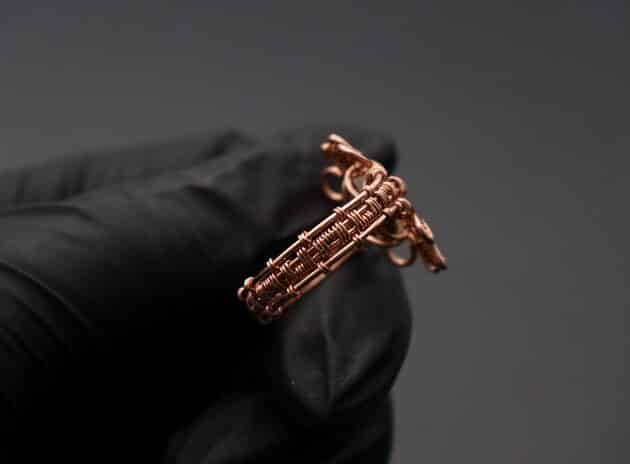
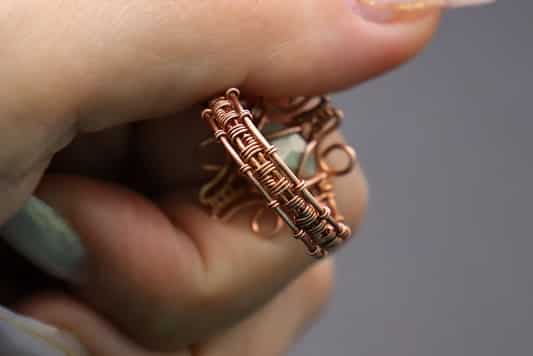
Checkpoint: This is how your woven ring band should look like (fig. 9f, 9g, 9h).

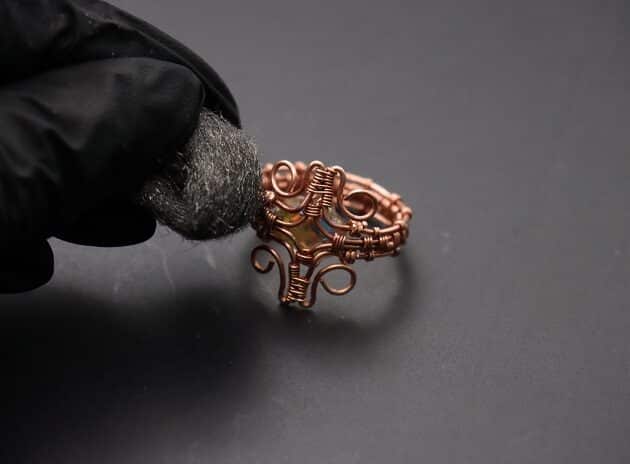
Lastly, polish the surface of your ring using a finest steel wire wool (fig. 9i, 9j).

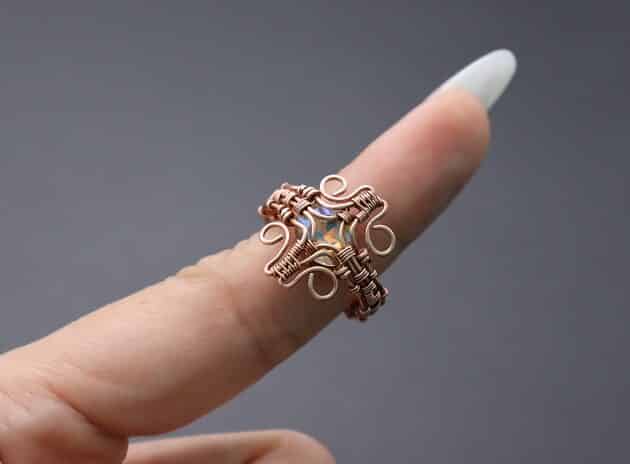
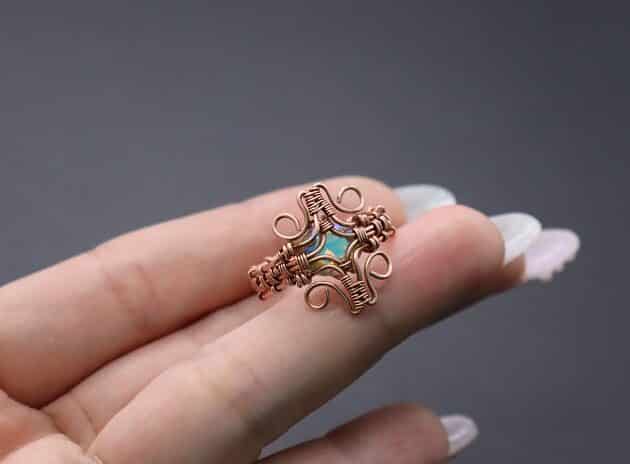
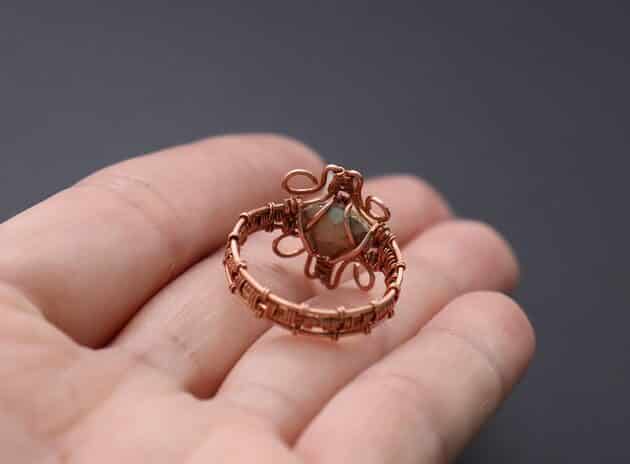
Well done! You have completed your tutorial.

Wire-Wrapping Eugene Oval Diamond Woven Ring Band Tutorial 54
fig. 9a
Wire-Wrapping Eugene Oval Diamond Woven Ring Band Tutorial 55
fig. 9b
Wire-Wrapping Eugene Oval Diamond Woven Ring Band Tutorial 56
fig. 9c
Wire-Wrapping Eugene Oval Diamond Woven Ring Band Tutorial 57
fig. 9d
Wire-Wrapping Eugene Oval Diamond Woven Ring Band Tutorial 58
fig. 9e
Wire-Wrapping Eugene Oval Diamond Woven Ring Band Tutorial 59
fig. 9f
Wire-Wrapping Eugene Oval Diamond Woven Ring Band Tutorial 60
fig. 9g
Wire-Wrapping Eugene Oval Diamond Woven Ring Band Tutorial 61
fig. 9h
Wire-Wrapping Eugene Oval Diamond Woven Ring Band Tutorial 62
fig. 9i
Wire-Wrapping Eugene Oval Diamond Woven Ring Band Tutorial 63
fig. 9j

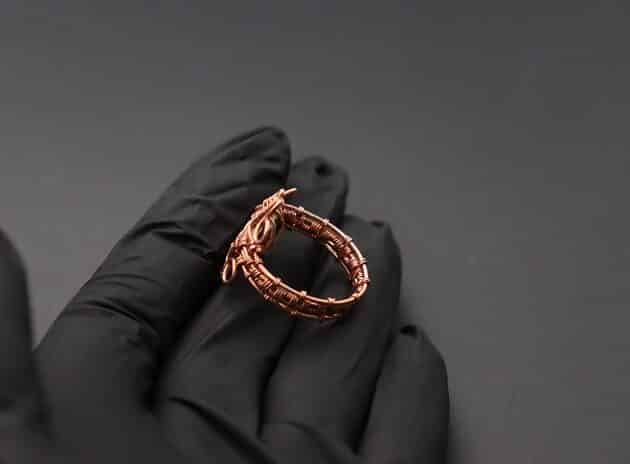
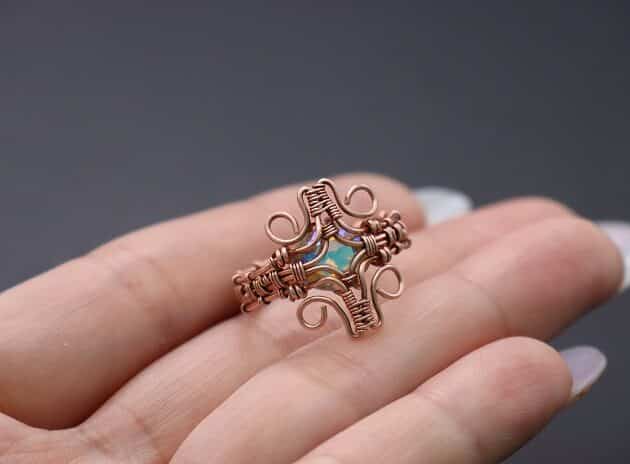
COMPLETED WIRE-WRAPPING EUGENE OVAL DIAMOND WOVEN RING

Wire-Wrapping Eugene Oval Diamond Woven Ring Band Tutorial 64
Completed Wire-Wrapping Eugene Oval Diamond Woven Ring Band (On Finger)
Wire-Wrapping Eugene Oval Diamond Woven Ring Band Tutorial 65
Completed Wire-Wrapping Eugene Oval Diamond Woven Ring Band (Front)
Wire-Wrapping Eugene Oval Diamond Woven Ring Band Tutorial 66
Completed Wire-Wrapping Eugene Oval Diamond Woven Ring Band (Back)
Wire-Wrapping Eugene Oval Diamond Woven Ring Band Tutorial 67
Completed Wire-Wrapping Eugene Oval Diamond Woven Ring Band (Band)
Wire-Wrapping Eugene Oval Diamond Woven Ring Band Tutorial 68
Completed Wire-Wrapping Eugene Oval Diamond Woven Ring Band (Top)

Want to Support me?

If you enjoyed my content,  please consider support me on Patreon:). This helps me to create more amazing free content to share with you 🙂


If you’d like to see my work and follow my wire journey, you can find me here:

Facebook Instagram Twitter Pinterest YouTube Etsy

madelynn signature

Pages: Page 1 Page 2 Page 3

Filed Under: Tutorials/DIY

Primary Sidebar

MadelynnHey there! Thanks for visiting 🙂

My name is Madelynn and I’m the owner of Studio 73 Designs.

Studio 73 Designs is managed by a team of wire wrapping jewelry enthusiasts 🙂 Cheers!

Follow Me

  • Facebook
  • Instagram
  • Pinterest
  • Twitter
  • YouTube

ARE YOU INTERESTED IN WIRE-WRAPPING?

Sign up below and get access to my FREE wire-wrapping guides!

Sign Up
Wire Wrapping Tutorials
Wire Wrapping for Beginners Start Here
Beginner's Guide to Jewelry Wire for Wire-Wrapping
Wire Wrapping Tools and Supplies for Beginners
How to wire wrap stones without holes wire-wrapping tutorial for beginners
Wire Wrapping Tutorials DIY Jewelry Kits

Footer

ARE YOU INTERESTED IN WIRE-WRAPPING?

Sign up below and get access to my FREE wire-wrapping guides!

Sign Up

Site Navigation

Home
About
Contact
Blog
Privacy Policy
Disclaimer
Terms & Conditions

Follow Me

  • Facebook
  • Instagram
  • Pinterest
  • Twitter
  • YouTube

© 2026 · Studio 73 Designs

wire-wrapping tutorials

Learn Wire-Wrapping

Want to create beautiful wire-wrapped jewelry? Join membership today and get access to 70+ step-by-step wire-wrapping tutorials with high-quality images

Learn More
x