• Skip to main content
  • Skip to secondary menu
  • Skip to primary sidebar
  • Skip to footer
Studio 73 Designs

Studio 73 Designs

Wire Jewelry Making & Wire Wrapping Techniques

  • Start Here!
  • FREE Wire-Wrapping Guides
  • Shop Tutorials
    • Cart
    • Checkout
  • Contact
  • Join Member
  • Member Login
Join PREMIUM MEMBERSHIP (FREE-TRIAL): 70+ Wire Wrapping Tutorials: Gain access to ALL step-by-step tutorials with high-quality images, no ads, plus all future tutorials. Check it out HERE.

Wire-Wrapping Creative Dragonfly Pendant Tutorial

January 20, 2024 by Madelynn

Step 7 of 9

For this step, we will make the last element to complete your pendant, the jump ring.

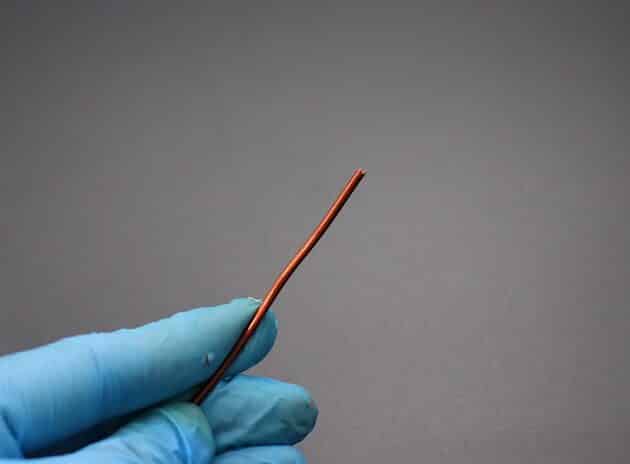
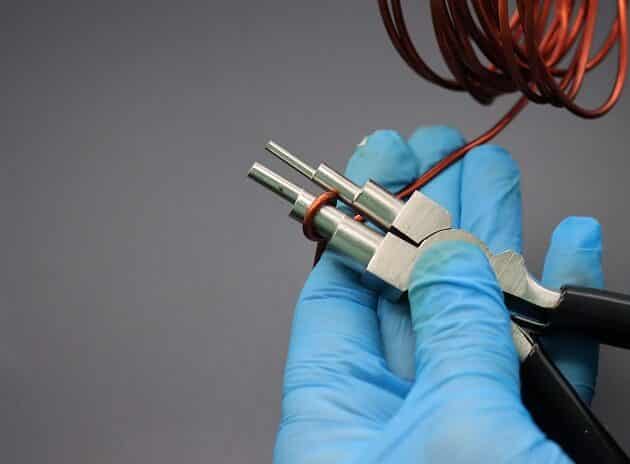
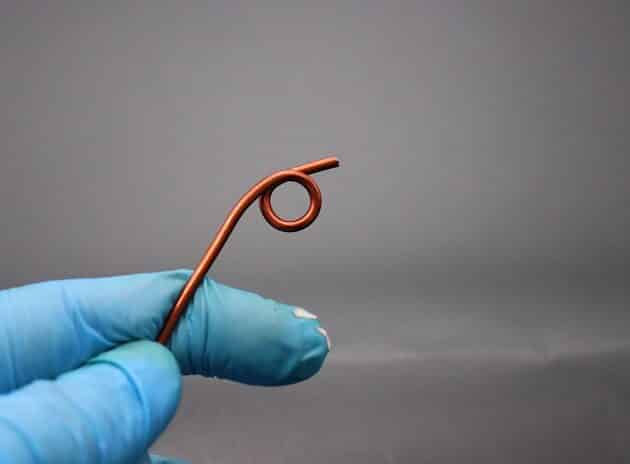
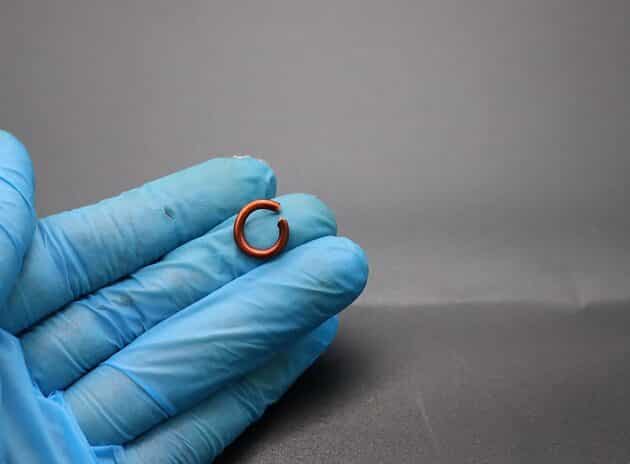
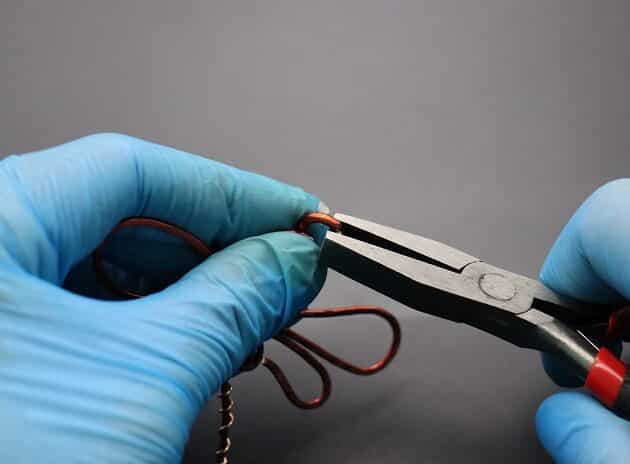
With a string of 12-gauge brown copper wire, make a small loop using a stepped bail-making pilers (fig. 7a, 7b, 7c).

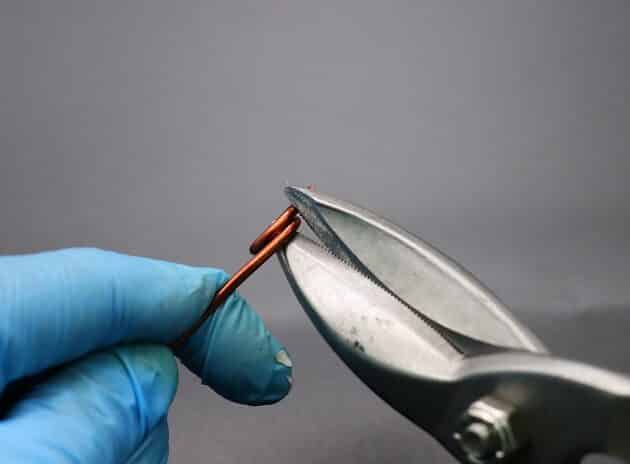
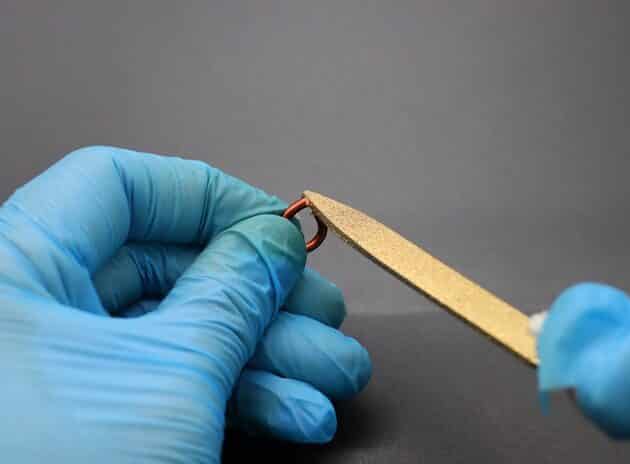
Then, cut the loop in half with a wire cutter as shown (fig. 7d, 7e).

wire wrap jewelry

FREE WIRE-WRAPPING GUIDE TO YOUR EMAIL! 

JOIN NEWSLETTER

SEND GUIDE TO EMAIL

We respect your privacy. Unsubscribe at anytime.

Wire-Wrapping Creative Dragonfly Pendant Tutorial 30
fig. 7a
Wire-Wrapping Creative Dragonfly Pendant Tutorial 31
fig. 7b
Wire-Wrapping Creative Dragonfly Pendant Tutorial 32
fig. 7c
Wire-Wrapping Creative Dragonfly Pendant Tutorial 33
fig. 7d
Wire-Wrapping Creative Dragonfly Pendant Tutorial 34
fig. 7e

Prefer this wire-wrapping tutorial in a PRINTABLE FORMAT? (High Resolution Photos)

Click here for the PDF version of “Simple Creative Dragonfly Wire-Wrapping Tutorial”
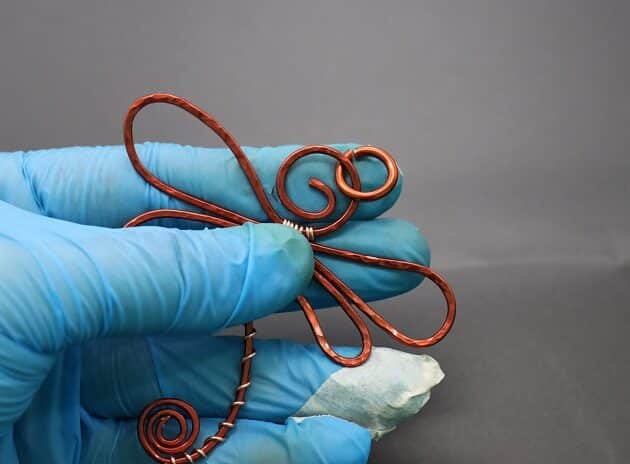
Step 8 of 9

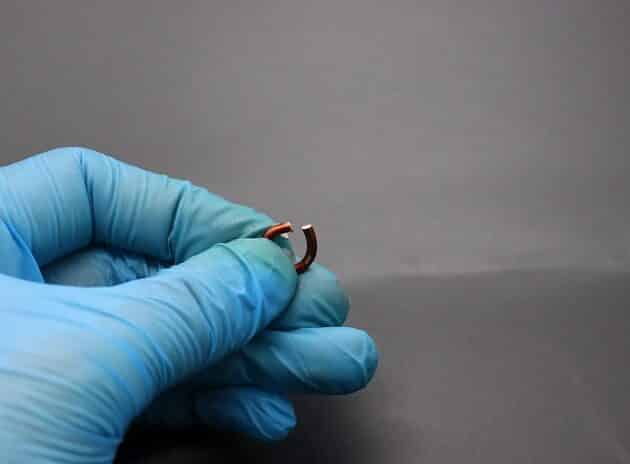
Moving on, use a triangle needle files to smooth the sharp trimmed ends of the jump ring (fig. 8a, 8b).

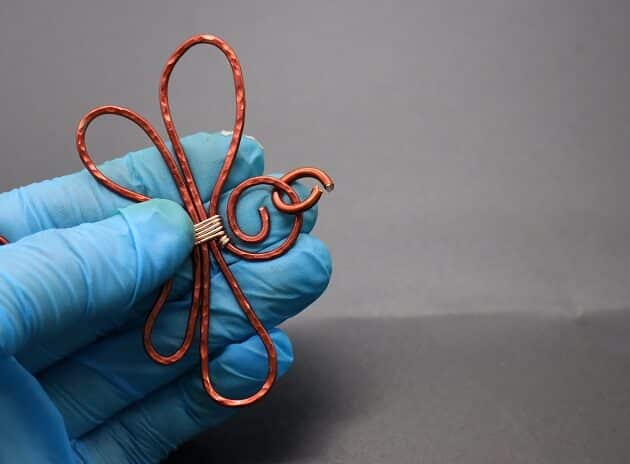
Then, slip the jump ring onto the dragonfly head structure and close it with a flat nose pliers (fig. 8c, 8d, 8e).
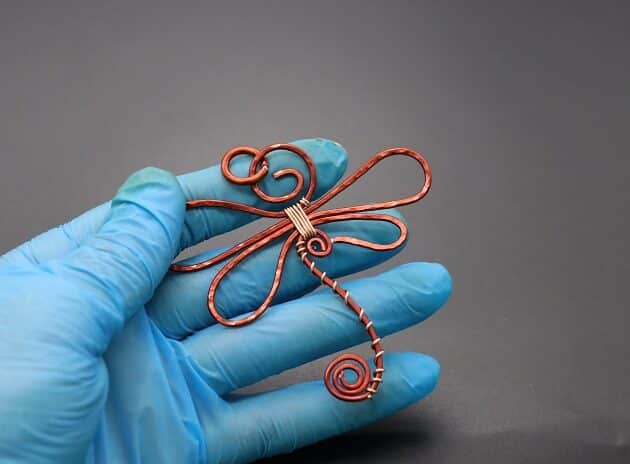
Wire-Wrapping Creative Dragonfly Pendant Tutorial 35
fig. 8a
Wire-Wrapping Creative Dragonfly Pendant Tutorial 36
fig. 8b
Wire-Wrapping Creative Dragonfly Pendant Tutorial 37
fig. 8c
Wire-Wrapping Creative Dragonfly Pendant Tutorial 38
fig. 8d
Wire-Wrapping Creative Dragonfly Pendant Tutorial 39
fig. 8e

Step 9 of 9

Finally, clear your dragonfly pendant from debris by using the finest steel wire wool (fig. 9a, 9b).

Well done! You have completed the tutorial.

Wire-Wrapping Creative Dragonfly Pendant Tutorial 40
fig. 9a
Wire-Wrapping Creative Dragonfly Pendant Tutorial 41
fig. 9b

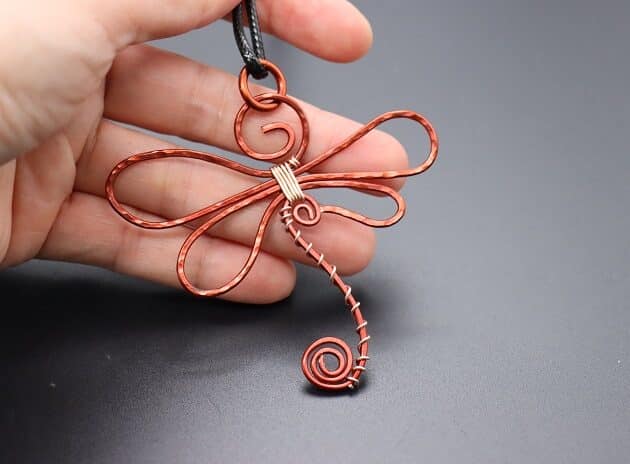
COMPLETED WIRE-WRAPPING CREATIVE DRAGONFLY PENDANT

Wire-Wrapping Creative Dragonfly Pendant Tutorial 42
Completed Wire-Wrapping Creative Dragonfly Pendant

Want to Support me?

If you enjoyed my content,  please consider support me on Patreon:). This helps me to create more amazing free content to share with you 🙂


If you’d like to see my work and follow my wire journey, you can find me here:

Facebook Instagram Twitter Pinterest YouTube Etsy

madelynn signature

Pages: Page 1 Page 2 Page 3

Filed Under: Tutorials/DIY

Primary Sidebar

MadelynnHey there! Thanks for visiting 🙂

My name is Madelynn and I’m the owner of Studio 73 Designs.

Studio 73 Designs is managed by a team of wire wrapping jewelry enthusiasts 🙂 Cheers!

Follow Me

  • Facebook
  • Instagram
  • Pinterest
  • Twitter
  • YouTube

ARE YOU INTERESTED IN WIRE-WRAPPING?

Sign up below and get access to my FREE wire-wrapping guides!

Sign Up
Wire Wrapping Tutorials
Wire Wrapping for Beginners Start Here
Beginner's Guide to Jewelry Wire for Wire-Wrapping
Wire Wrapping Tools and Supplies for Beginners
How to wire wrap stones without holes wire-wrapping tutorial for beginners
Wire Wrapping Tutorials DIY Jewelry Kits

Footer

ARE YOU INTERESTED IN WIRE-WRAPPING?

Sign up below and get access to my FREE wire-wrapping guides!

Sign Up

Site Navigation

Home
About
Contact
Blog
Privacy Policy
Disclaimer
Terms & Conditions

Follow Me

  • Facebook
  • Instagram
  • Pinterest
  • Twitter
  • YouTube

© 2026 · Studio 73 Designs