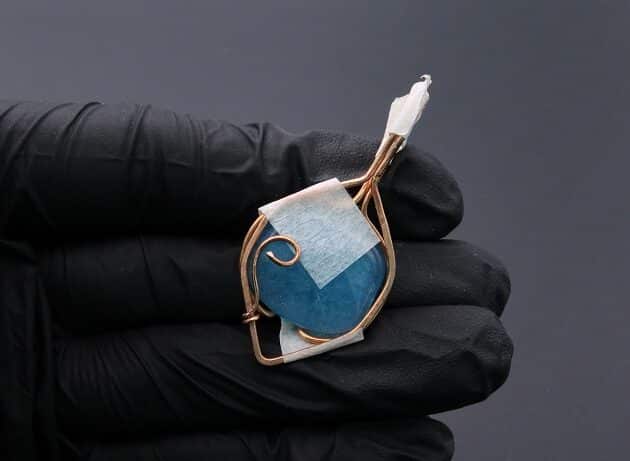
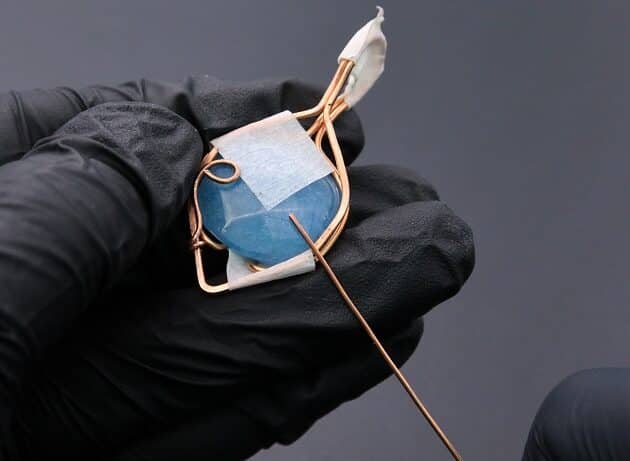
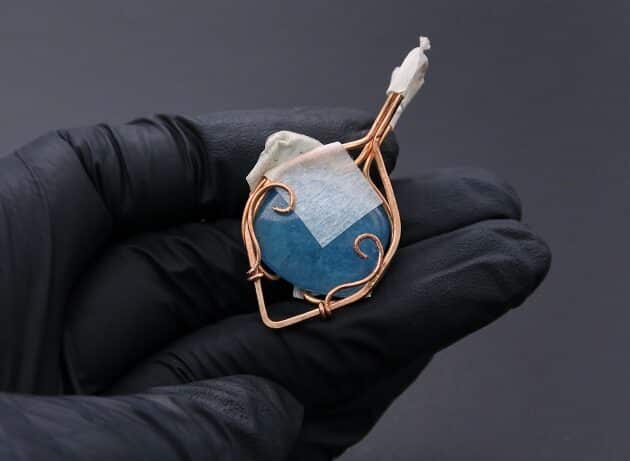
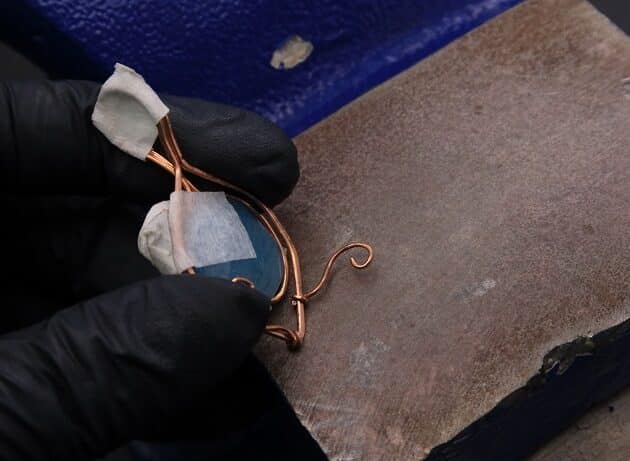
• Skip to main content
  • Skip to secondary menu
  • Skip to primary sidebar
  • Skip to footer
Studio 73 Designs

Studio 73 Designs

Wire Jewelry Making & Wire Wrapping Techniques

  • Start Here!
  • FREE Wire-Wrapping Guides
  • Shop Tutorials
    • Cart
    • Checkout
  • Contact
  • Join Member
  • Member Login
Join PREMIUM MEMBERSHIP (FREE-TRIAL): 70+ Wire Wrapping Tutorials: Gain access to ALL step-by-step tutorials with high-quality images, no ads, plus all future tutorials. Check it out HERE.

Wire-Wrapping Bejeweled Aqua Jade Pendant Tutorial

June 27, 2025 by Madelynn

Step 5 of 17

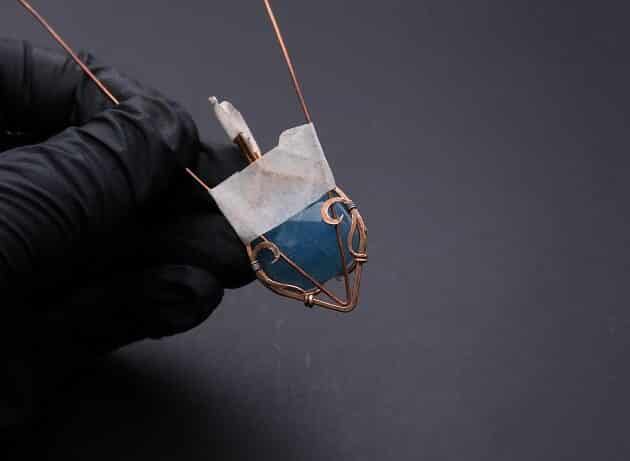
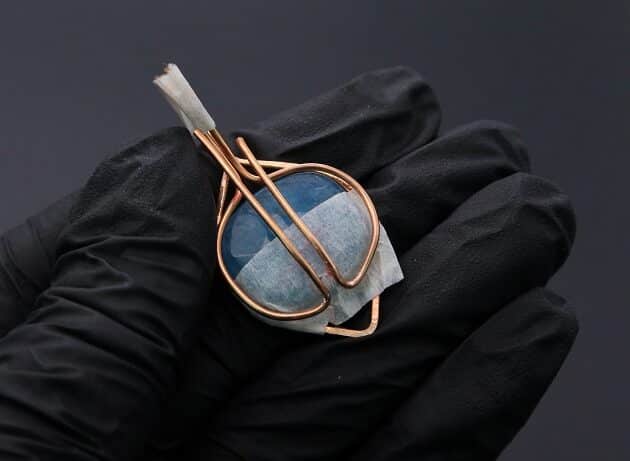
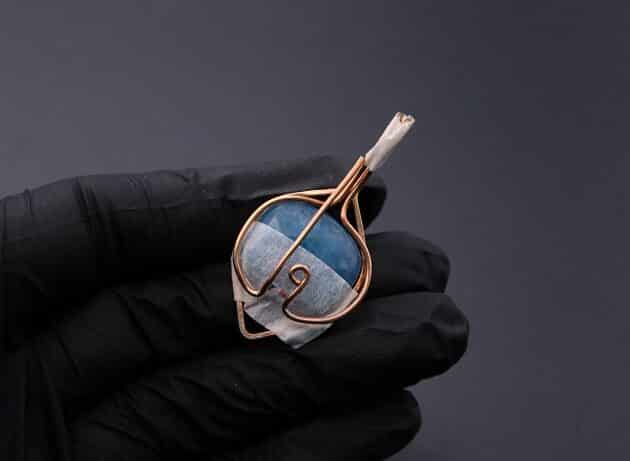
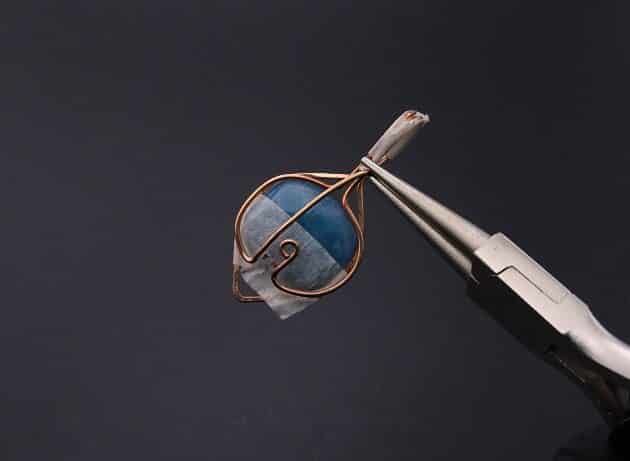
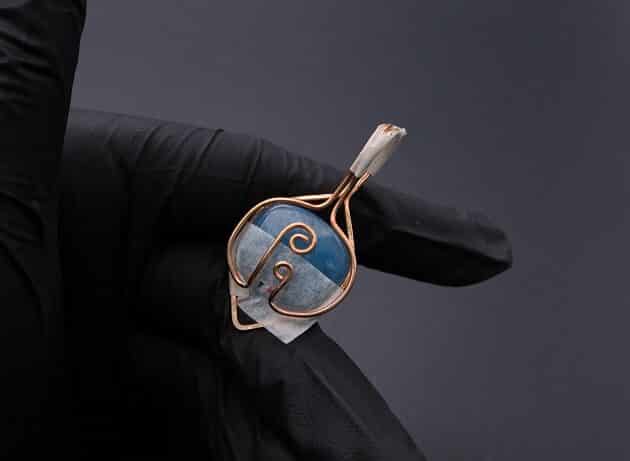
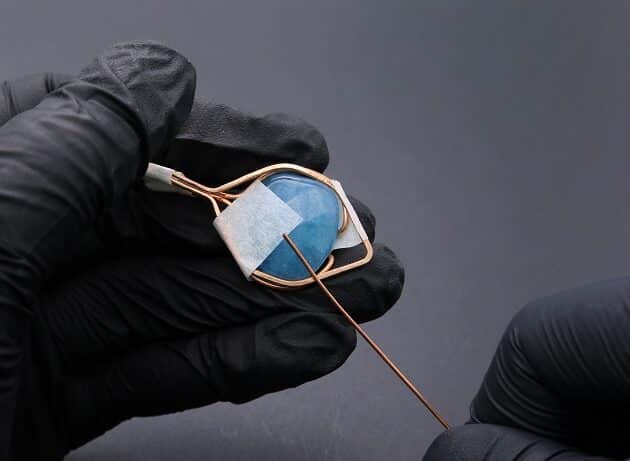
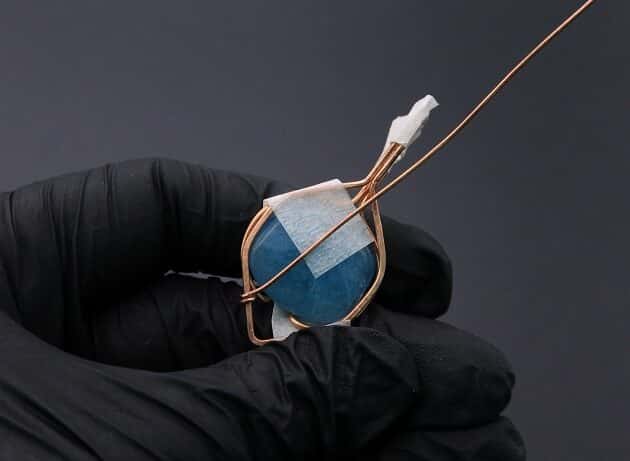
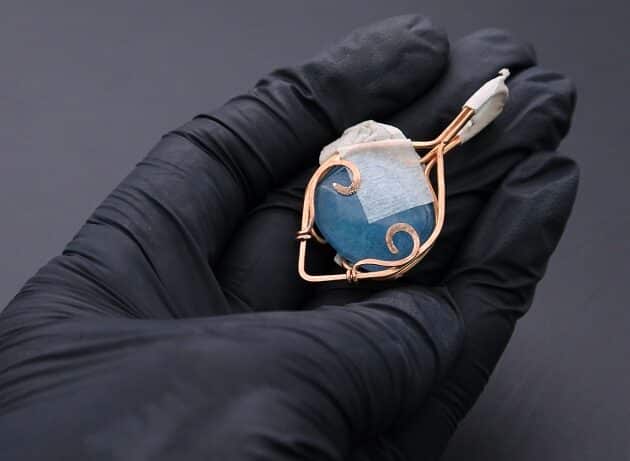
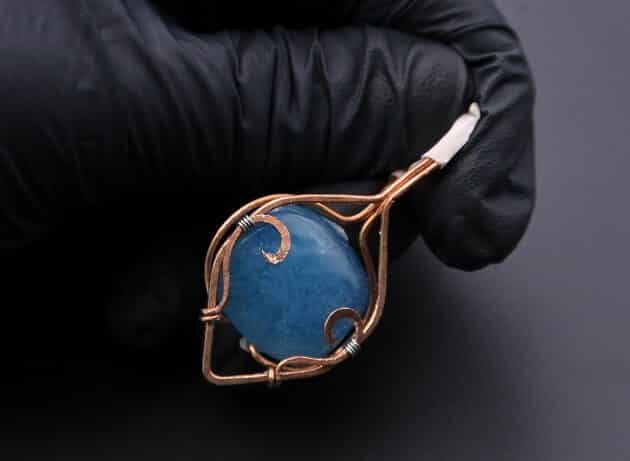
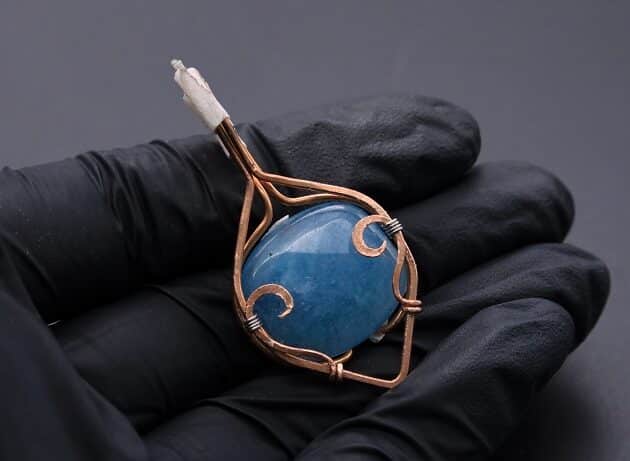
Moving on, trim the right 18-gauge copper wire shorter than the left wire (fig. 5a, 5b, 5c).

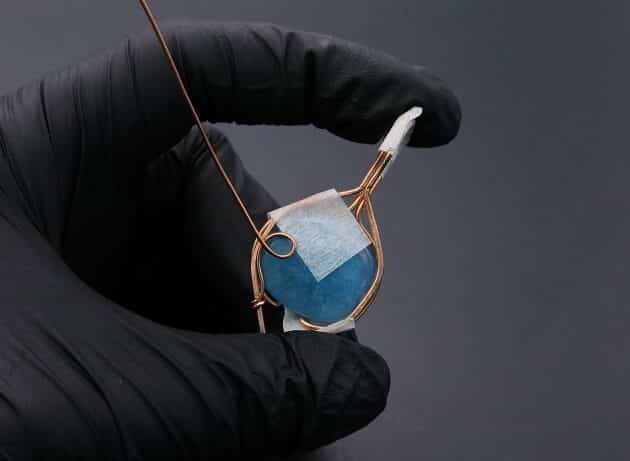
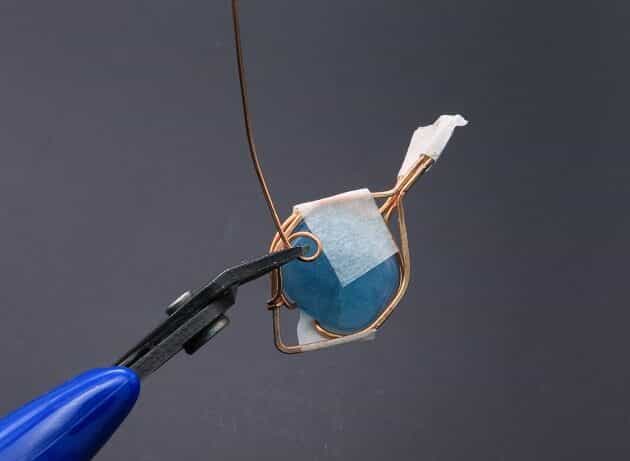
Complete the back stone holder frame design by curling the wire ends inwards with a round nose pliers (fig. 5d, 5e, 5f, 5g).

Wire-Wrapping Bejeweled Aqua Jade Pendant Tutorial 28
fig. 5a

Wire-Wrapping Bejeweled Aqua Jade Pendant Tutorial 29
fig. 5b

Wire-Wrapping Bejeweled Aqua Jade Pendant Tutorial 30
fig. 5c

Wire-Wrapping Bejeweled Aqua Jade Pendant Tutorial 31
fig. 5d

Wire-Wrapping Bejeweled Aqua Jade Pendant Tutorial 32
fig. 5e

Wire-Wrapping Bejeweled Aqua Jade Pendant Tutorial 33
fig. 5f

Wire-Wrapping Bejeweled Aqua Jade Pendant Tutorial 34
fig. 5g

wire wrap jewelry

FREE WIRE-WRAPPING GUIDE TO YOUR EMAIL! 

JOIN NEWSLETTER

SEND GUIDE TO EMAIL

We respect your privacy. Unsubscribe at anytime.


Prefer this wire-wrapping tutorial in a PRINTABLE FORMAT? (High Resolution Photos)

Click here for the PDF version of “Wire-Wrapping Bejeweled Aqua Jade Pendant Tutorial”
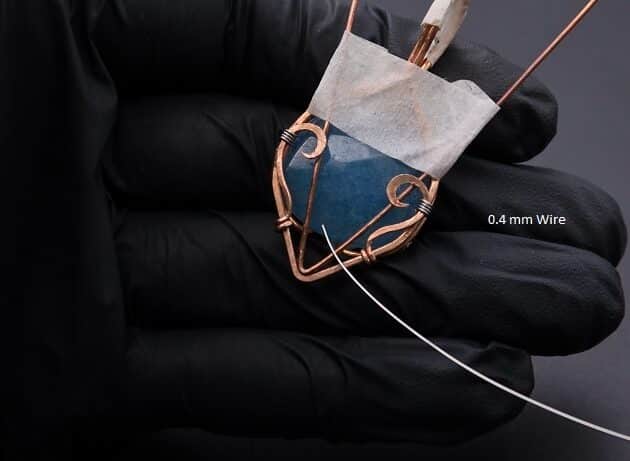
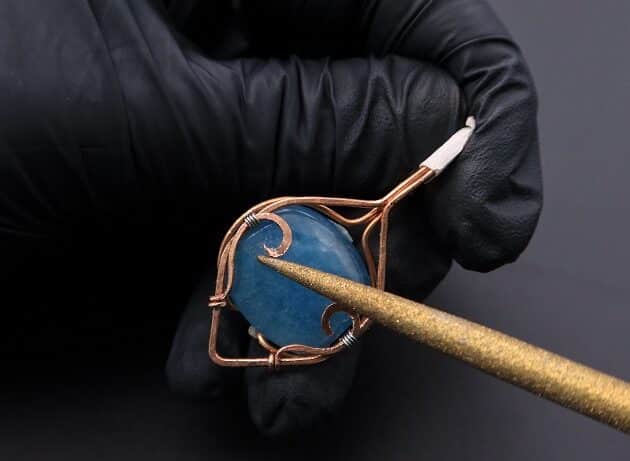
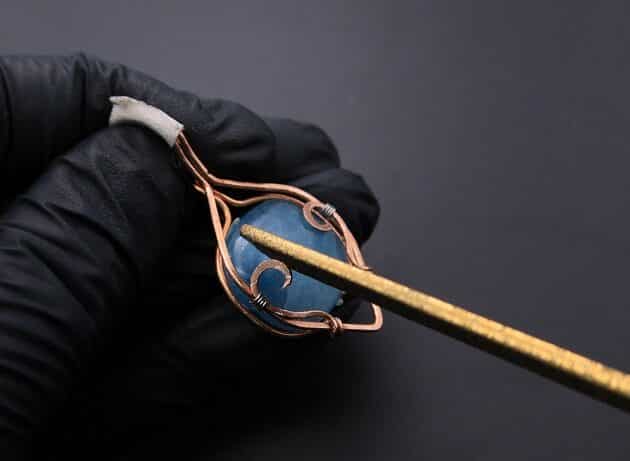
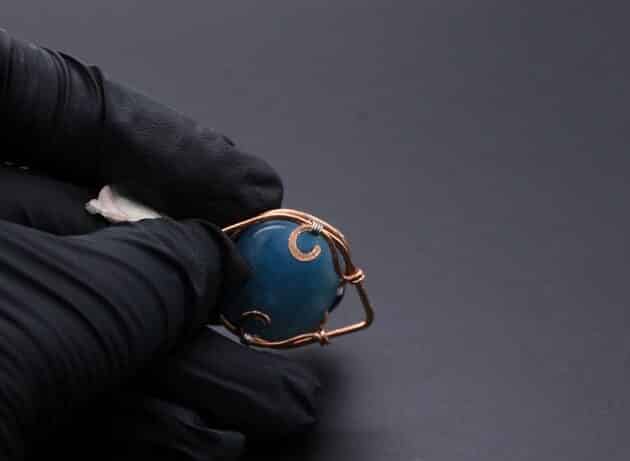
 

Step 6 of 17

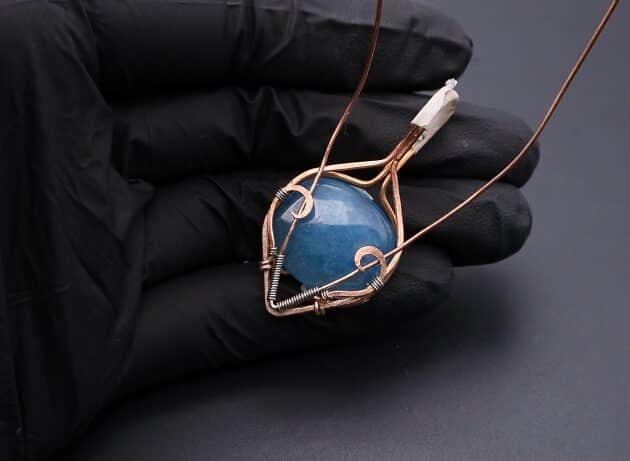
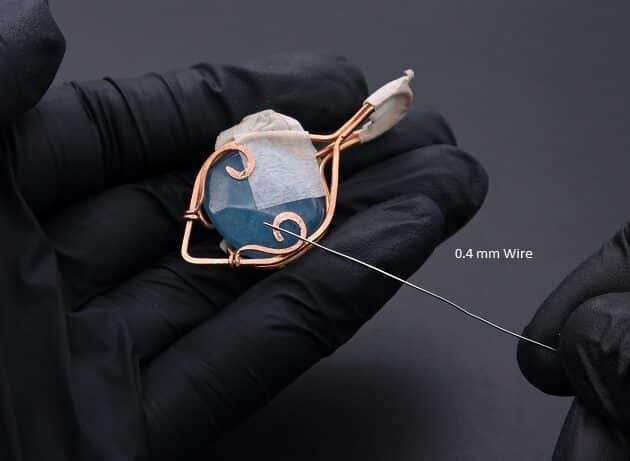
Fourthly, let’s add fine details onto your copper pendant frame.

For the first layer, take a new 20-gauge copper wire and anchor it on the bottom left of the hexagon wire frame (fig. 6a, 6b, 6c).

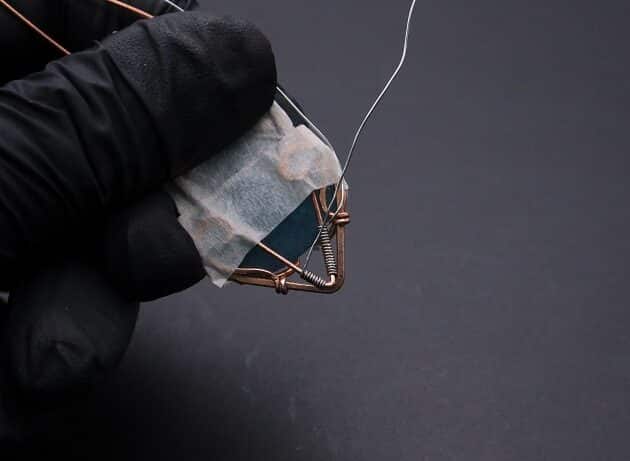
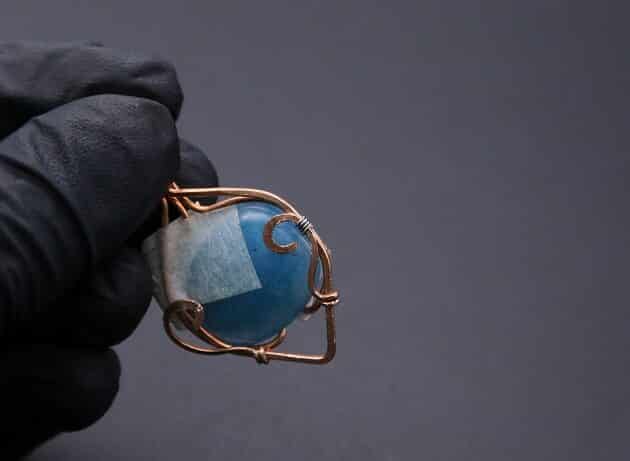
Curl a swirl at the left frame and trim off the excess wire with a wire cutter (fig. 6d, 6e, 6f).

Duplicate the wire swirl on the right frame (fig. 6g, 6h).

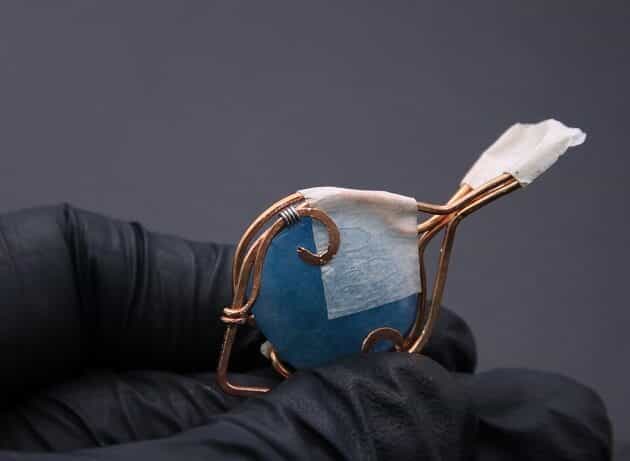
After that, flatten the wire swirls by hammering them on a base metal plate (fig. 6i, 6j, 6k).
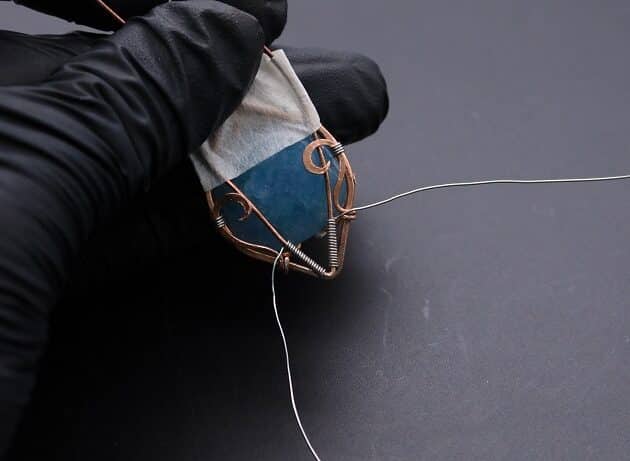
Wire-Wrapping Bejeweled Aqua Jade Pendant Tutorial 35
fig. 6a

Wire-Wrapping Bejeweled Aqua Jade Pendant Tutorial 36
fig. 6b

Wire-Wrapping Bejeweled Aqua Jade Pendant Tutorial 37
fig. 6c

Wire-Wrapping Bejeweled Aqua Jade Pendant Tutorial 38
fig. 6d

Wire-Wrapping Bejeweled Aqua Jade Pendant Tutorial 39
fig. 6e

Wire-Wrapping Bejeweled Aqua Jade Pendant Tutorial 40
fig. 6f

Wire-Wrapping Bejeweled Aqua Jade Pendant Tutorial 41
fig. 6g

Wire-Wrapping Bejeweled Aqua Jade Pendant Tutorial 42
fig. 6h

Wire-Wrapping Bejeweled Aqua Jade Pendant Tutorial 43
fig. 6i

Wire-Wrapping Bejeweled Aqua Jade Pendant Tutorial 44
fig. 6j

Wire-Wrapping Bejeweled Aqua Jade Pendant Tutorial 45
fig. 6k

Step 7 of 17

Coil the flat wire swirls in position using a 26-gauge silver copper wire (fig. 7a, 7b, 7c, 7d).

Then, sharpen the blunt swirl ends with a round needle files (fig. 7e, 7f, 7g, 7h).

Wire-Wrapping Bejeweled Aqua Jade Pendant Tutorial 46
fig. 7a

Wire-Wrapping Bejeweled Aqua Jade Pendant Tutorial 47
fig. 7b

Wire-Wrapping Bejeweled Aqua Jade Pendant Tutorial 48
fig. 7c

Wire-Wrapping Bejeweled Aqua Jade Pendant Tutorial 49
fig. 7d

Wire-Wrapping Bejeweled Aqua Jade Pendant Tutorial 50
fig. 7e

Wire-Wrapping Bejeweled Aqua Jade Pendant Tutorial 51
fig. 7f

Wire-Wrapping Bejeweled Aqua Jade Pendant Tutorial 52
fig. 7g

Wire-Wrapping Bejeweled Aqua Jade Pendant Tutorial 53
fig. 7h

Step 8 of 17

For the second layer, bend a 20-gauge copper wire into a V-shape and align it at the bottom hexagon frame (fig. 8a, 8b).

Coil the wire V-base using 26-gauge silver copper wire and trim off the excess wire (fig. 8c, 8d, 8e, 8f).

Wire-Wrapping Bejeweled Aqua Jade Pendant Tutorial 54
fig. 8a

Wire-Wrapping Bejeweled Aqua Jade Pendant Tutorial 55
fig. 8b

Wire-Wrapping Bejeweled Aqua Jade Pendant Tutorial 56
fig. 8c

Wire-Wrapping Bejeweled Aqua Jade Pendant Tutorial 57
fig. 8d

Wire-Wrapping Bejeweled Aqua Jade Pendant Tutorial 58
fig. 8e

Wire-Wrapping Bejeweled Aqua Jade Pendant Tutorial 59
fig. 8f

Pages: Page 1 Page 2 Page 3 Page 4 Page 5

Filed Under: Tutorials/DIY

Primary Sidebar

MadelynnHey there! Thanks for visiting 🙂

My name is Madelynn and I’m the owner of Studio 73 Designs.

Studio 73 Designs is managed by a team of wire wrapping jewelry enthusiasts 🙂 Cheers!

Follow Me

  • Facebook
  • Instagram
  • Pinterest
  • Twitter
  • YouTube

ARE YOU INTERESTED IN WIRE-WRAPPING?

Sign up below and get access to my FREE wire-wrapping guides!

Sign Up
Wire Wrapping Tutorials
Wire Wrapping for Beginners Start Here
Beginner's Guide to Jewelry Wire for Wire-Wrapping
Wire Wrapping Tools and Supplies for Beginners
How to wire wrap stones without holes wire-wrapping tutorial for beginners
Wire Wrapping Tutorials DIY Jewelry Kits

Footer

ARE YOU INTERESTED IN WIRE-WRAPPING?

Sign up below and get access to my FREE wire-wrapping guides!

Sign Up

Site Navigation

Home
About
Contact
Blog
Privacy Policy
Disclaimer
Terms & Conditions

Follow Me

  • Facebook
  • Instagram
  • Pinterest
  • Twitter
  • YouTube

© 2026 · Studio 73 Designs

wire-wrapping tutorials

Learn Wire-Wrapping

Want to create beautiful wire-wrapped jewelry? Join membership today and get access to 70+ step-by-step wire-wrapping tutorials with high-quality images

Learn More
x