Step 13 of 15
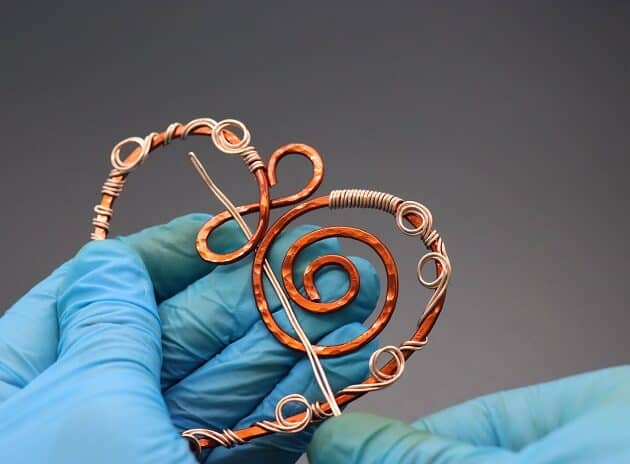
Next step, secure top two halves of the Heart pendant by making a tight wrap with a new length of modified 20-gauge gold copper wire (fig. 13a, 13b, 13c, 13d).
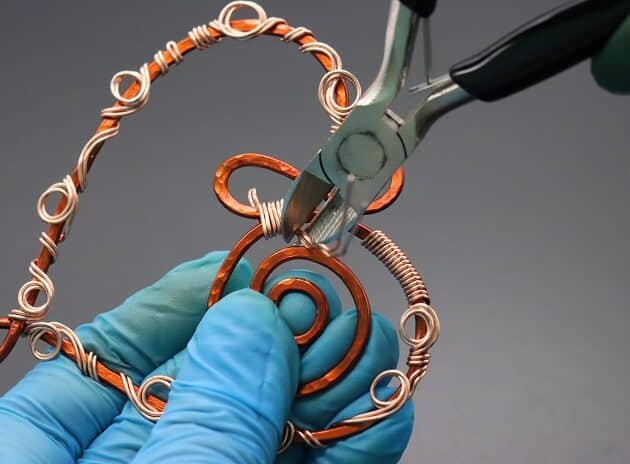
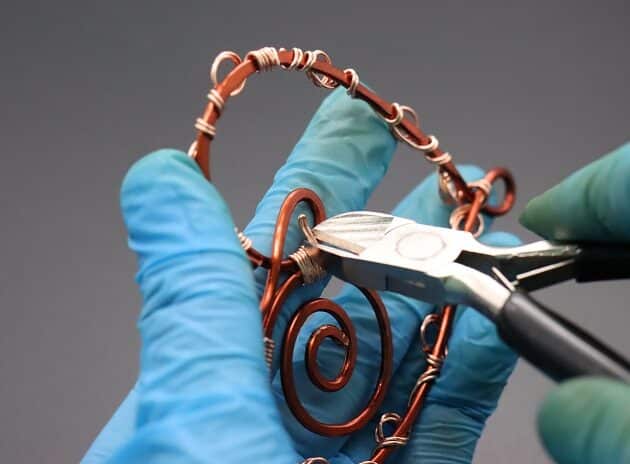
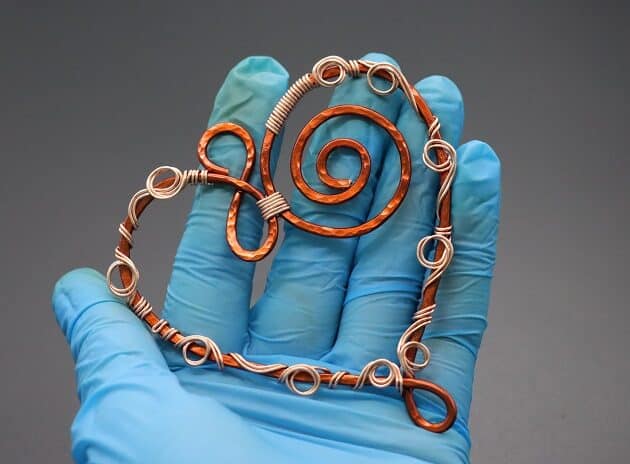
Cut off the excess wires for a neat finish (fig. 13e, 13f, 13g, 13h).


Prefer this wire-wrapping tutorial in a PRINTABLE FORMAT? (High Resolution Photos)
Click here for the PDF version of “Heart With Love Wire-Wrapping Tutorial”

FREE WIRE-WRAPPING GUIDE TO YOUR EMAIL!
JOIN NEWSLETTER
We respect your privacy. Unsubscribe at anytime.
Step 14 of 15
Welcome to the final part of the tutorial! Well done for making it this far.
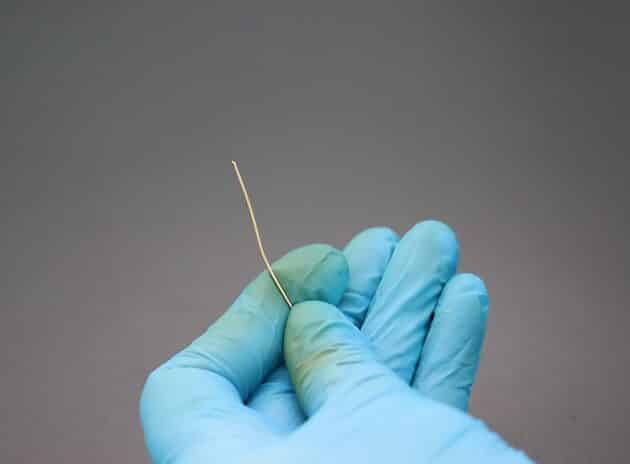
To make this Heart pendant more meaningful, let’s add a beautiful wire “Love” word (fig. 14a).
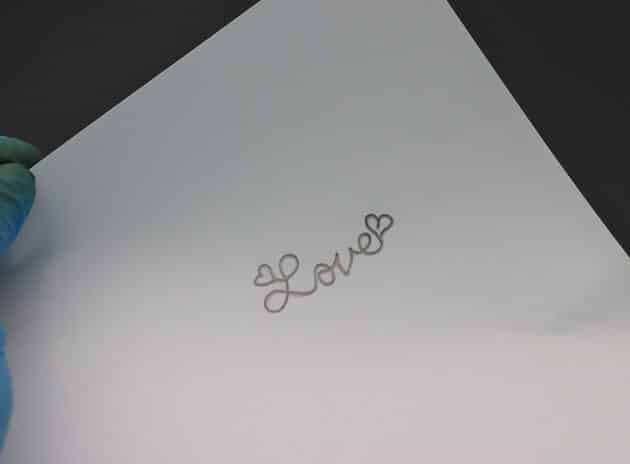
Make an outline of the Love word art graphic on a piece of paper (fig. 14b).
Trace the Love word with a new length of 20-gauge gold copper wire (fig. 14c).
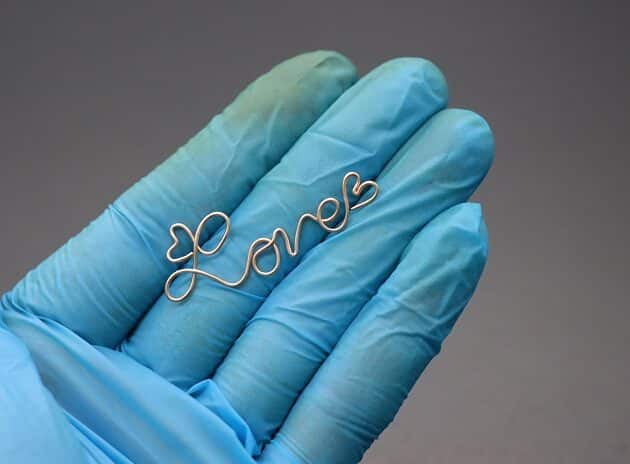
Make sure the Love word fits the center space of the Heart Pendant (fig. 14d).
Step 15 of 15
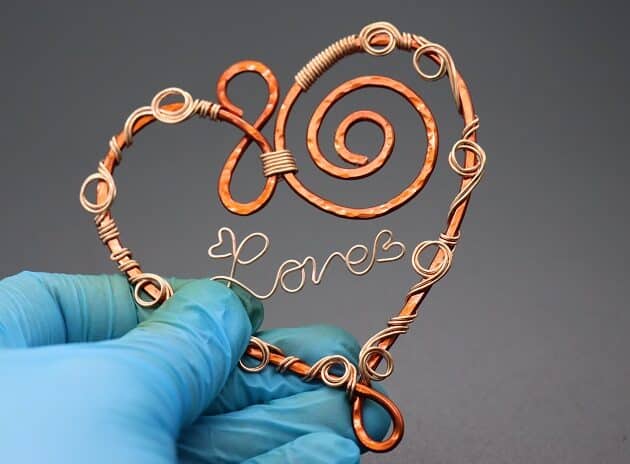
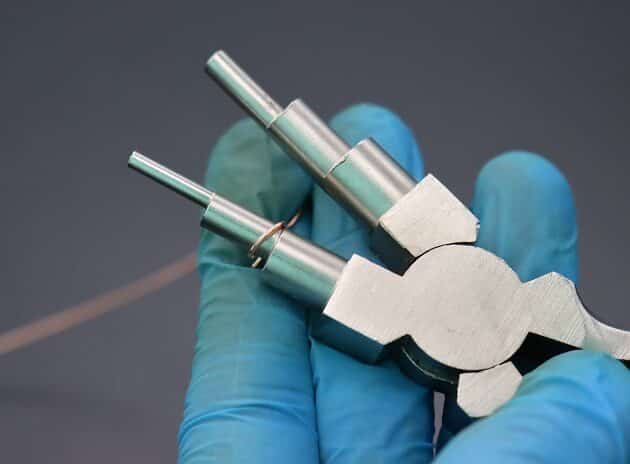
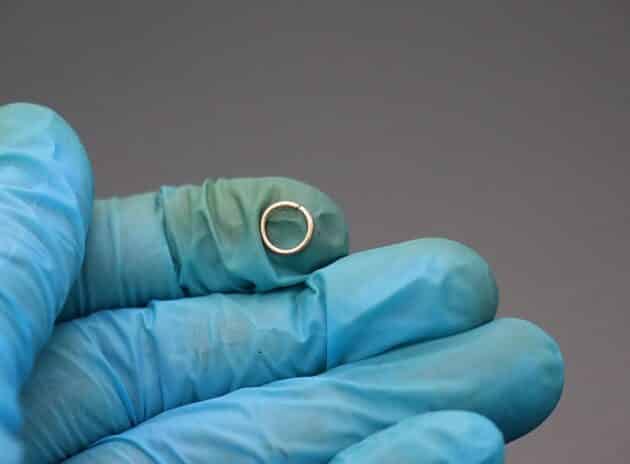
The final step, make two jump rings with stepped bail-making pliers (fig. 15a, 15b).
Hang the Love word on the Heart pendant with the jump rings you made (fig. 15c, 15d).
You have completed the tutorial!
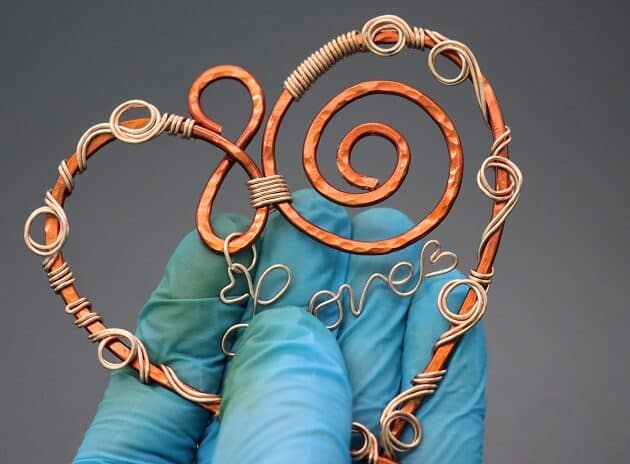
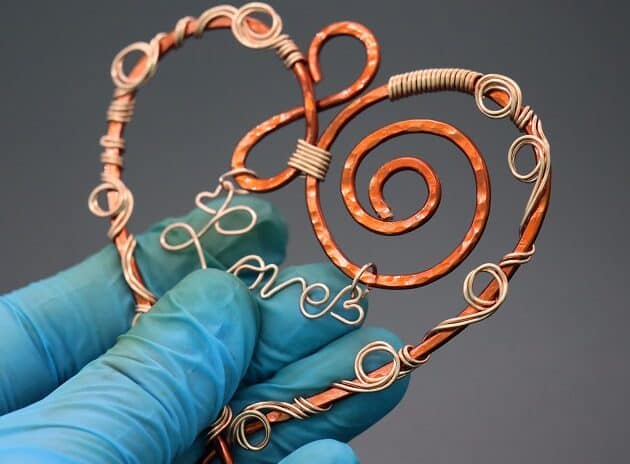
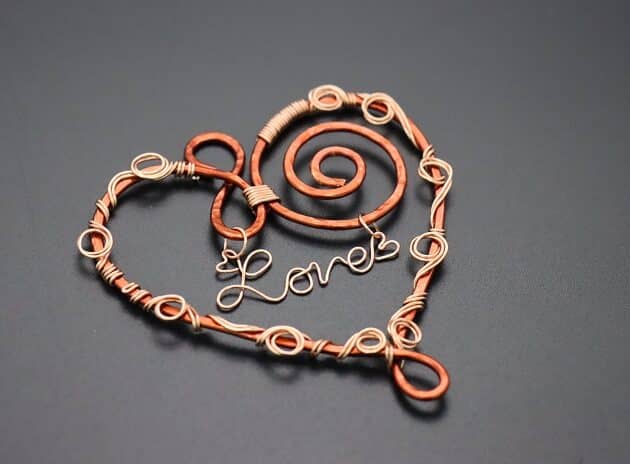
COMPLETED WIRE-WRAPPING ROMANTIC HEART WITH WORD LOVE PENDANT
Want to Support me?
If you enjoyed my content, please consider support me on Patreon:). This helps me to create more amazing free content to share with you 🙂
If you’d like to see my work and follow my wire journey, you can find me here:
Facebook Instagram Twitter Pinterest YouTube Etsy
