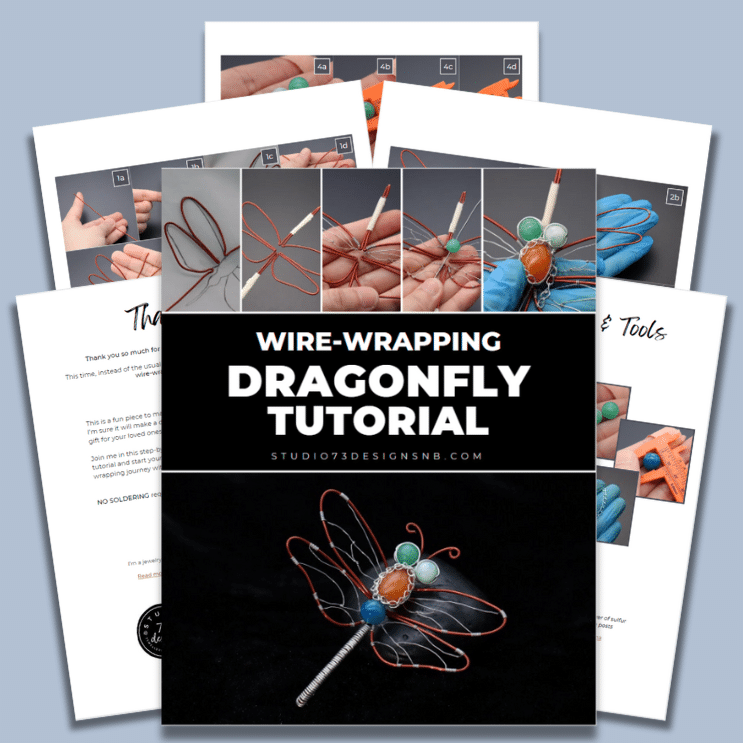
Welcome back wire-wrappers!
This time, instead of the usual pendant tutorials, I will show you how to make a Wire-Wrapping Dragonfly structure.
This is a fun piece to make and I’m sure it will make a delightful gift for your loved ones.
Join me in this step-by-step tutorial and start your wire-wrapping journey with me!
FREE WIRE-WRAPPING GUIDE TO YOUR EMAIL!
JOIN NEWSLETTER
We respect your privacy. Unsubscribe at anytime.
Good news – NO SOLDERING required!
LEVEL: INTERMEDIATE
MATERIALS + TOOLS
- Small Round Stones, Oval Stone
- Red Copper Wire (14 Gauge ): Length (40″)
- Silver Copper Wire (32 Gauge)
- Silver Copper Wire (26 Gauge)
- Silver Copper Wire (18 Gauge)
- Silver Chain
- Wing Template (Optional)
- Wire Cutter (Big + Small)
- Nylon jaw pliers
- Bail Making Pliers
- Bent Nose Plier
- Pen / Marker Pen
- Masking Tape
Prefer this wire-wrapping tutorial in a PRINTABLE FORMAT? (High Resolution Photos)
Click here for the PDF version of “Dragonfly Wire-Wrapping Tutorial”
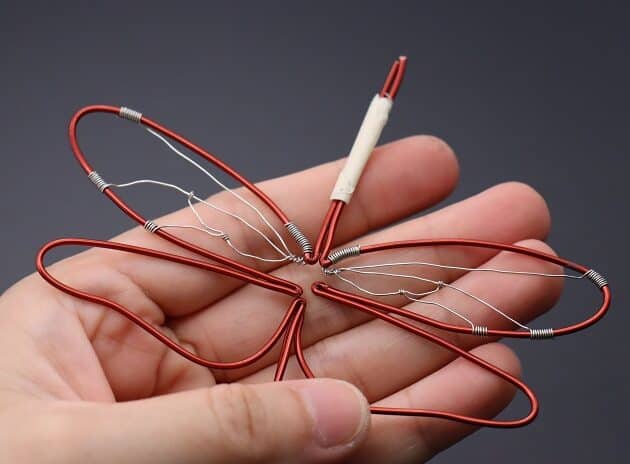
WIRE-WRAPPING DRAGONFLY TUTORIALS
Step 1 of 10
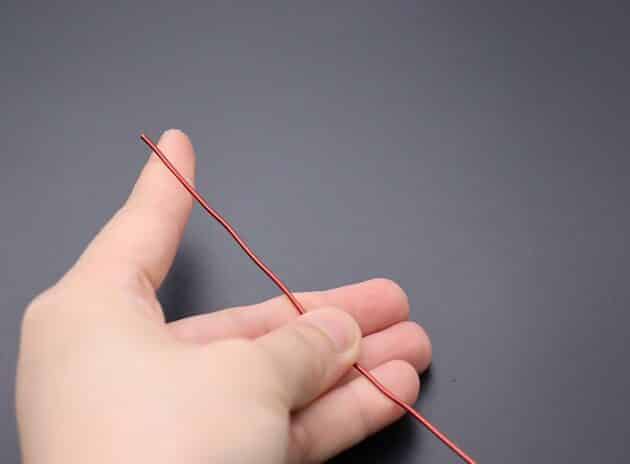
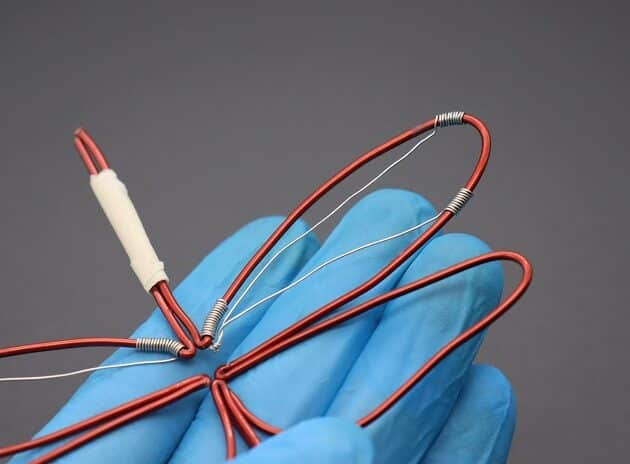
Firstly, prepare a 40 inches long 14-gauge red copper wire for the main frame of the Dragonfly structure (fig. 1a).
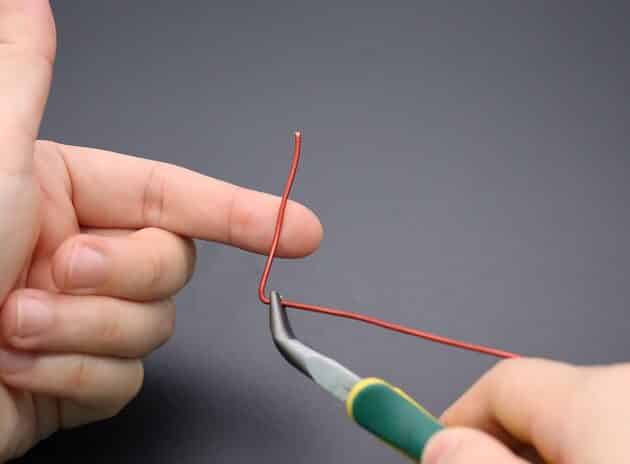
Always use a bent nose pliers to shape the red copper wire as it gives more precision (fig. 1b).
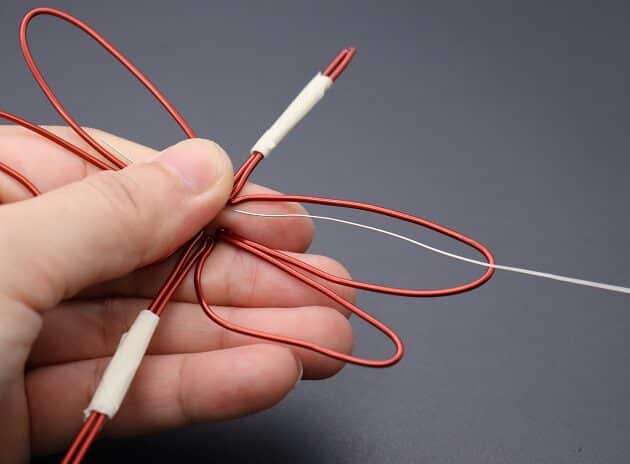
Next, sketch the outline of dragonfly on a piece of paper and bend the red copper wire accordingly (fig. 1c, 1d).
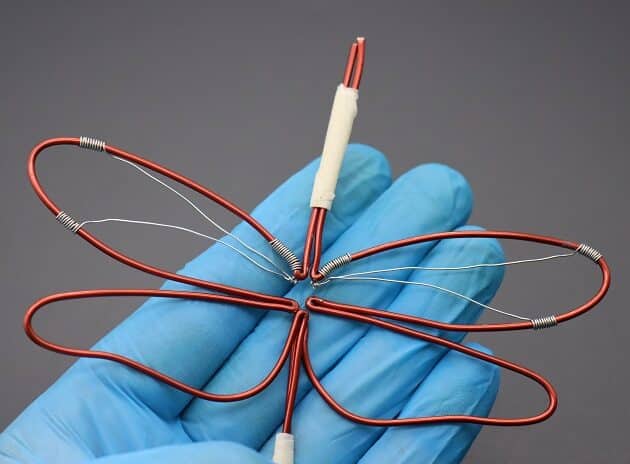
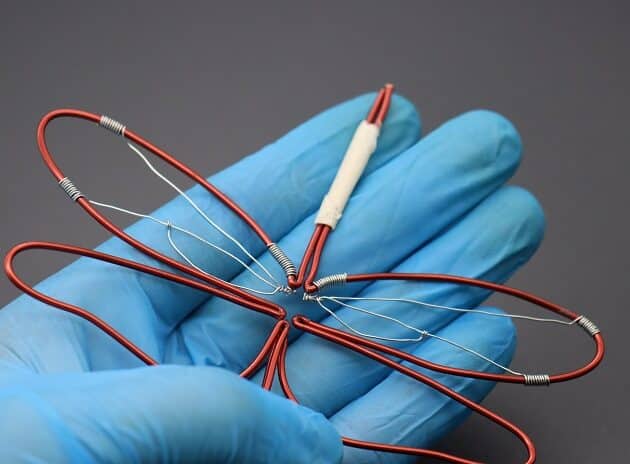
Make a duplicate to complete your dragonfly wire frame and tape them in place as shown (fig. 1e, 1f).
Step 2 of 10
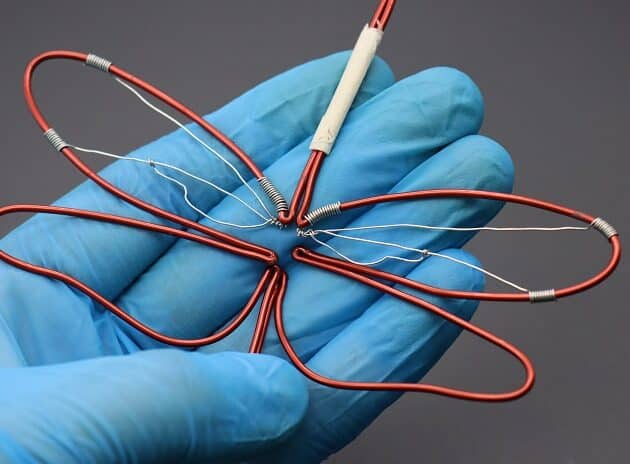
For Step 2, we will be focusing on the top wing design for the dragonfly.
Prefer this wire-wrapping tutorial in a PRINTABLE FORMAT? (High Resolution Photos)
Click here for the PDF version of “Dragonfly Wire-Wrapping Tutorial”
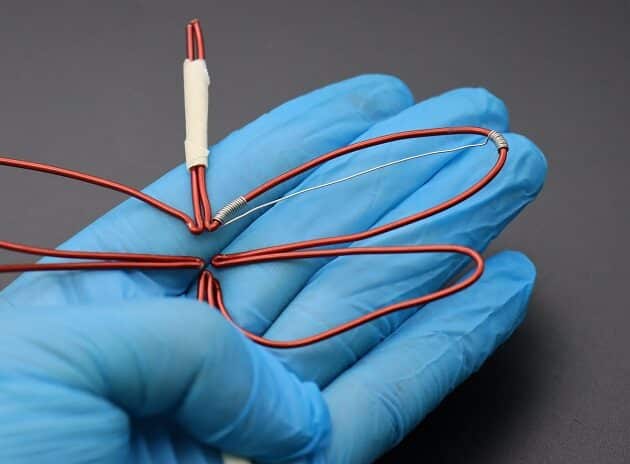
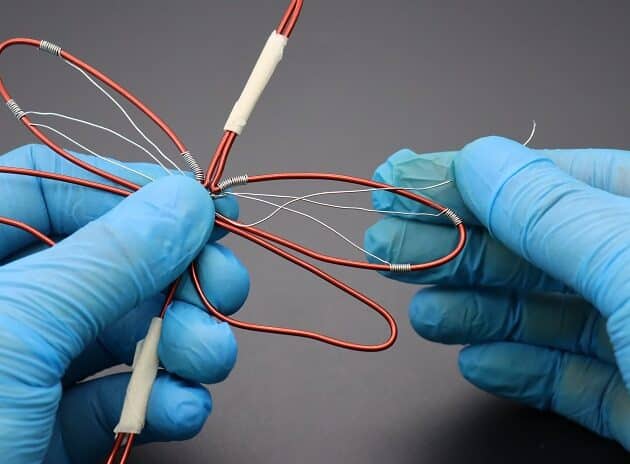
Start the design from the middle with a length of 26-gauge silver copper wire (fig. 2a).
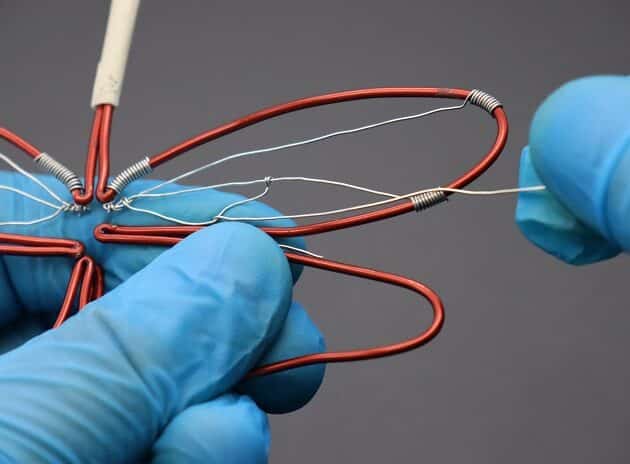
There will be 4 connecting wires to complete the top wing design:
- Connection 1: (fig. 2b, 2c)
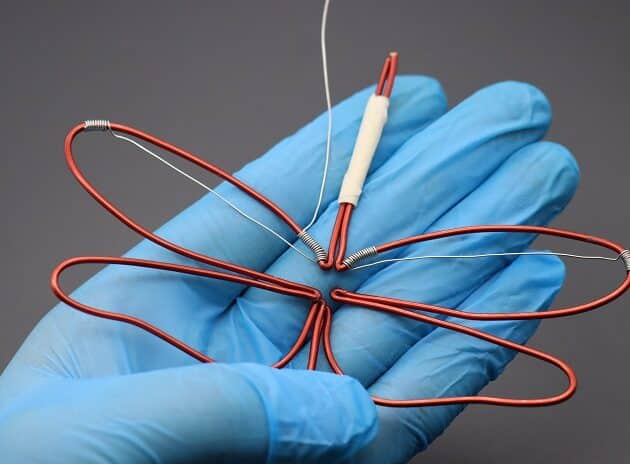
- Connection 2: (fig. 2e, 2f, 2g)
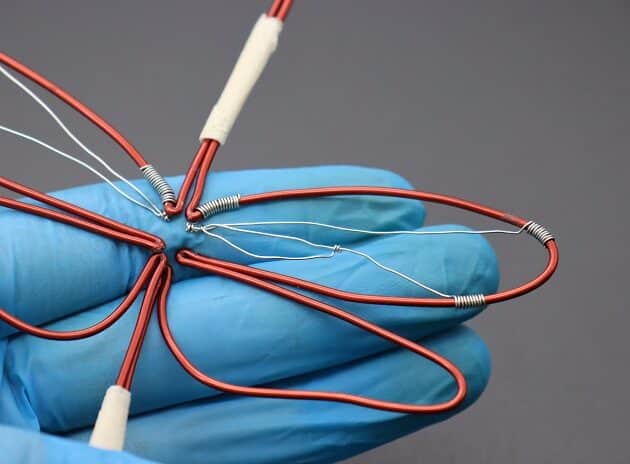
- Connection 3: (fig. 2h, 2i, 2j) For added flare, make a minimal dent as shown in (fig. 2k).
- Connection 4: (fig. 2l, 2m)
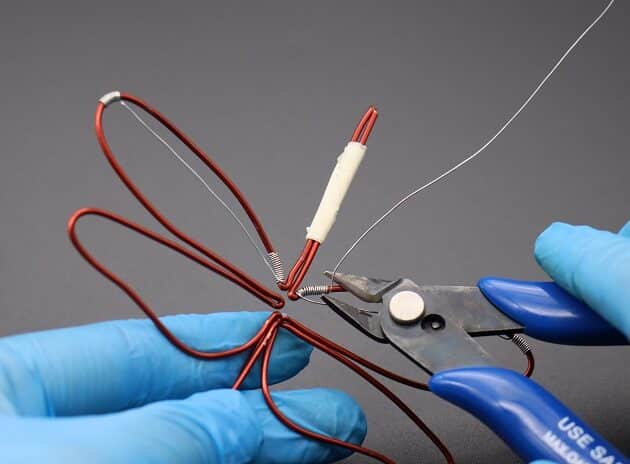
Cut the excess silver wire with a wire cutter (fig. 2d).
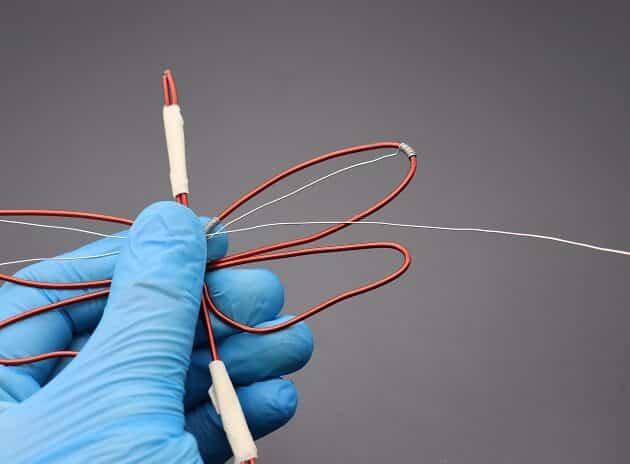
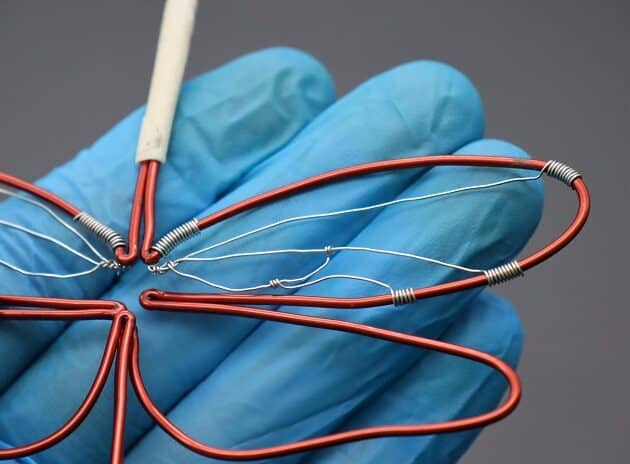
The completed Dragonfly top wing design should look like (fig. 2n).
Step 3 of 10
For Step 3, we will focus on the bottom wing design for the dragonfly structure.
Begin with a new length of 26-gauge silver copper wire from the middle of the wire frame (fig. 3a).
Similarly, there are 4 connecting wires to make a complete bottom wing design:
- Connection 1: (fig. 3b)
- Connection 2: (fig. 3c, 3d)
- Connection 3: (fig. 3e, 3f)
- Connection 4: (fig. 3g, 3h)
Repeat the connections on the opposite wing and complete the bottom design as shown (fig. 3i).
Step 4 of 10
In this step, we will prepare for the dragonfly body parts assembling.
First, ready two round stones and one oval stone with hole in the middle (fig. 4a).
Take the measurements of the stones accordingly (fig. 4b, 4c, 4d).
Then, weave the top half of the wire frame together with the remaining 26-gauge silver copper wire as shown (fig. 4e, 4f).
Step 5 of 10
For Step 5, we will make the eyes for the dragonfly structure.
Use a 18-gauge silver copper wire and slide in one of the round stone (fig. 5a).
Make sure to leave extra length of wire at the front end for anchoring later (fig. 5b).
Then, wrap the round stone in 3 loops as a frame (fig. 5c, 5d, 5e, 5f, 5g).
Repeat the framing for the second stone (fig. 5h, 5i, 5j).
Place the eyes on the main frame and anchor them with the front end wire (fig. 5k, 5l, 5m).
Cut the excess wire with a wire cutter (fig. 5n).
Step 6 of 10
Moving on, we continue with the dragonfly’s body by sliding in the oval stone to the 18-gauge wire (fig. 6a, 6b, 6c).
Secure the position of the oval stone by wrapping 2 loops at the side (fig. 6d, 6e, 6f, 6g, 6h).
The completed body frame should like this (fig. 6i, 6j).
Step 7 of 10
To add a pop of texture, prepare a chain and wrap it around the body frame (fig. 7a, 7b).
Then, use a 32-gauge silver copper wire (fig. 7c) to weave the chain and body frame together as shown (fig. 7d, 7e, 7f, 7g, 7h).
Step 8 of 10
Lastly, prepare a new round stone for the tail design of the dragonfly (fig. 8a).
After sliding in the round stone (fig. 8b), use the remaining 18-gauge wire to coil the tail frame (fig. 8c, 8d, 8e, 8f, 8g, 8h).
Step 9 of 10
After coiling the tail at a desired length, trim the 18-gauge (fig. 9a) and 14-gauge (fig. 9b) wires with wire cutters fit for their size (fig. 9c).
Then, use a stepped bail making pliers to curl the end tip of the dragonfly tail (fig. 9d, 9e).
Step 10 of 10
As a final touch to the dragonfly structure, split the top wire frame (fig. 10a, 10b).
Curl both ends of the wire with stepped bail making pliers as the antennae (fig. 10c, 10d, 10e).
COMPLETED WIRE-WRAPPING DRAGONFLY STRUCTURE
Prefer this wire-wrapping tutorial in a PRINTABLE FORMAT? (High Resolution Photos)
Click here for the PDF version of “Dragonfly Wire-Wrapping Tutorial”
Want to Support me?
If you enjoyed my content, please consider support me on Patreon:). This helps me to create more amazing free content to share with you 🙂
If you’d like to see my work and follow my wire journey, you can find me here:
Facebook Instagram Twitter Pinterest YouTube Etsy