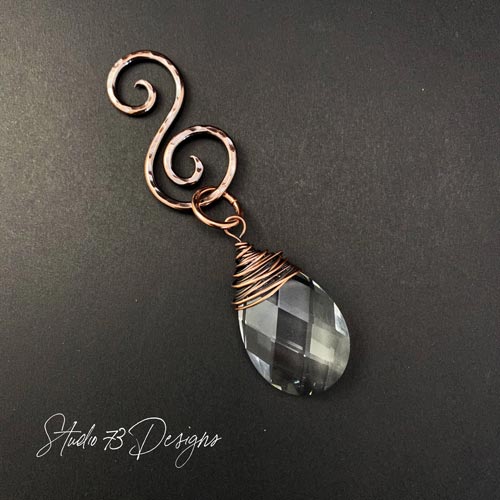
In this tutorial, I’ll show you how to wrap a briolette, specifically a Swarovski crystal prism, for a pendant.
A briolette is a a type of gemstone cut which is elongated, and quite often pear-shaped. There is a hole drilled in the top and it can be hung like a bead. They work beautifully for pendants and earrings.
PLEASE NOTE: Swarovski crystals are not required for this tutorial. You can use ANY BRIOLETTE you have on hand – the same technique applies.
This wire-wrapping tutorial is part of my “Beginner series” of simple wire wrapping techniques.

FREE WIRE-WRAPPING GUIDE TO YOUR EMAIL!
JOIN NEWSLETTER
We respect your privacy. Unsubscribe at anytime.
Prefer this tutorial in a PRINTABLE FORMAT?
Click here for the PDF version of “How to Wire-Wrap a Briolette”
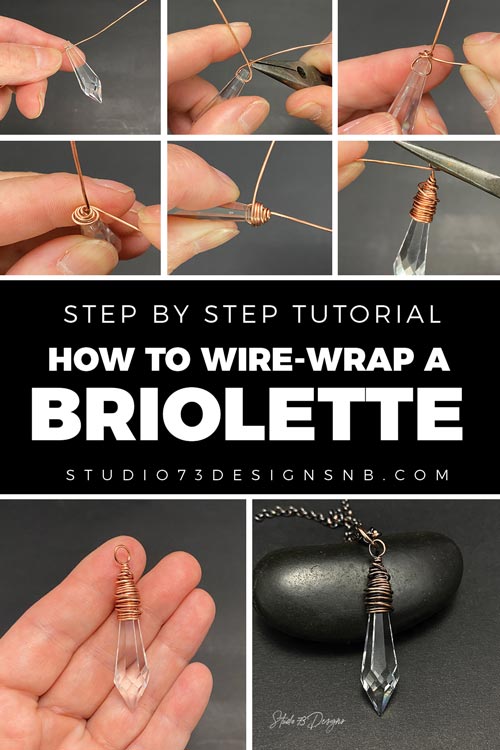
HOW TO WRAP A BRIOLETTE
LEVEL: BEGINNER
MATERIALS + TOOLS
- 30″ piece of 22 gauge copper wire (or wire of your choice)
- Swarovski Crystal (in this tutorial, I am using a 40 mm prism spear however you can use any briolette you’d like)
- Needle nose pliers
- Round nose pliers
- Wire cutters
- Liver of sulfur (optional)
- Nylon Jaw Pliers
NOTE: If you are using a smaller briolette, you will likely have to use a smaller gauge wire. Check the hole size of the briolette – the wire should be small enough to fit through the hole.
RELATED CONTENT
- Beginner’s Guide to Jewelry Wire for Wire-Wrapping
- Simple Wire Brooch Tutorial
- Wire-Wrapping Tutorials: 13 DIY Wire-Wrapped Pendants
- Wire-Wrapping Tutorial DIY Jewelry Kits on Etsy
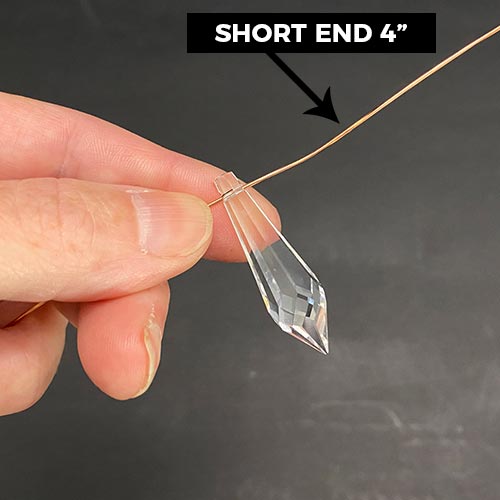
Step 1
Feed your wire through the hole of the briolette and place approximately 4″ from end of wire. (fig. 1)
Step 2
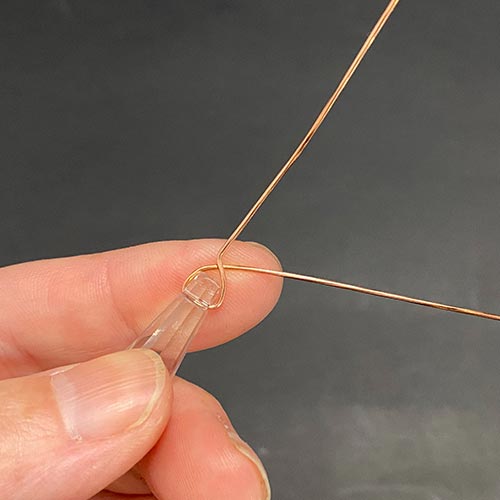
Using your fingers, gently bend the wires so they cross each other. (fig. 2)
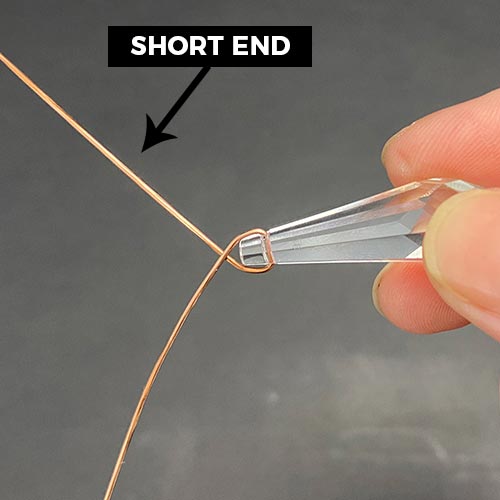
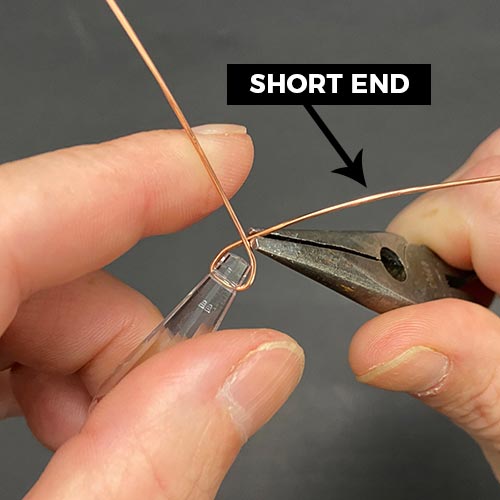
Step 3
Using a pair of needle nose pliers, bend the short end of wire so it is standing straight up. This short piece will be used to create the bail. (fig. 3a, 3b)
Prefer this tutorial in a PRINTABLE FORMAT?
Click here for the PDF version of “How to Wire-Wrap a Briolette”
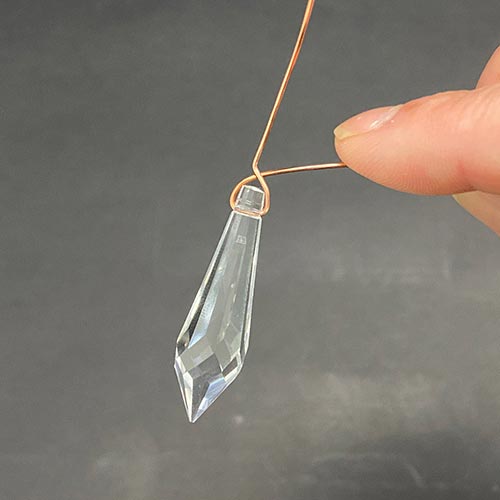
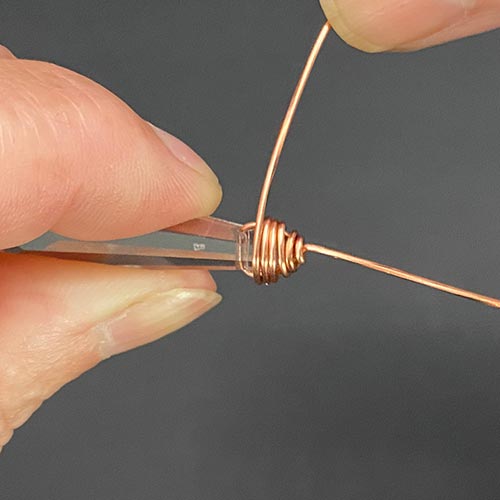
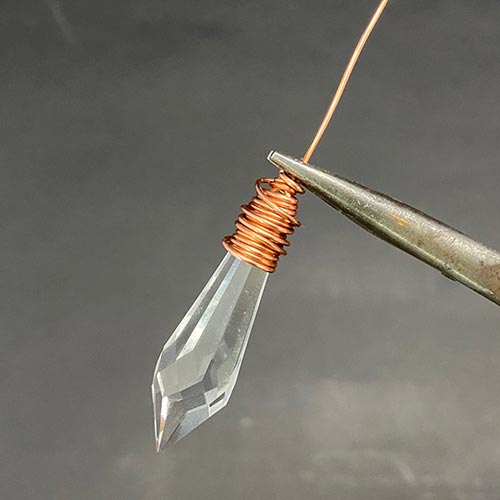
Step 4
Using your fingers, grab the long end of the wire and start wrapping around the short piece (the one sticking up), and eventually the top of the crystal. (fig. 4a, 4b, 4c, 4d)
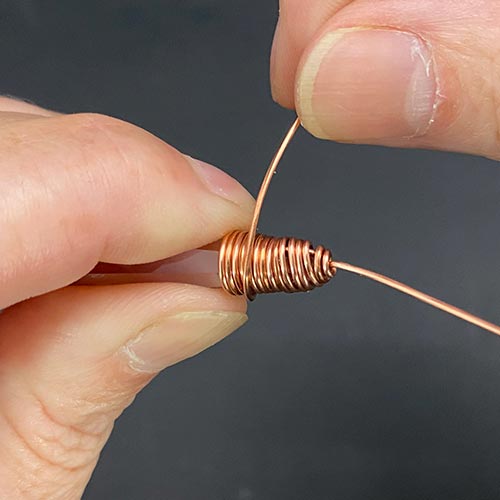
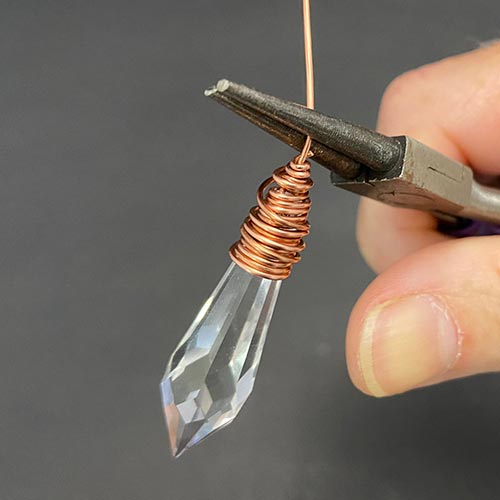
Step 5
You can keep wrapping as far down as you’d like. Once you’re happy with the number of wraps, start wrapping back up the pendant until you get to the top. (fig. 5a, 5b) Don’t be concerned about making perfect wraps – this is how you can achieve a “nest” look.
Prefer this tutorial in a PRINTABLE FORMAT?
Click here for the PDF version of “How to Wire-Wrap a Briolette”
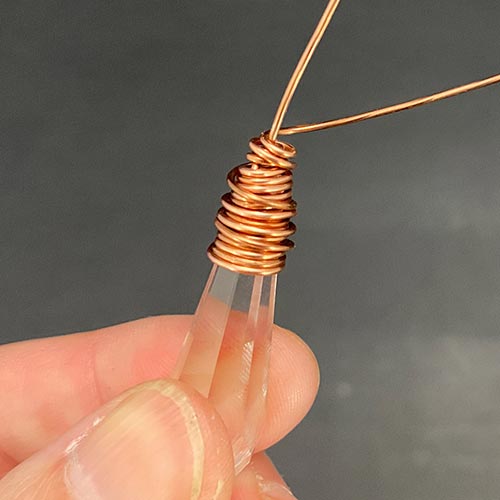
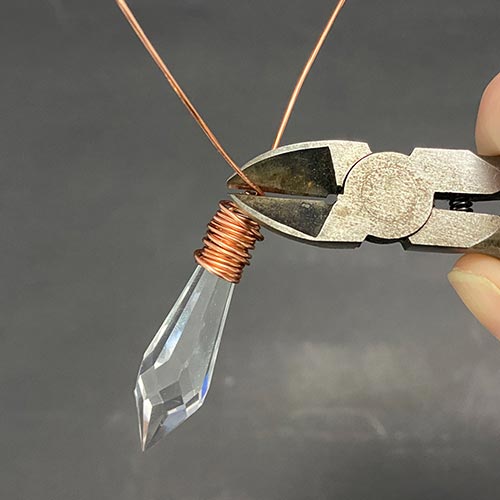
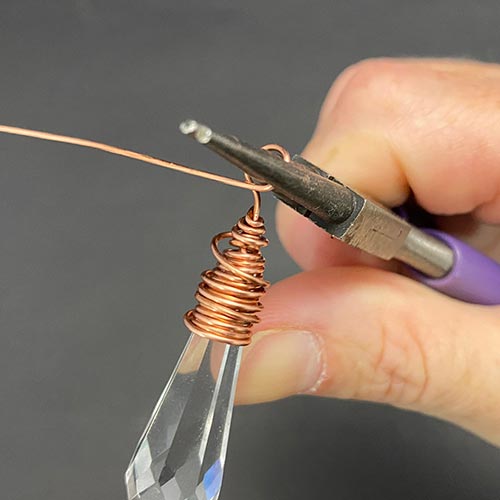
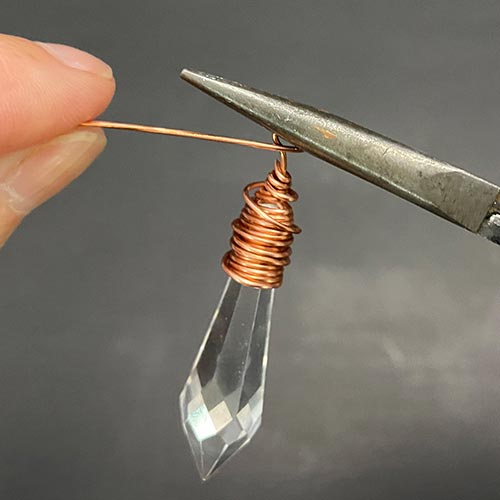
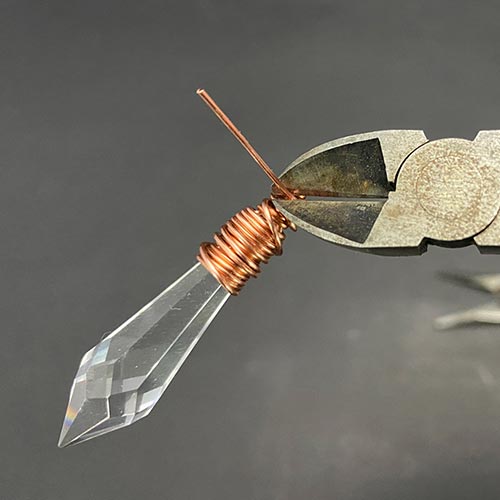
Step 6
Once you’ve wrapped your wire back up to top of pendant, snip excess wire and tuck wire in with needle nose pliers (fig. 6a, 6b)

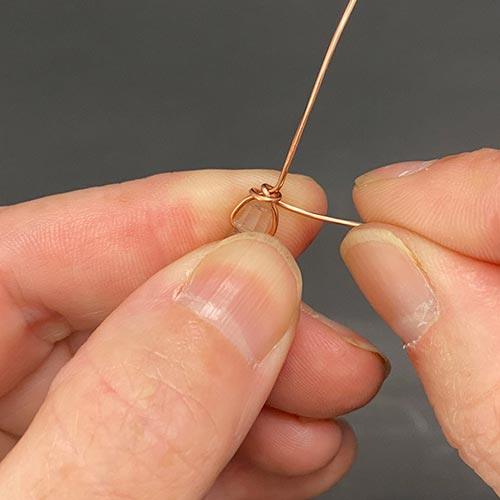
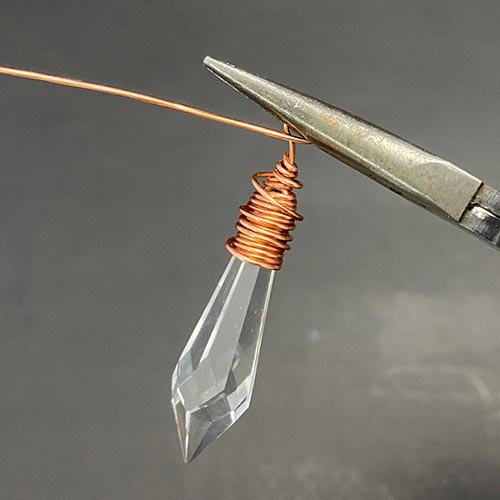
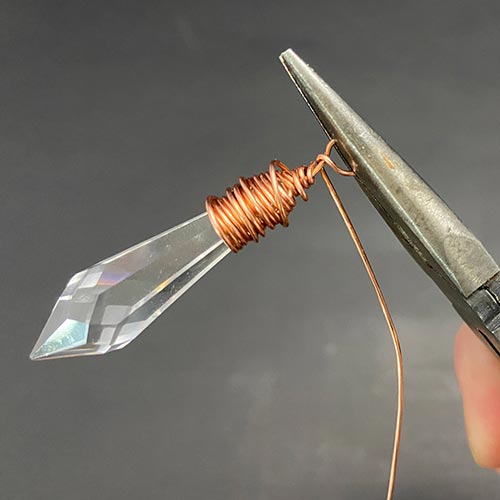
Step 7
Now it’s time to start forming the bail. Using your needle nose pliers, start forming a wrapped eye pin loop (fig. 7a, 7b).
RELATED: How to Make a Wrapped Eye Pin Loop
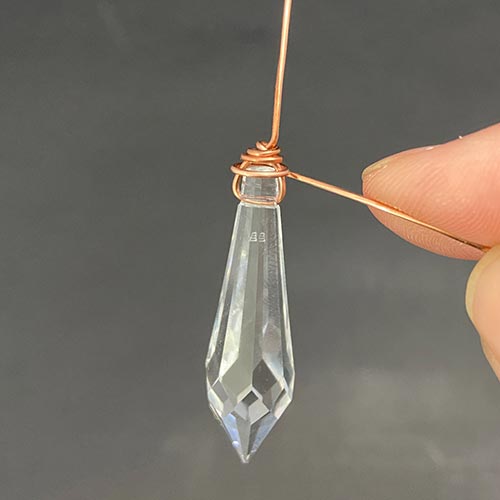
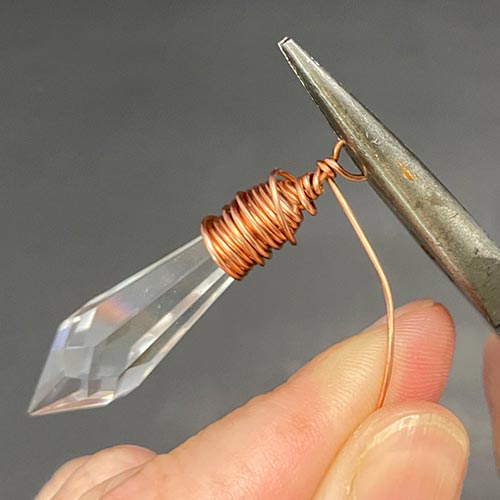
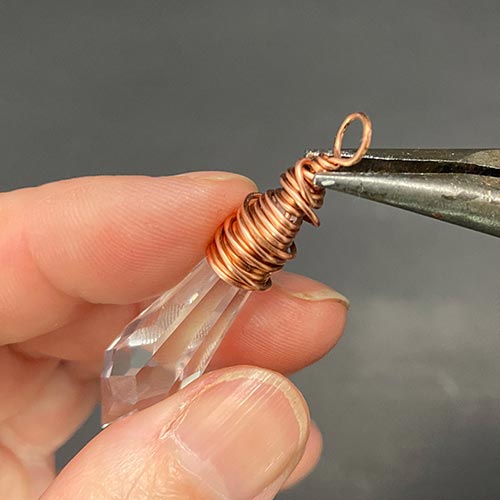
Step 8
Using a pair of needle nose pliers, hold the pendant as shown in fig. 8a. If you have nylon jaw pliers, use those instead so you don’t scratch the bail. (I had to use needle nose pliers because my nylon jaw pliers are broken 🙁 However I definitely do recommend them!).
Using your fingers, start wrapping the wire around the base wire (fig. 8b, 8c)
Prefer this tutorial in a PRINTABLE FORMAT?
Click here for the PDF version of “How to Wire-Wrap a Briolette”
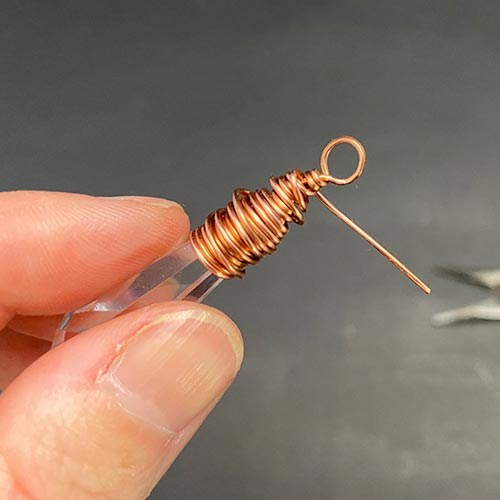
Step 9
Keep wrapping as much as you’d like (basically enough to cover the base wire – fig. 9a, 9b)
Step 10
Trim excess wire and tuck end in with a pair of needle nose pliers (fig. 10a, 10b).
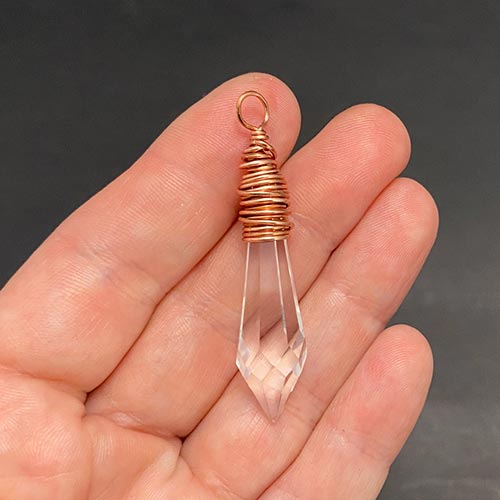
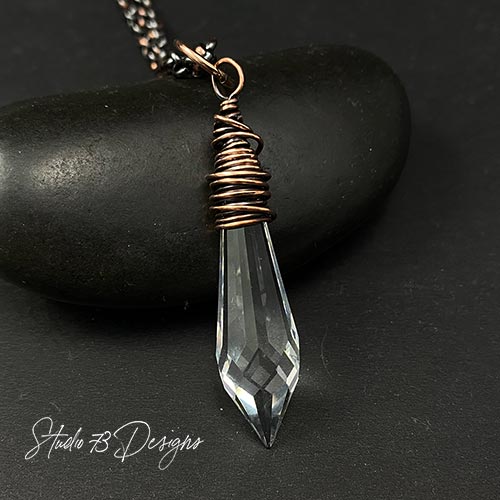
All Done!
At this point, your pendant is done 🙂
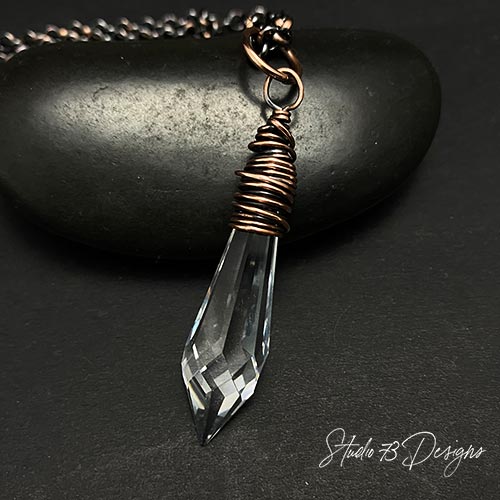
I work exclusively with copper wire and I like using liver of sulfur to achieve an “antique” look.
RELATED: How to Use Liver of Sulfur as Copper Patina
Here is the pendant after using liver of sulfur

RELATED CONTENT
- Beginner’s Guide to Jewelry Wire for Wire-Wrapping
- Wire-Wrapping Tutorials: 13 DIY Wire-Wrapped Pendants
- Wire-Wrapping Tools + Supplies: What You Need
- Wire-Wrapped Crescent Moon Tutorial

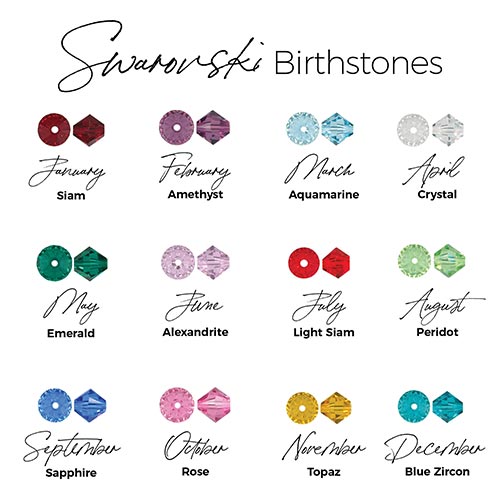
Wire-Wrapped Swarovski Crystal Birthstone Pendants
You can easily add little birthstone charms like these ones. I make my charms with little Swarovski crystals – Tutorial coming on this soon.
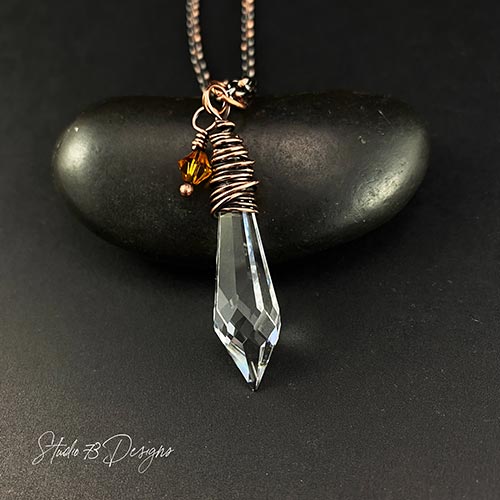
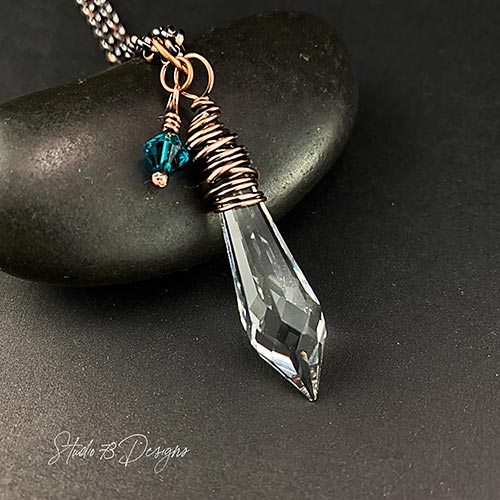
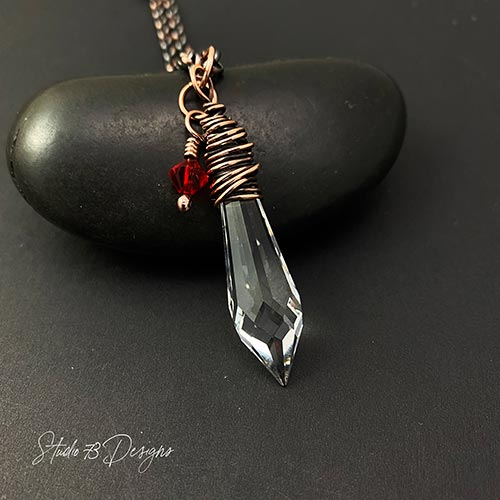
Here are all Swarovski birthstones
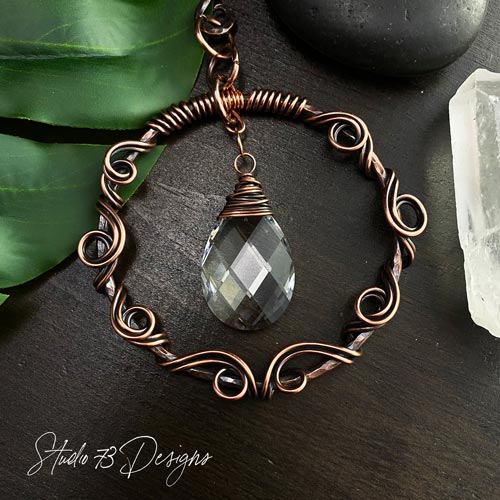
Wire-Wrapped Swarovski Crystal Suncatchers
Here are a couple of wire-wrapped Swarovski crystal suncatchers that I’ve made – the possibilities are endless.
RELATED CONTENT
- Wire-Wrapping Tools & Supplies for Beginners
- How to Make a Spiral Bead Cage Pendant
- Wire-Wrapping Tutorials: 13 DIY Wire-Wrapped Pendants
- Wire-Wrapped Ring Tutorials – How to Wire-Wrap Rings
If you’d like to see my work and follow my wire journey, you can find me here:
Facebook
Instagram
Twitter
Pinterest
YouTube
Etsy

