What is the best jewelry wire coiling tool? Can you custom wire coiling with it?
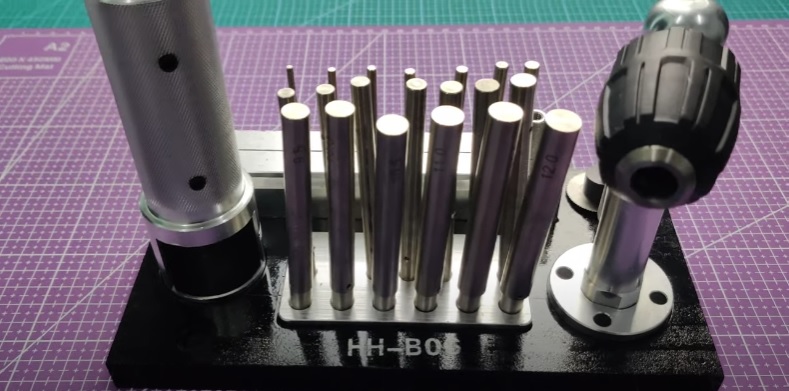
In my opinion, the jump ring maker tool may not be the best coiling tool out there, but it is versatile.
Plus, it supports various diameters for wire coiling with its many jump ring mandrel sizes.
So, let me guide you on how to use a jump ring maker for custom wire coiling.

FREE WIRE-WRAPPING GUIDE TO YOUR EMAIL!
JOIN NEWSLETTER
We respect your privacy. Unsubscribe at anytime.
Here is my step-by-step video demo for those who prefer visual instructions:
How To Use Jump Ring Maker For Custom Wire Coiling
Article Key Points:
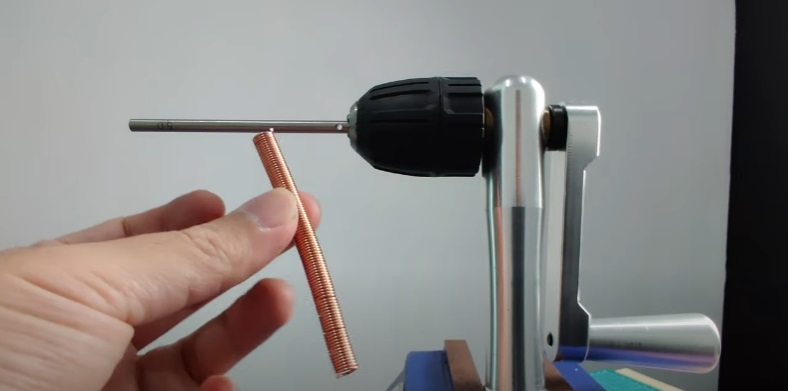
- Fasten custom mandrel onto coil winder and secure wire at starter hole.
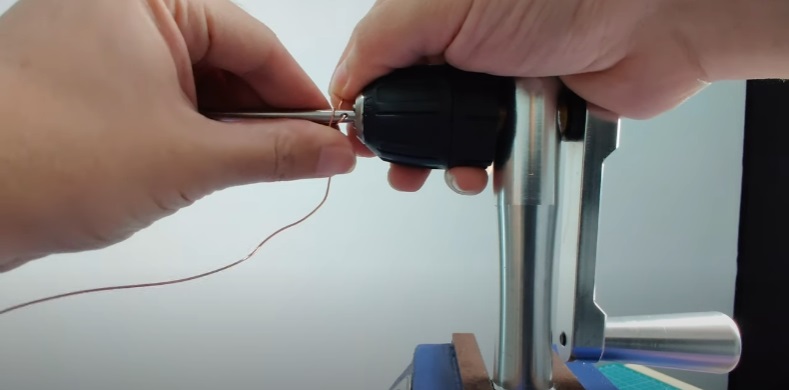
- Make a few starter loops then pull wire downwards while coiling.
- Use combination pliers to seal gaps and tighten wire coils.
- Coil wire until desired length and remove excess wire with a cutter.`
- Use combination pliers to untie wire from the starter hole and slide coiled wire off the mandrel.
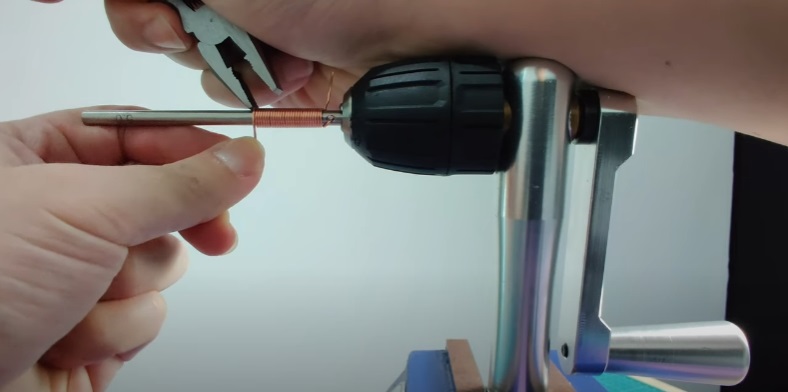
- Fasten custom mandrel onto coil winder and secure wire at starter hole.
Firstly, choose jump ring mandrel size of your choice and fit it onto the hand coil winder. Then, insert the front end of your wire into the starter hole.
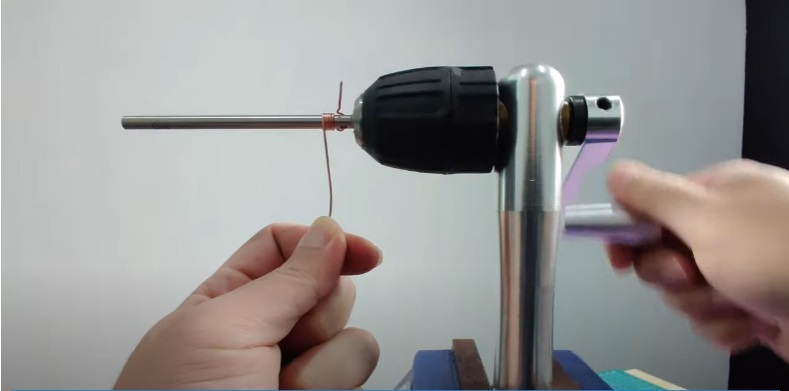
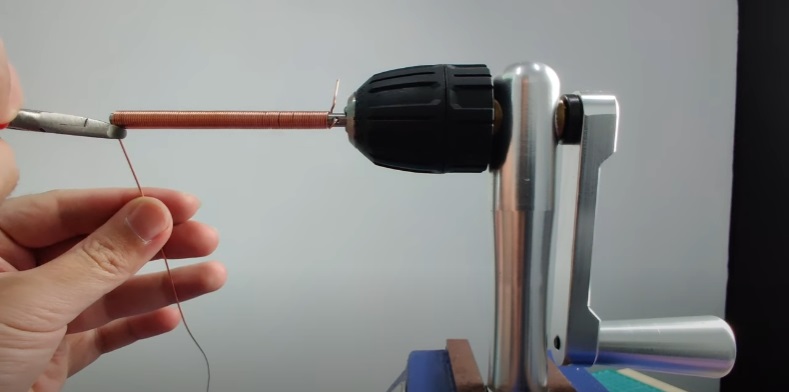
- Make a few starter loops then pull wire downwards while coiling.
Secondly, slowly loop the wire to make a firm grip on the mandrel. Once the wire is anchored, pull the remaining wire downwards and start the coiling process.
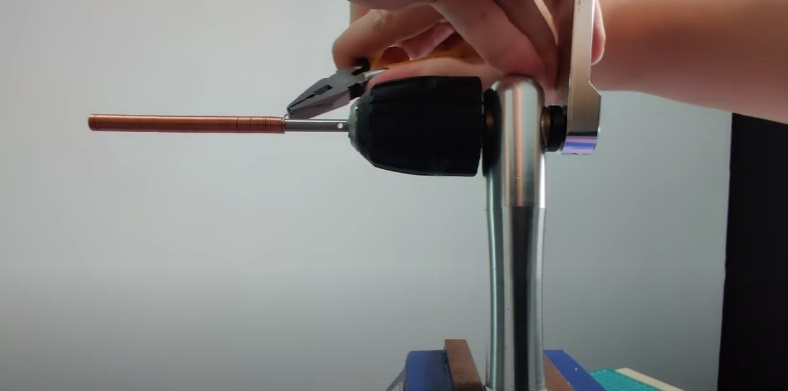
- Use combination pliers to close gaps and tighten wire coils.
Meanwhile, there will be gaps appearing in between coils and that’s normal.
Just use the handy combination pliers to compress the coils inwards to seal the gaps for tighter space.
However, I prefer to use my hands to compress the wire if the wire I use is soft and ductile.
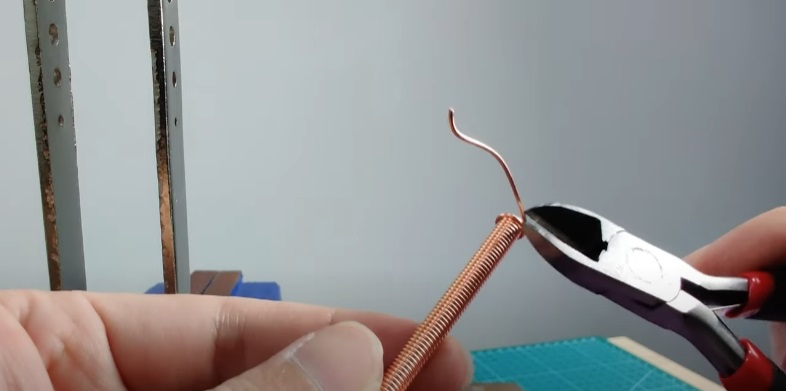
- Coil wire until desired length and remove excess wire with a cutter.
Moving on, continue the coiling process until you reach your desired length. Then, snip the excess wire with a cutter.
- Use combination pliers to untie wire from the starter hole and slide coiled wire off the mandrel.
Lastly, slide the finished product off the mandrel by untying the wire from the starter hole with combination pliers. Then, cut off any excess wire to give the end product a neat finish.
And there you have it! A customizable wire coiling of different diameters by using a jump ring maker tool.
Thank you for reading my guide. I would love to hear your feedback! Your comments will greatly help me improve my content.
