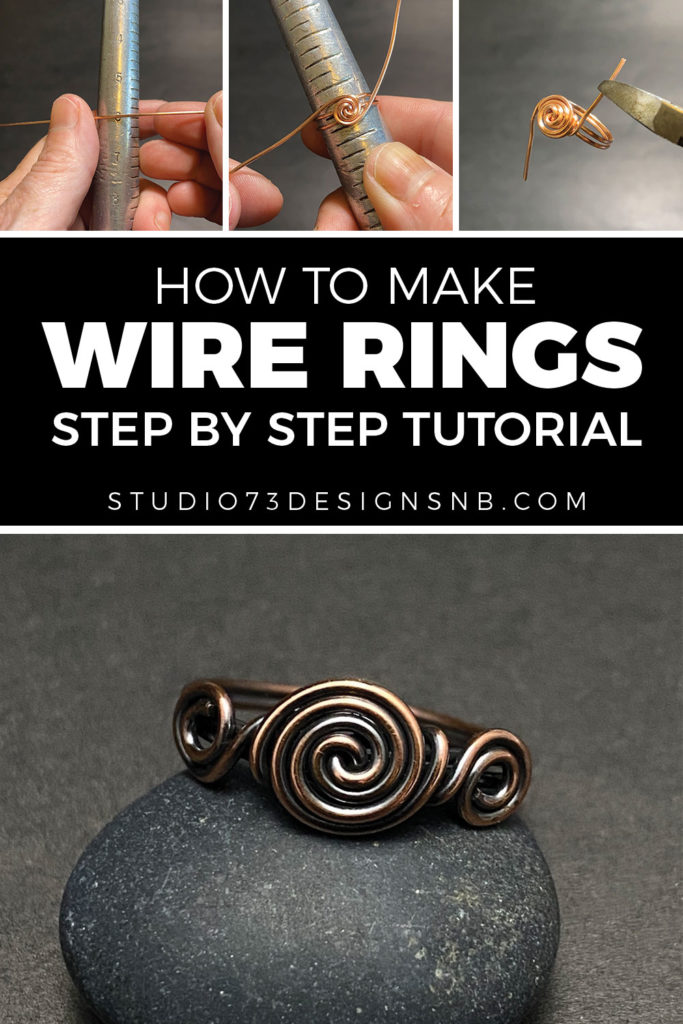
In this wire wrapping tutorial, I will show you how to make wire rings for easy DIY jewelry!
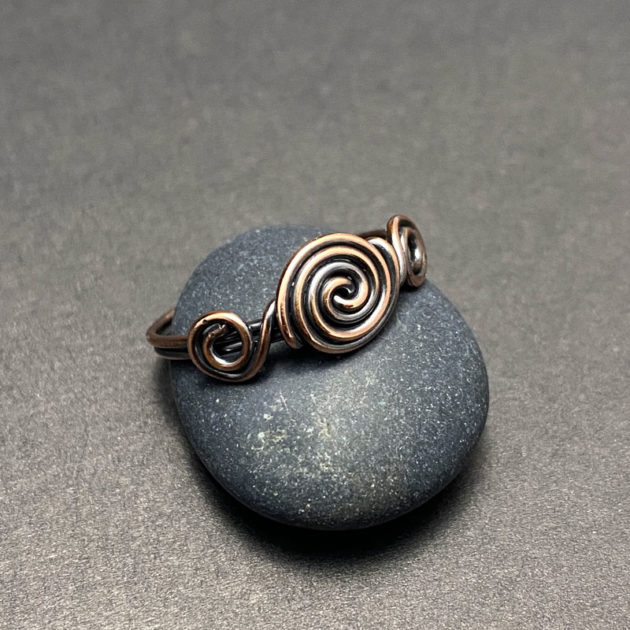
This particular design is called a rosette ring and it’s made strictly with wire (no gems or beads). This is a simple tutorial perfectly suited for beginners who are learning basic wire wrapping techniques.
These rings are super cute, very easy to make and fun to wear. They also make excellent gifts for any jewelry lover in your life!
This wire-wrapping tutorial is part of my “Beginner Series” of simple wire wrapping techniques.

FREE WIRE-WRAPPING GUIDE TO YOUR EMAIL!
JOIN NEWSLETTER
We respect your privacy. Unsubscribe at anytime.
Prefer this DIY ring tutorial in a PRINTABLE FORMAT?
Click here for the PDF version of “How to Make Wire Rings” tutorial
LEVEL: BEGINNER
MATERIALS + TOOLS
- 12″ – 14″ of 20 gauge copper wire
- Ring mandrel
- Round nose pliers
- Rubber Mallet
- Wire cutters
- Liver of sulfur (optional)
HOW TO MAKE WIRE RINGS
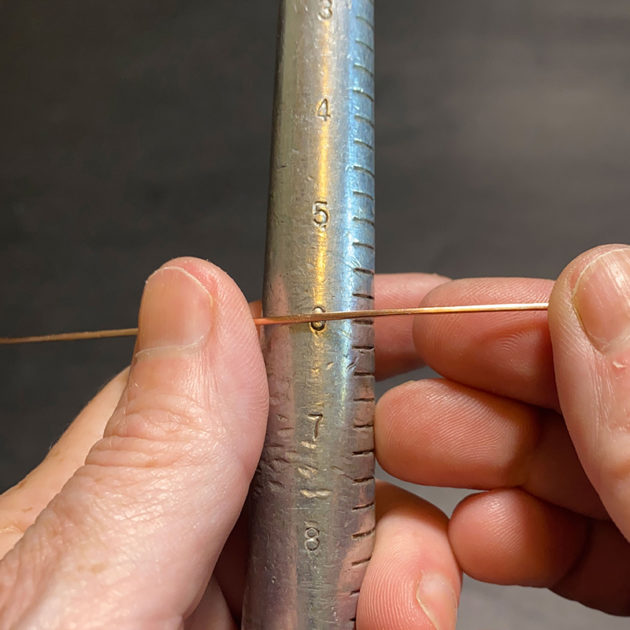
STEP 1
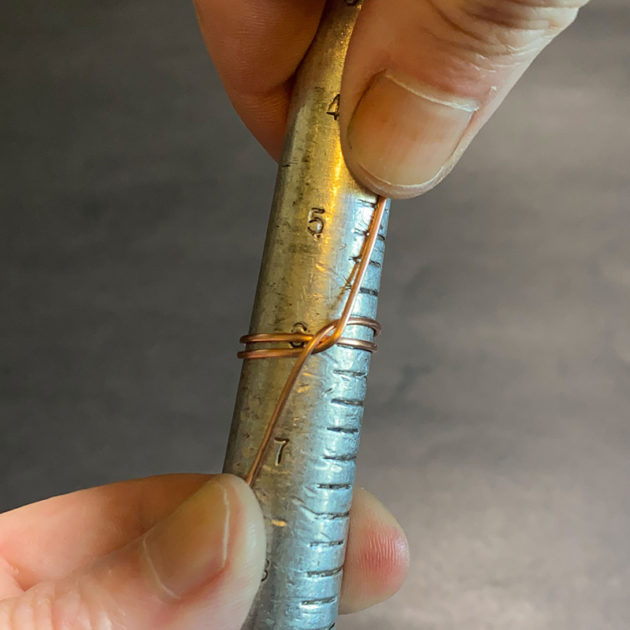
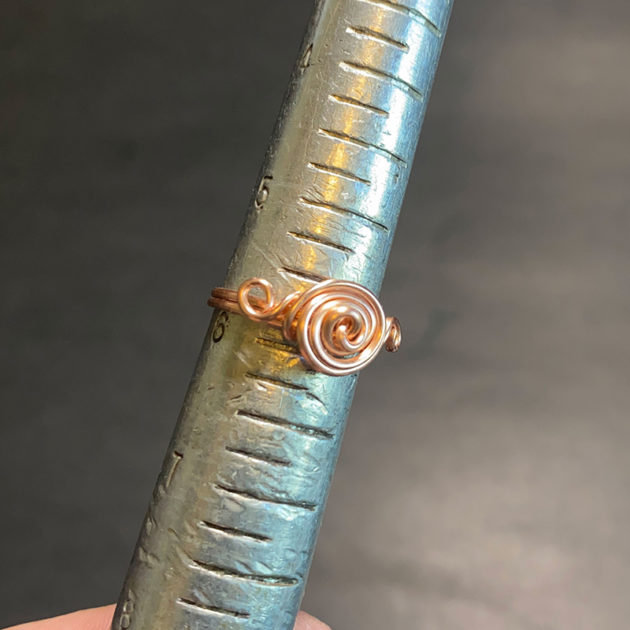
Start by placing your wire against the ring mandrel at the size you want.
In this tutorial, I’m making a ring around size 6 (fig. 1a).
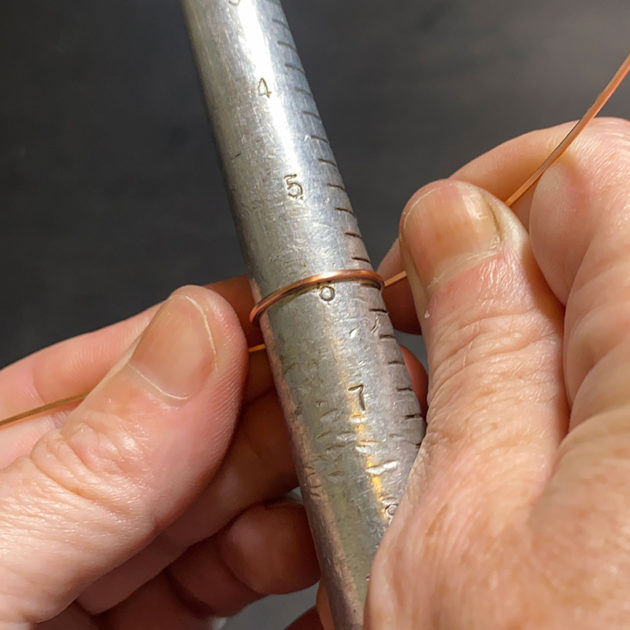
Tightly wrap the wire around the mandrel, and bring wire back to front (fig. 1b, 1c).
Prefer this DIY Wire Ring tutorial in a PRINTABLE FORMAT?
Click here for the PDF version of “How to Make Wire Rings” tutorial
STEP 2
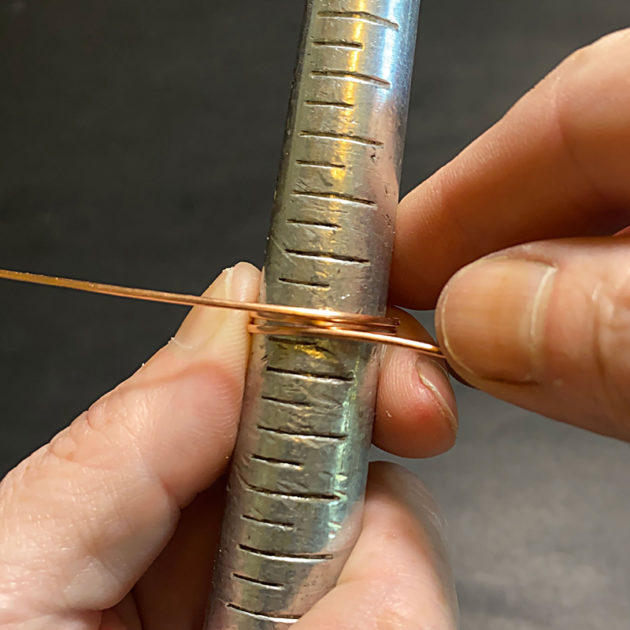
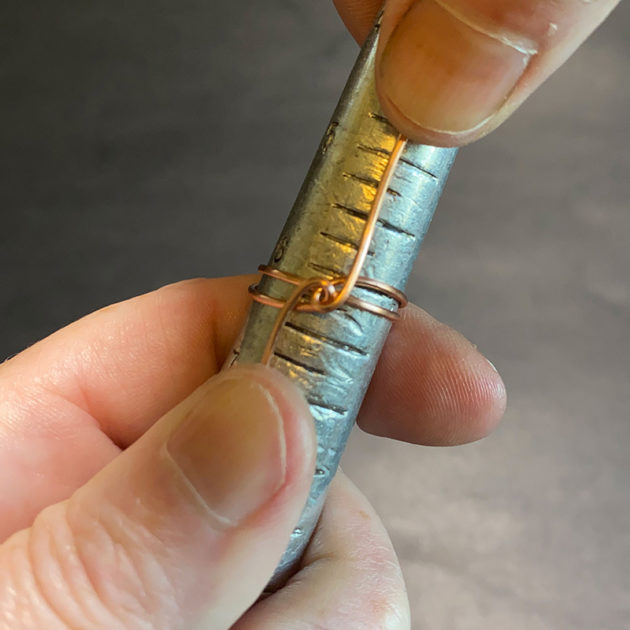
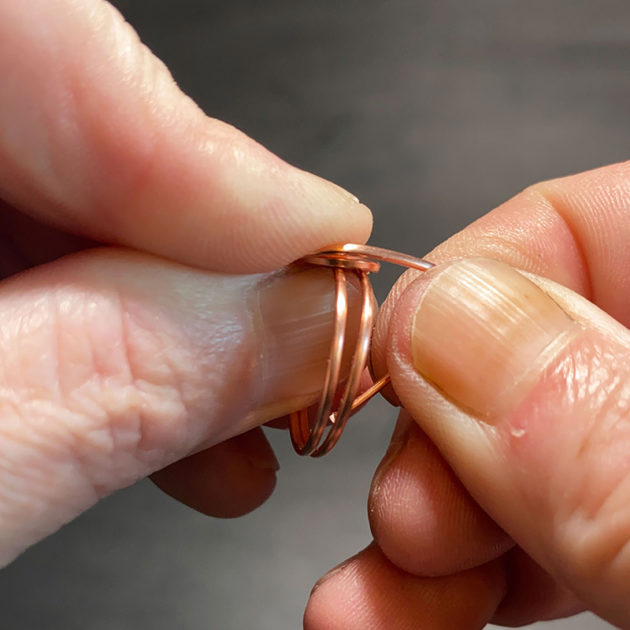
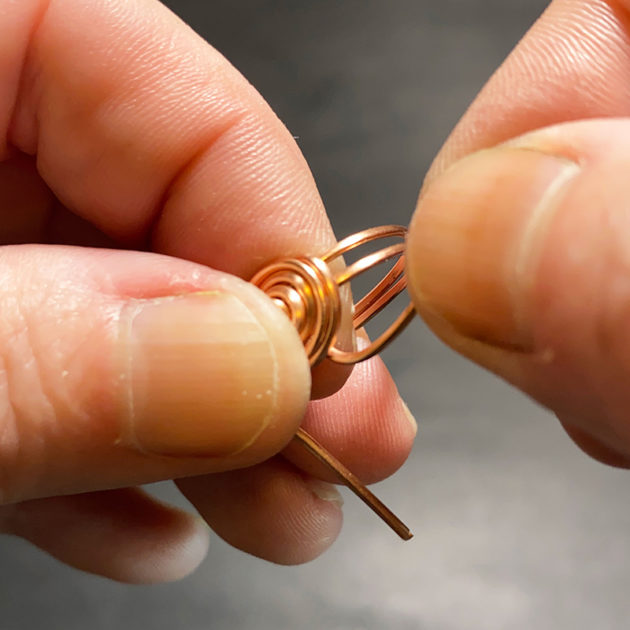
Grab each wire and start twisting it as tightly as you can so that your ring size doesn’t change (fig. 2a, 2b).
Keep twisting your wires in around in a spiral until you are happy with the size of your rosette (fig. 2c).
Using a rubber mallet, lightly hammer the rosette against the ring mandrel (fig. 2d).
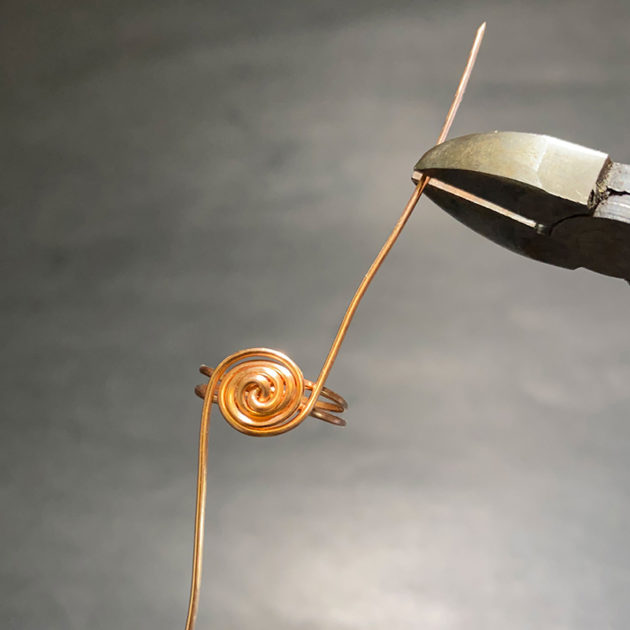
STEP 3
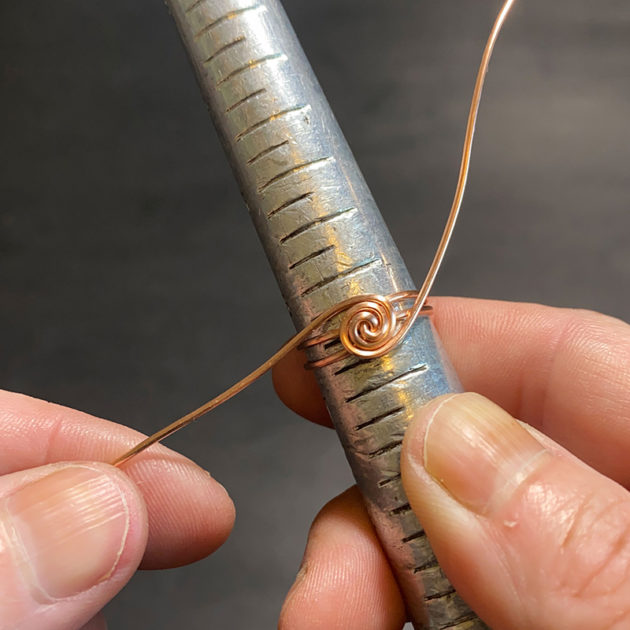
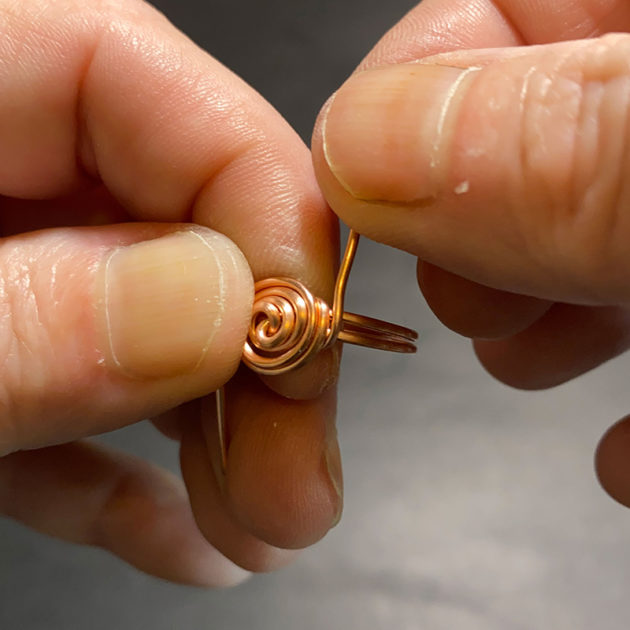
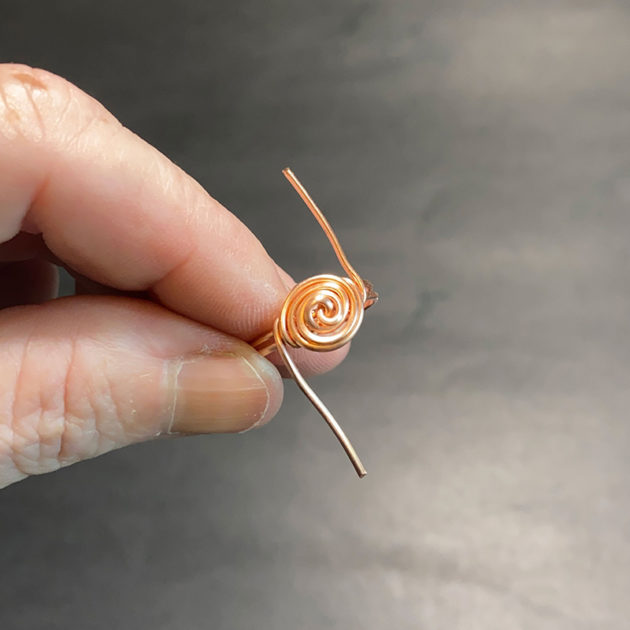
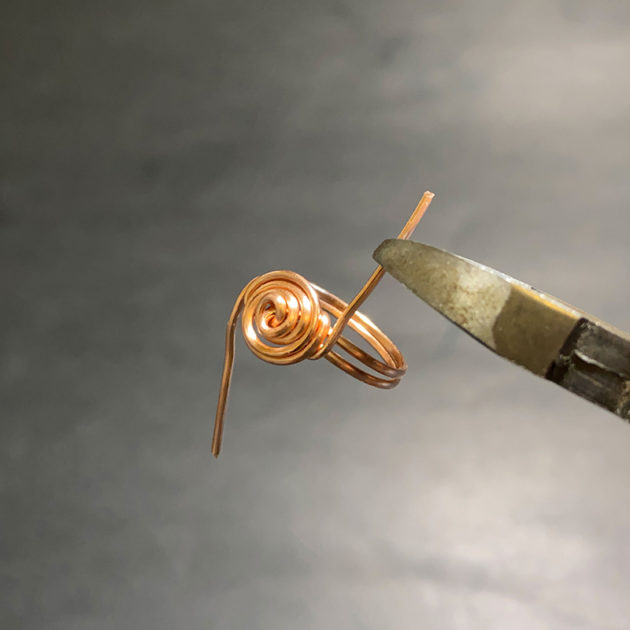
Remove your ring from the mandrel.
Using your wire cutters, cut excess wire, leaving about 1.5″ or so on both sides (fig. 3a, 3b).
Prefer this DIY wire ring tutorial in a PRINTABLE FORMAT?
Click here for the PDF version of “How to Make Wire Rings” tutorial
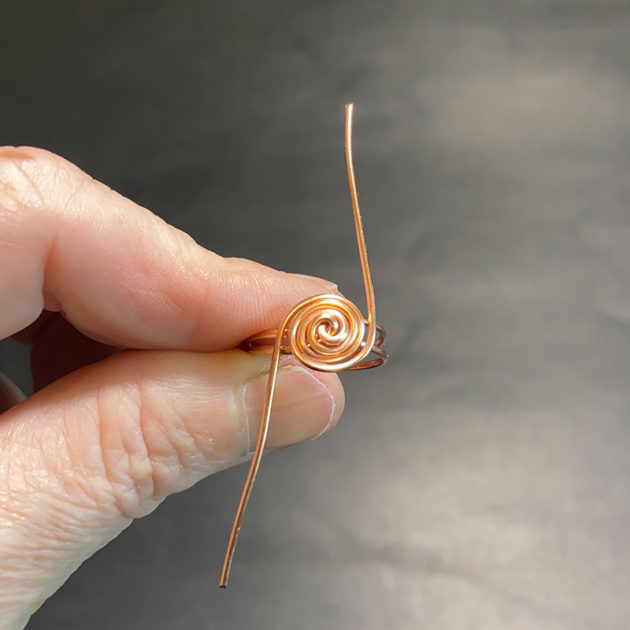
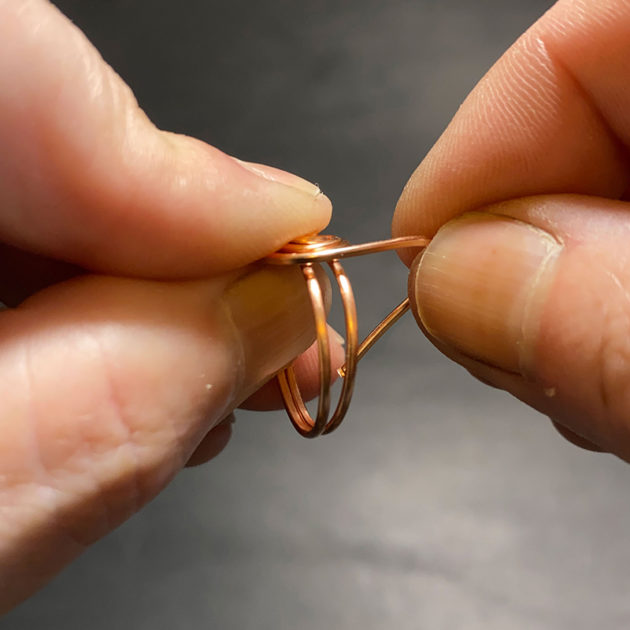
STEP 4
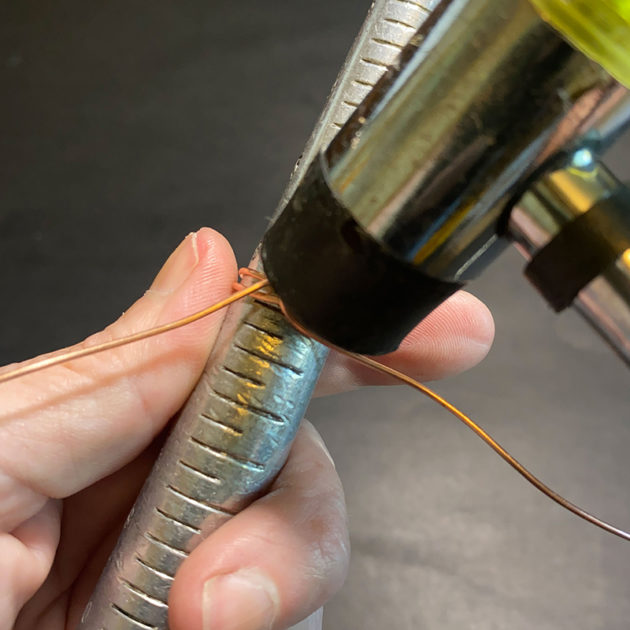
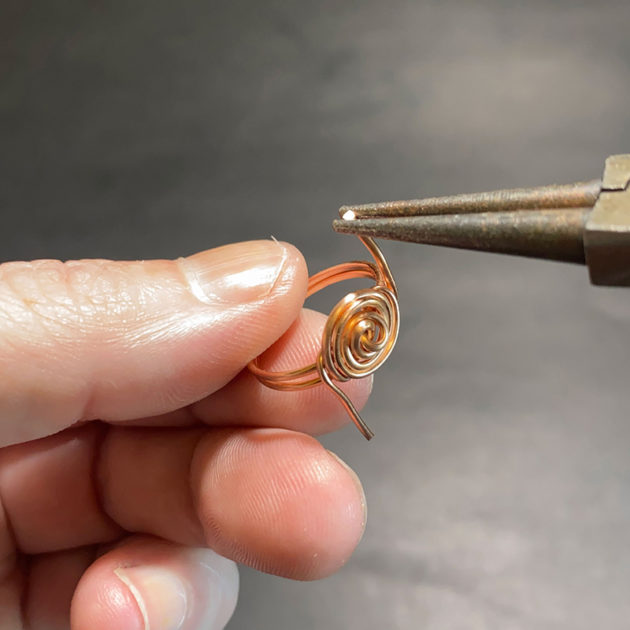
Using your fingers, wrap the end of one wire down through the ring and around the shank or ring band (fig. 4a, 4b).
Repeat on other side (fig. 4c, 4d, 4e, 4f).
This keeps the two wires from the ring band together tightly.
Prefer this DIY wire ring tutorial in a PRINTABLE FORMAT?
Click here for the PDF version of “How to Make Wire Rings” tutorial
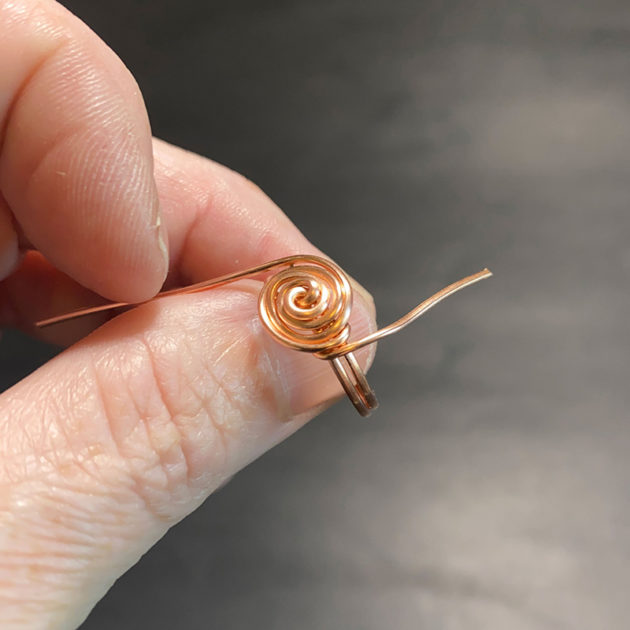
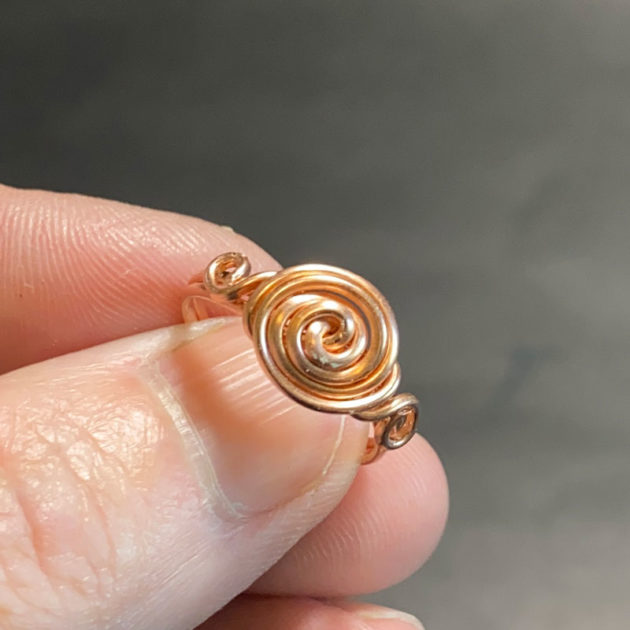
STEP 5
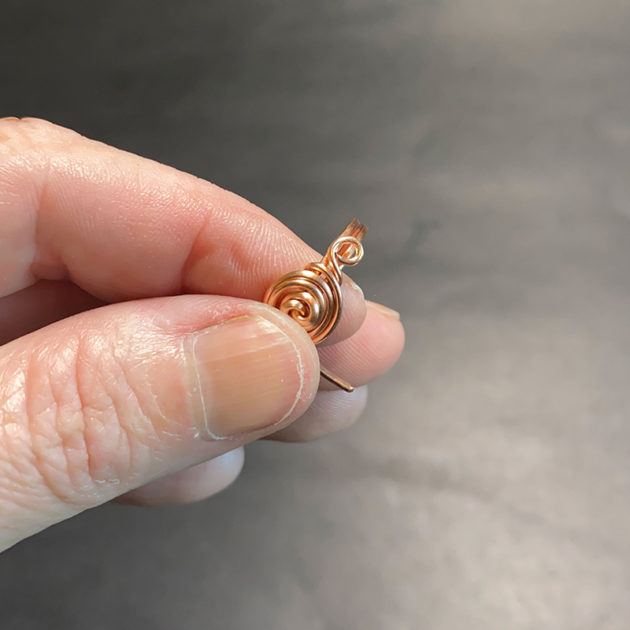
Using your wire cutters, cut any excess wire, leaving 0.5-0.75″ of wire.
The amount of wire you leave will determine the size of your side swirls (fig. 5a).
Using your round nose pliers, form a swirl on each side (fig. 5b, 5c, 5d).
STEP 6
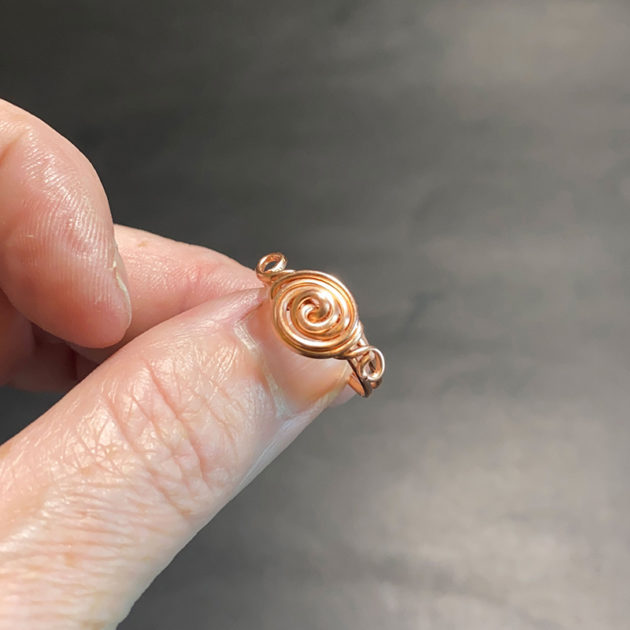
To finish the ring, place it back on the ring mandrel and gently hammer the rosette, then the swirls.
This ensures that nothing is sticking out.
Once this is done, hammer the ring in a downward motion to strengthen the wires that form the band (fig. 6a, 6b, 6c).

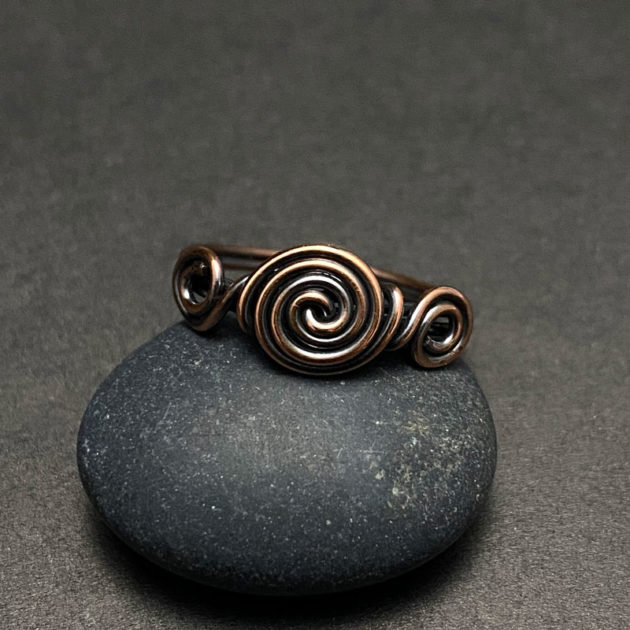
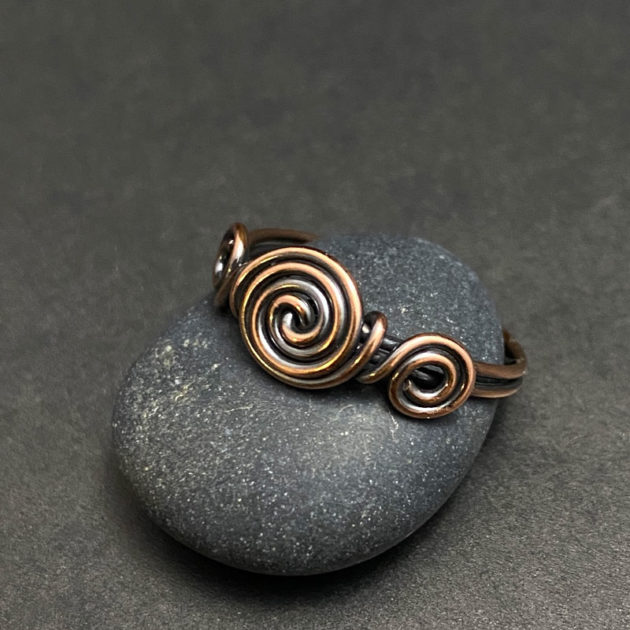
FINISHED DIY WIRE RING
Prefer this DIY wire ring tutorial in a PRINTABLE FORMAT?
Want to Support me?
If you enjoyed my content, please consider support me on Patreon:). This helps me to create more amazing free content to share with you 🙂
If you’d like to see my work and follow my wire journey, you can find me here:
Facebook
Instagram
Twitter
Pinterest
YouTube
Etsy
