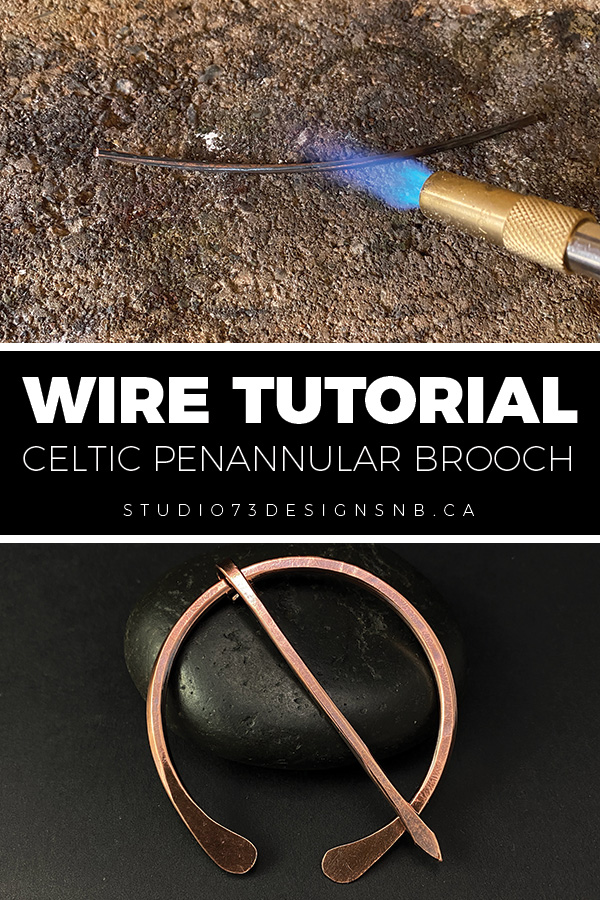
Today, I decided to put together a short tutorial on how to make a Celtic Penannular brooch.
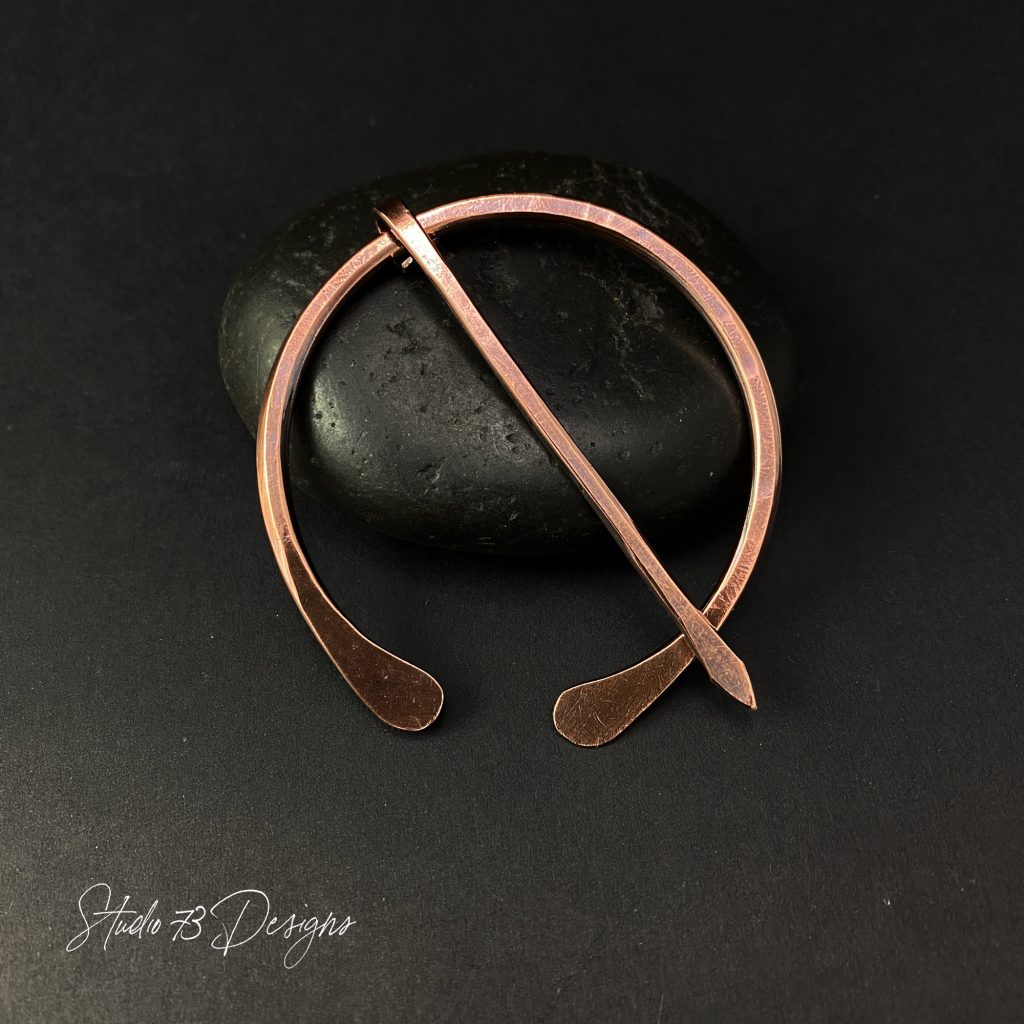
The Celtic penannular brooch dates back to the Iron age. The brooch features a pin which is fastened on one end to the ring which allows it to slide freely around the brooch.
Penannular means “incomplete ring” which allows a small space for the pin to move through.
They work great on sweaters, scarves or shawls.

FREE WIRE-WRAPPING GUIDE TO YOUR EMAIL!
JOIN NEWSLETTER
We respect your privacy. Unsubscribe at anytime.

MY PROCESS
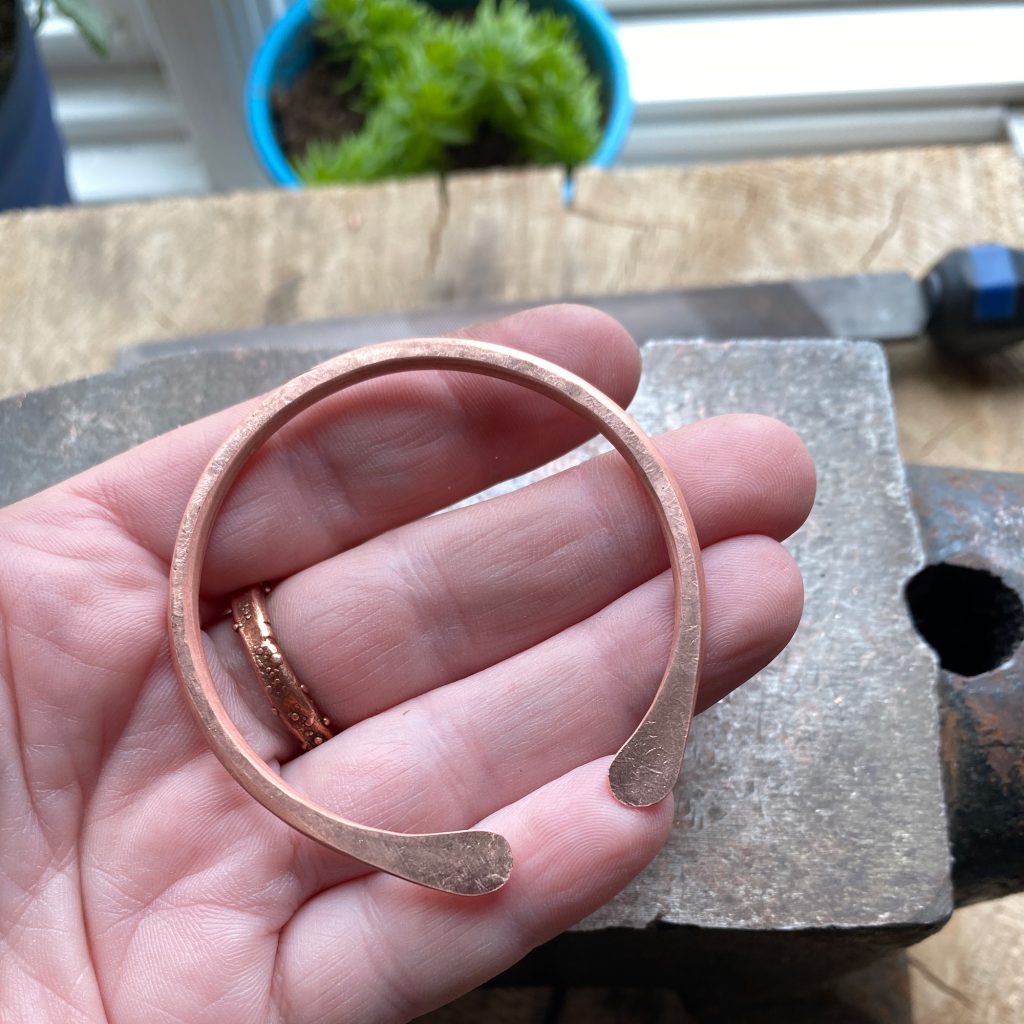
This upcycled copper wire penannular brooch is made with roughly 10 & 12 gauge wire. It measures roughly 2″ by 2″.
RECYCLE/UPCYCLE
I make all my copper jewelry with salvaged electrical wire which I get at my local salvage yard. I believe in reusing materials that are readily available.❤️
This tutorial is step by step as you can see below but I’ve also included the video version.
Penannular Brooch Tutorial
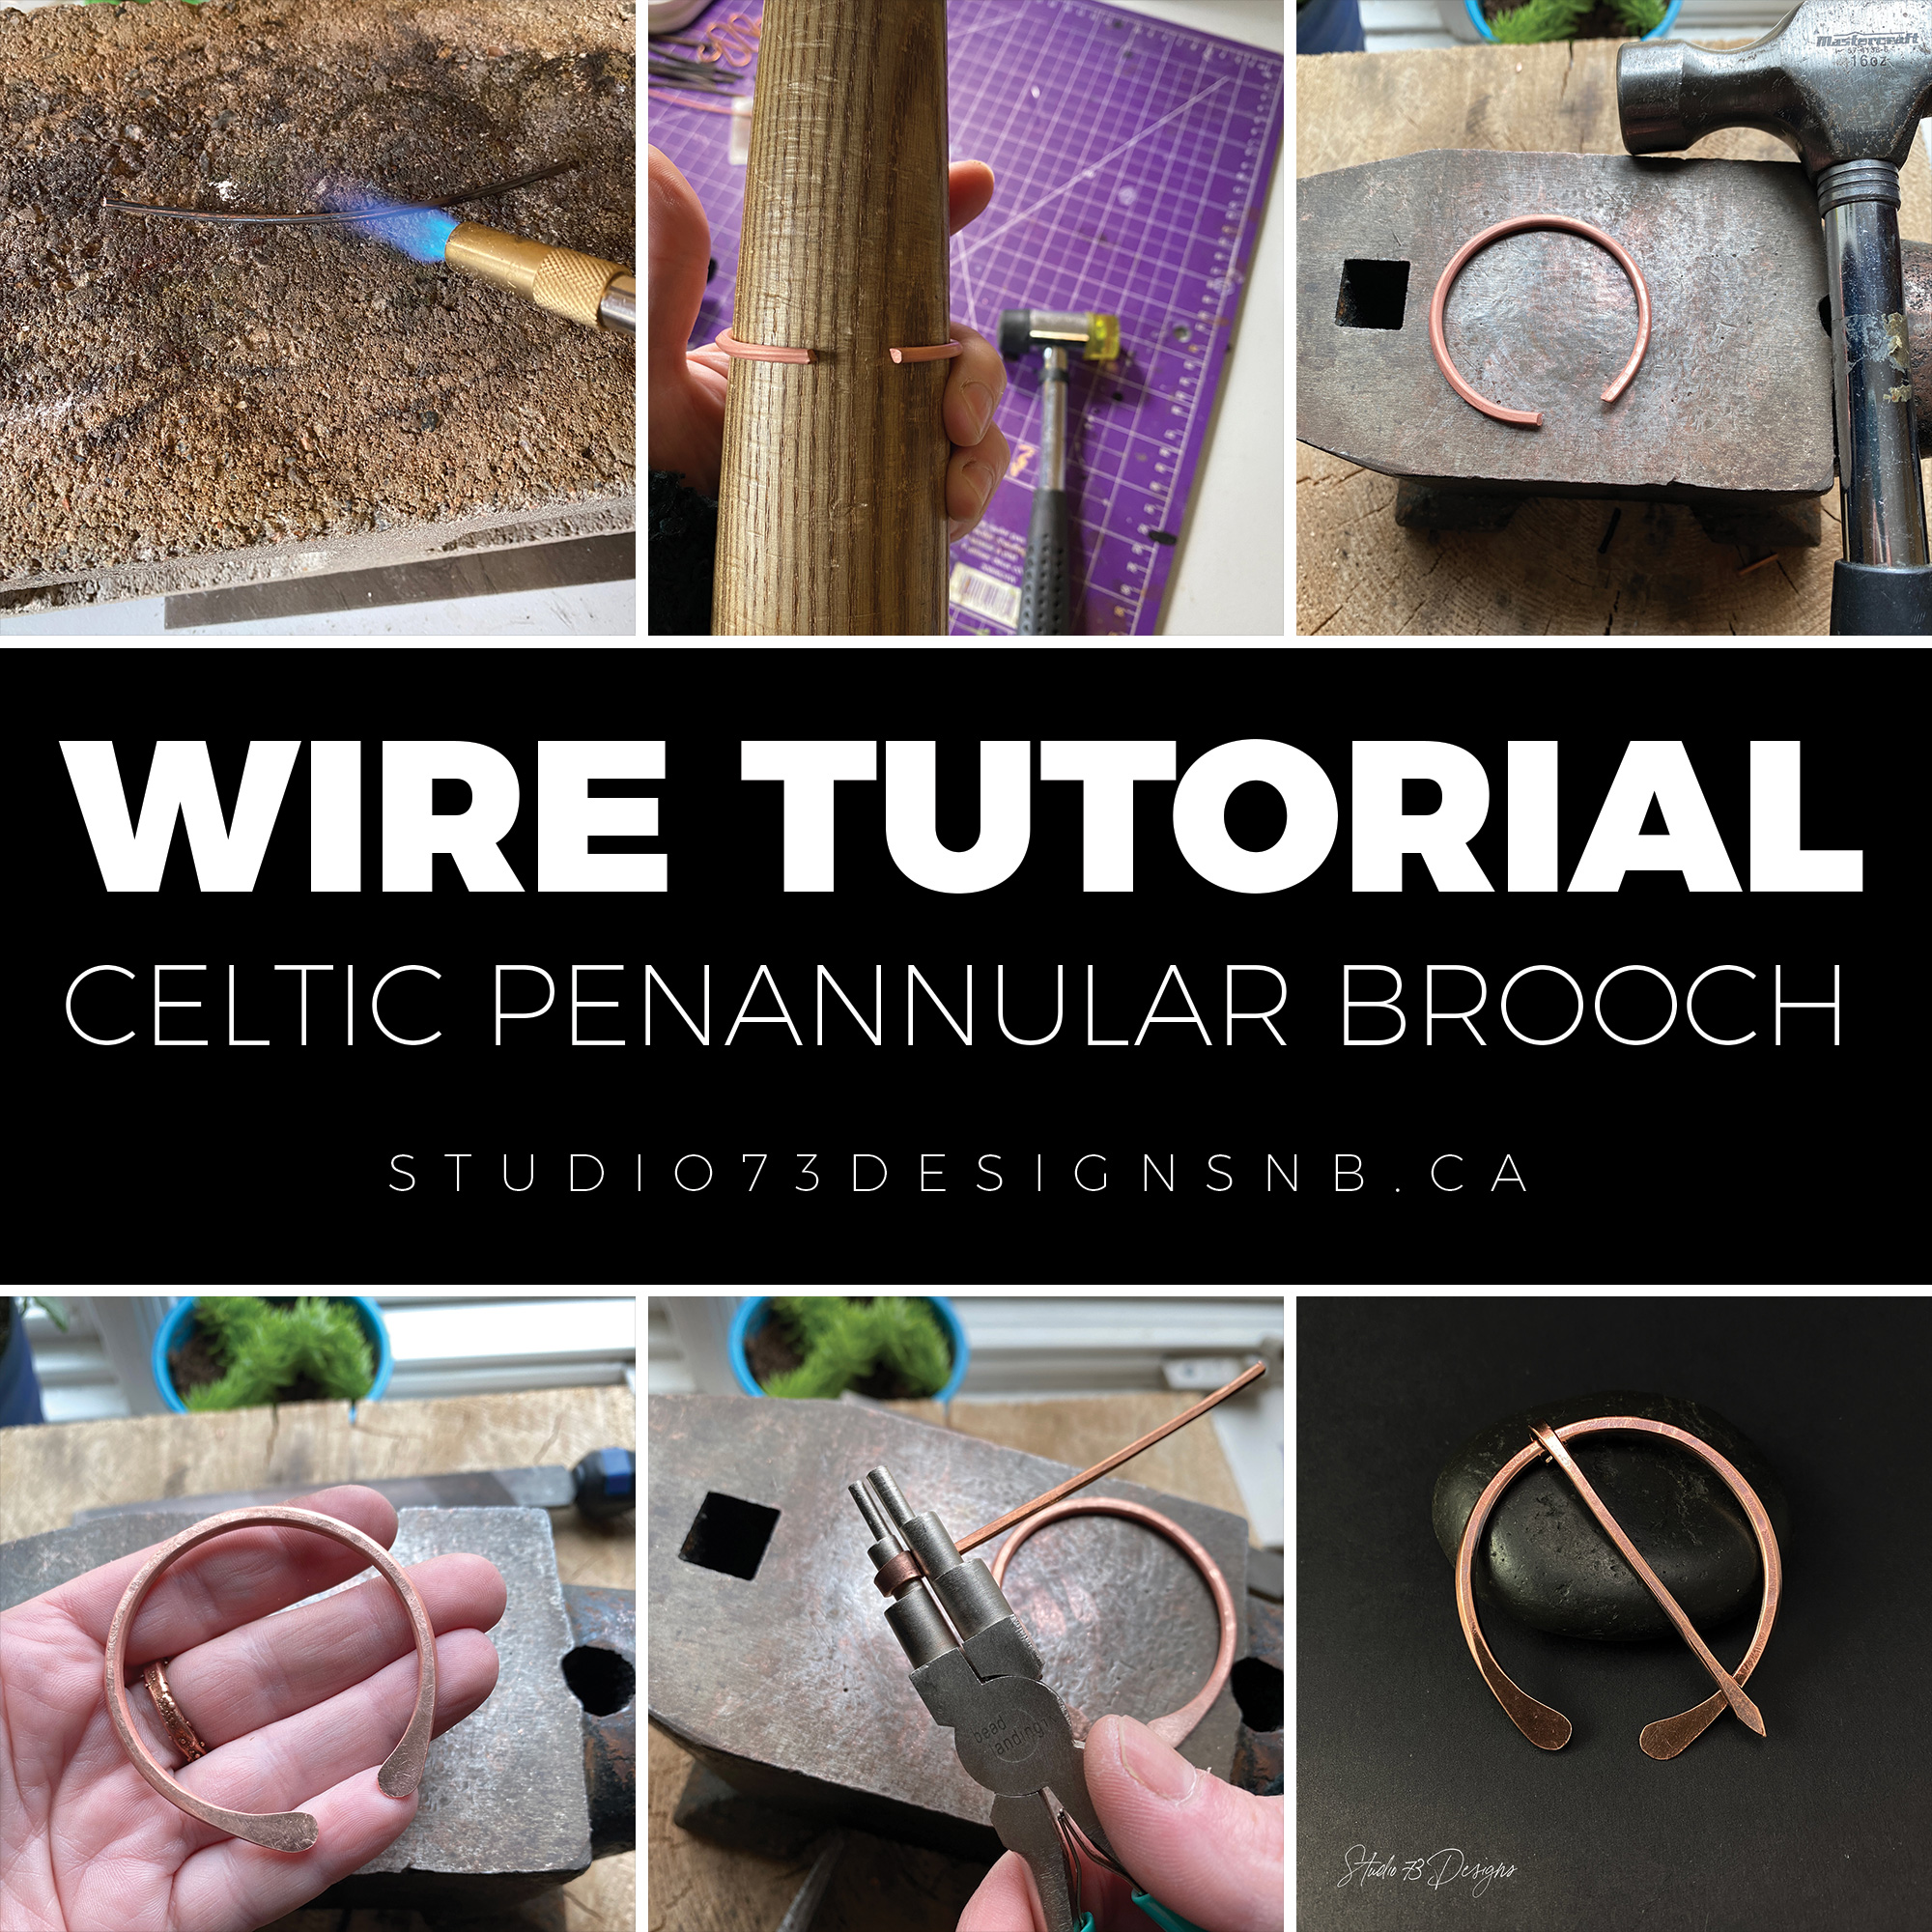
Part One – The Frame
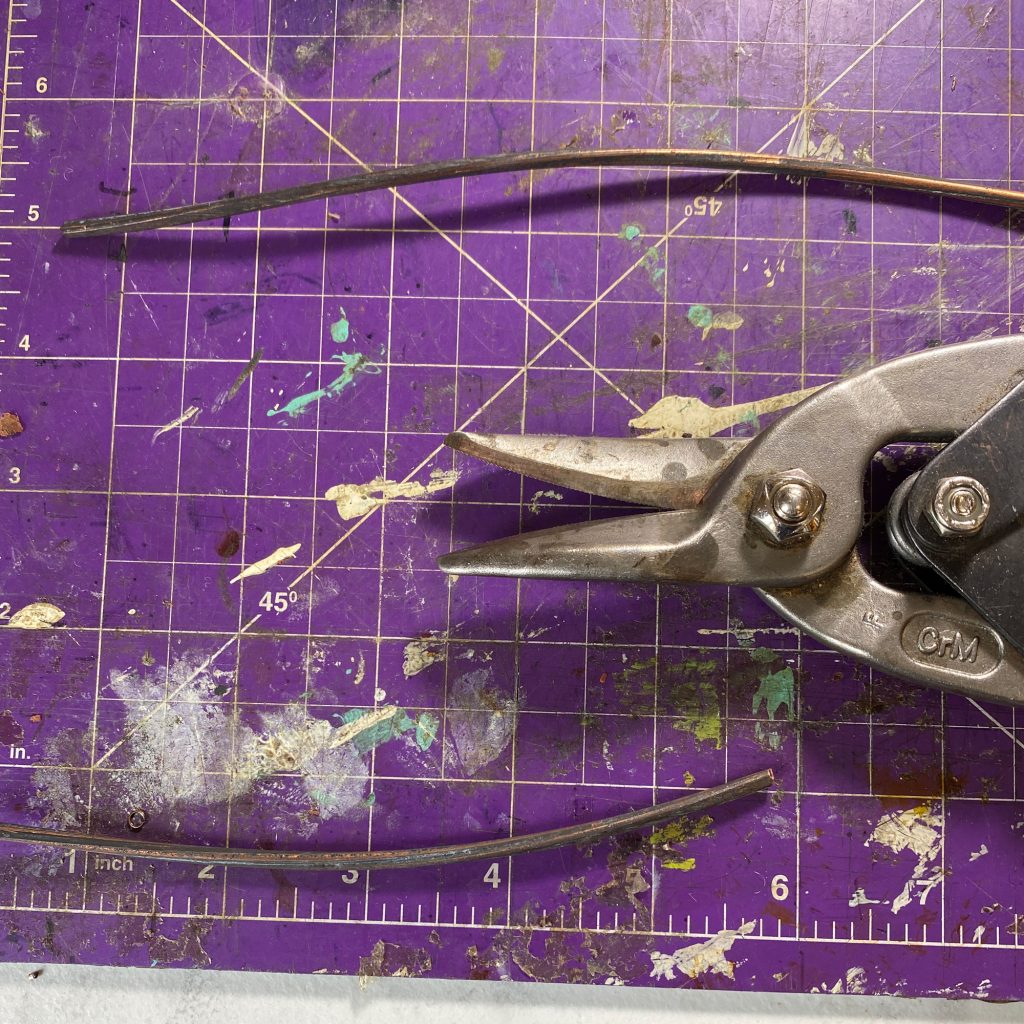
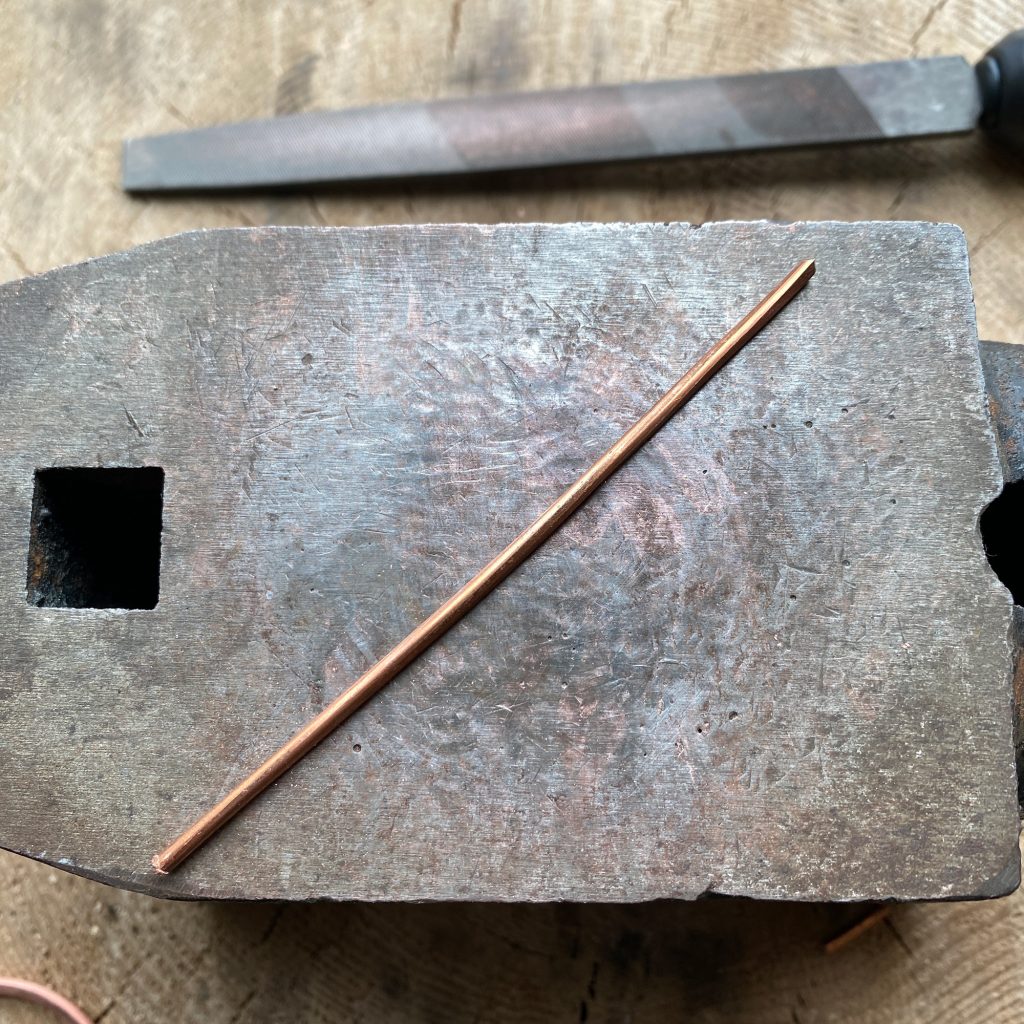
Step 1 – With a pair of sheers, cut a 6″ piece of wire.
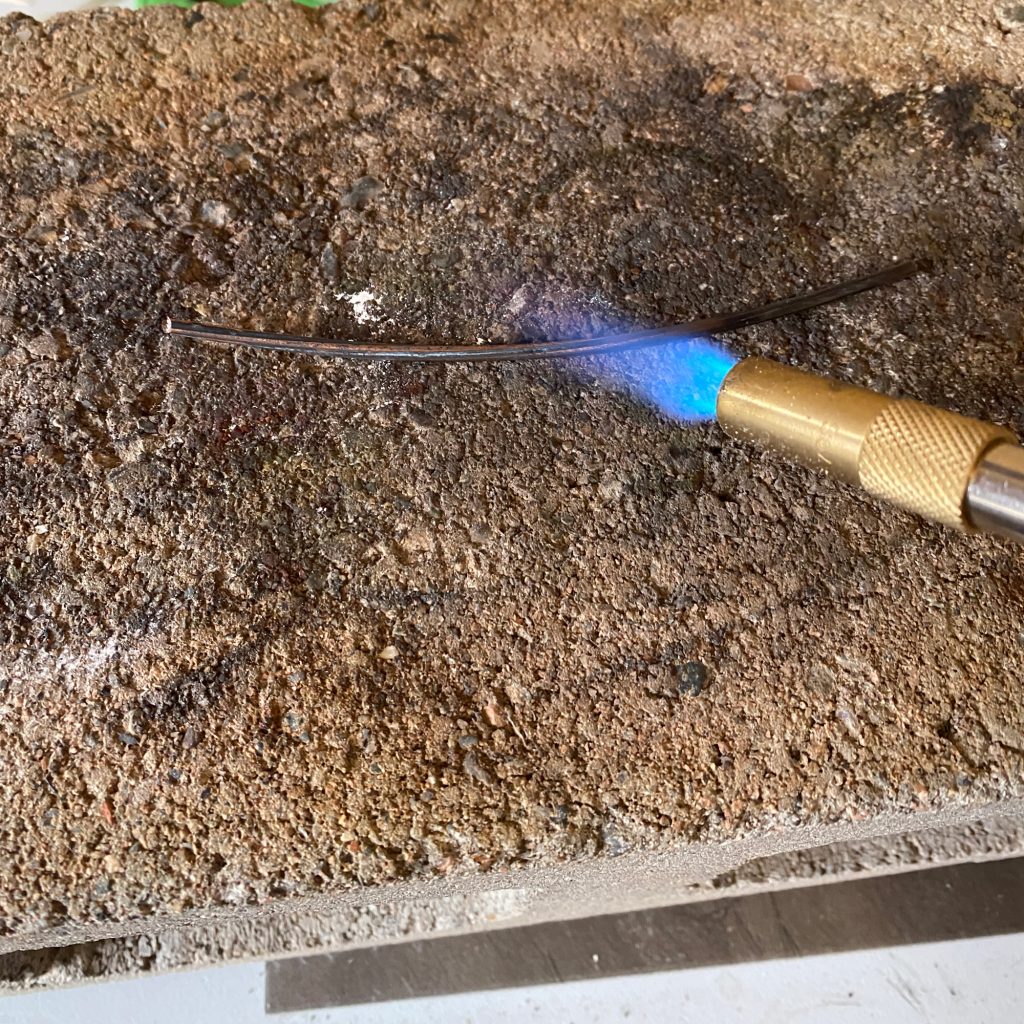
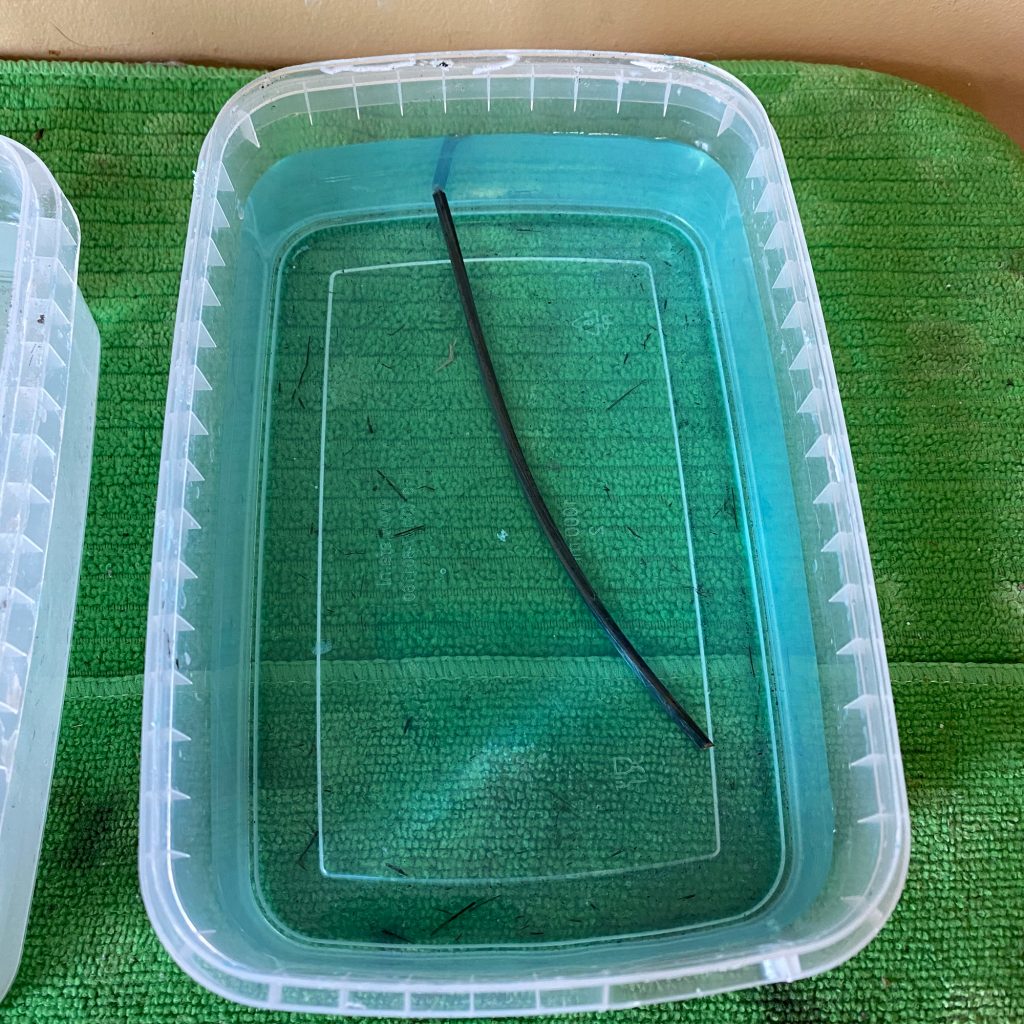
Step 2 – Heat the wire with a torch. This is the process of annealing the wire (it makes it easier to work with).
Step 3 – After quenching, place in pickle pot. This removes the firescale from the wire and cleans it.
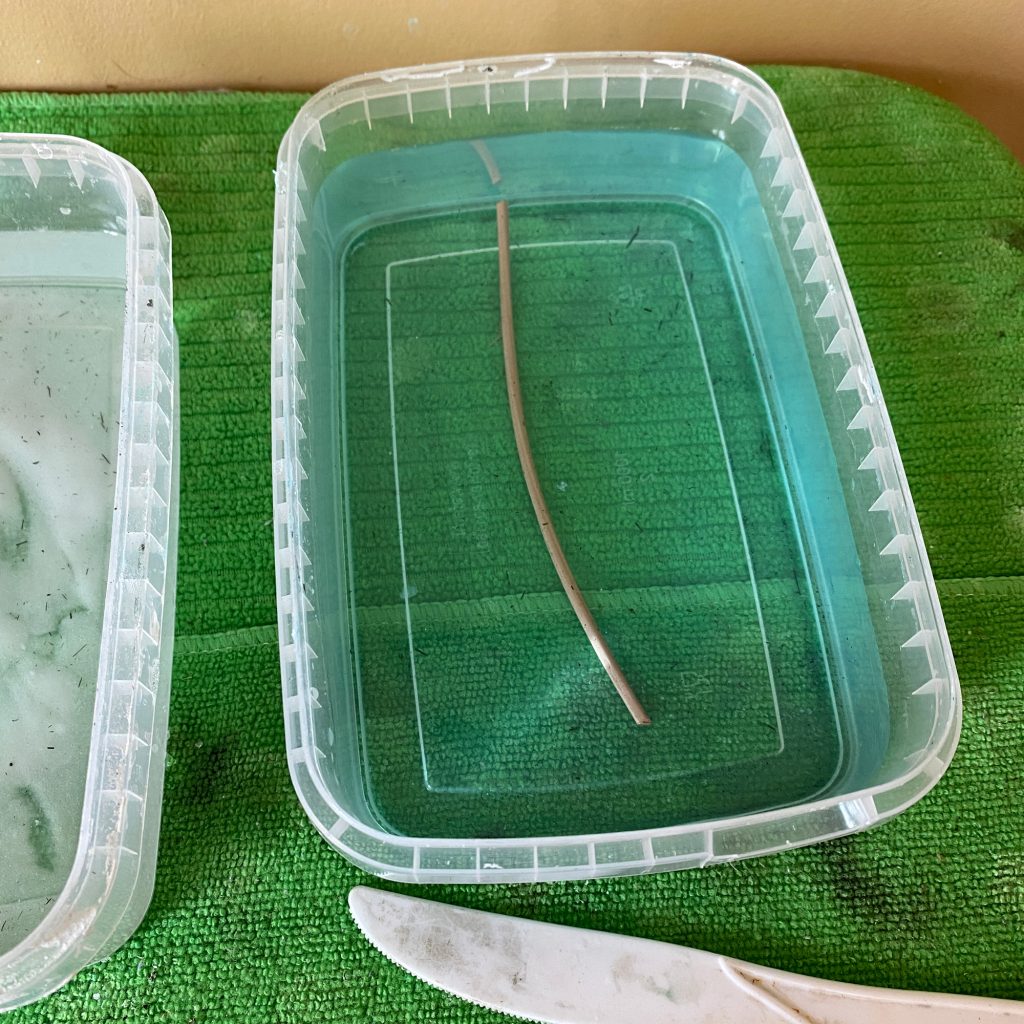
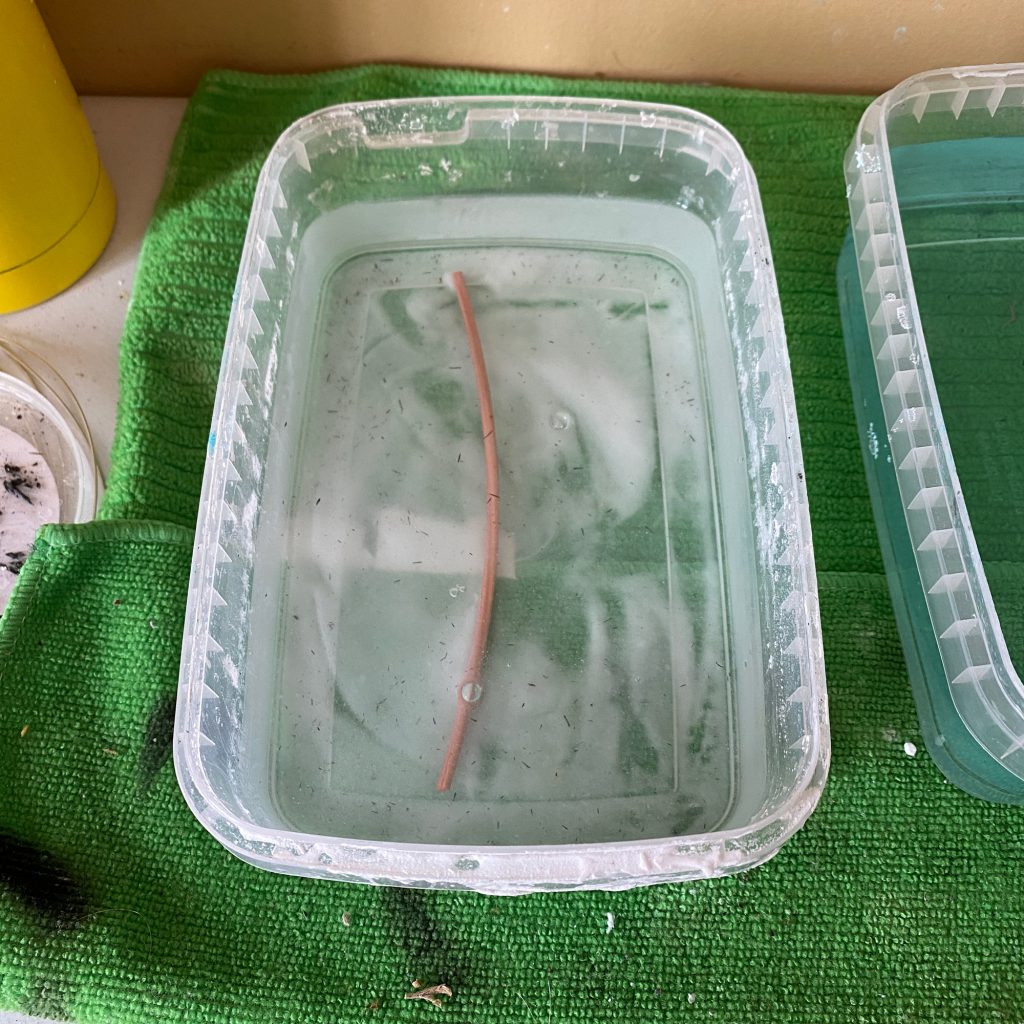
Step 4 – Place in water and baking soda to neutralize.
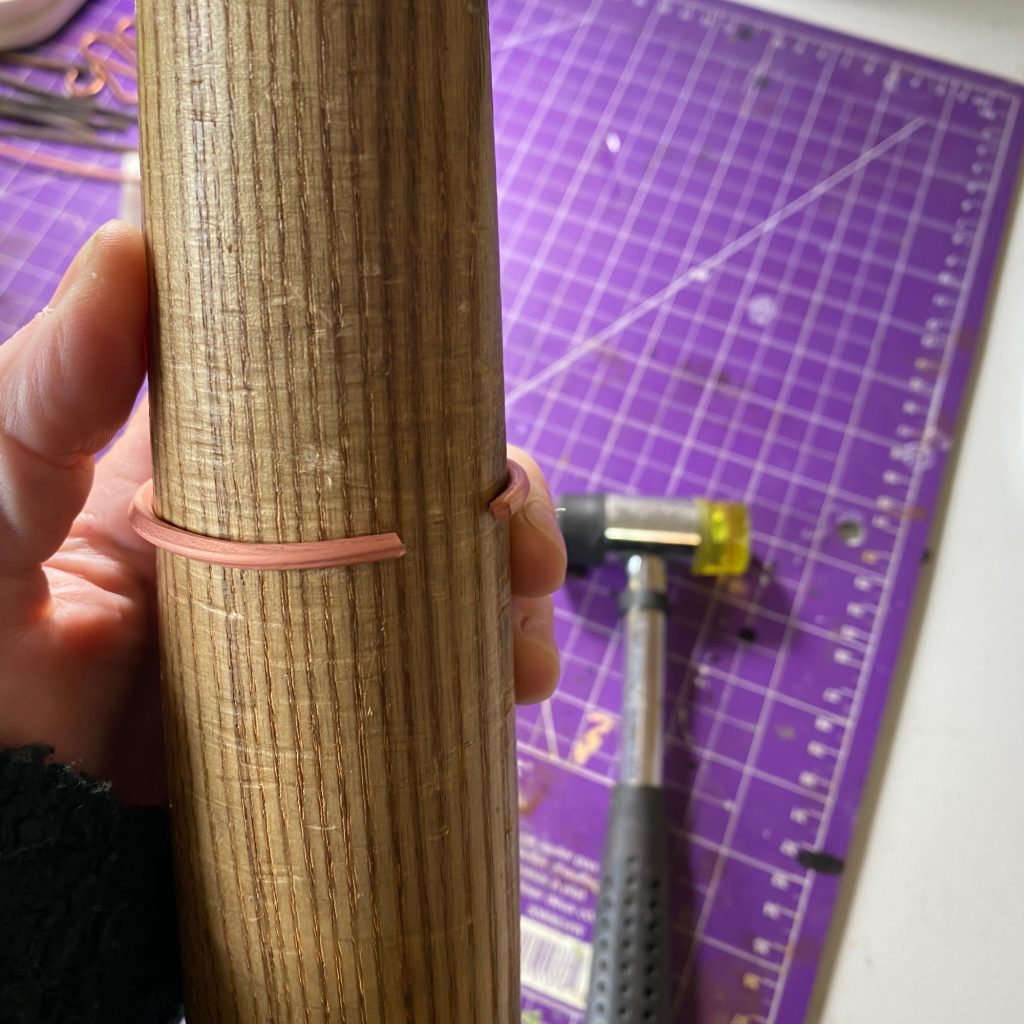
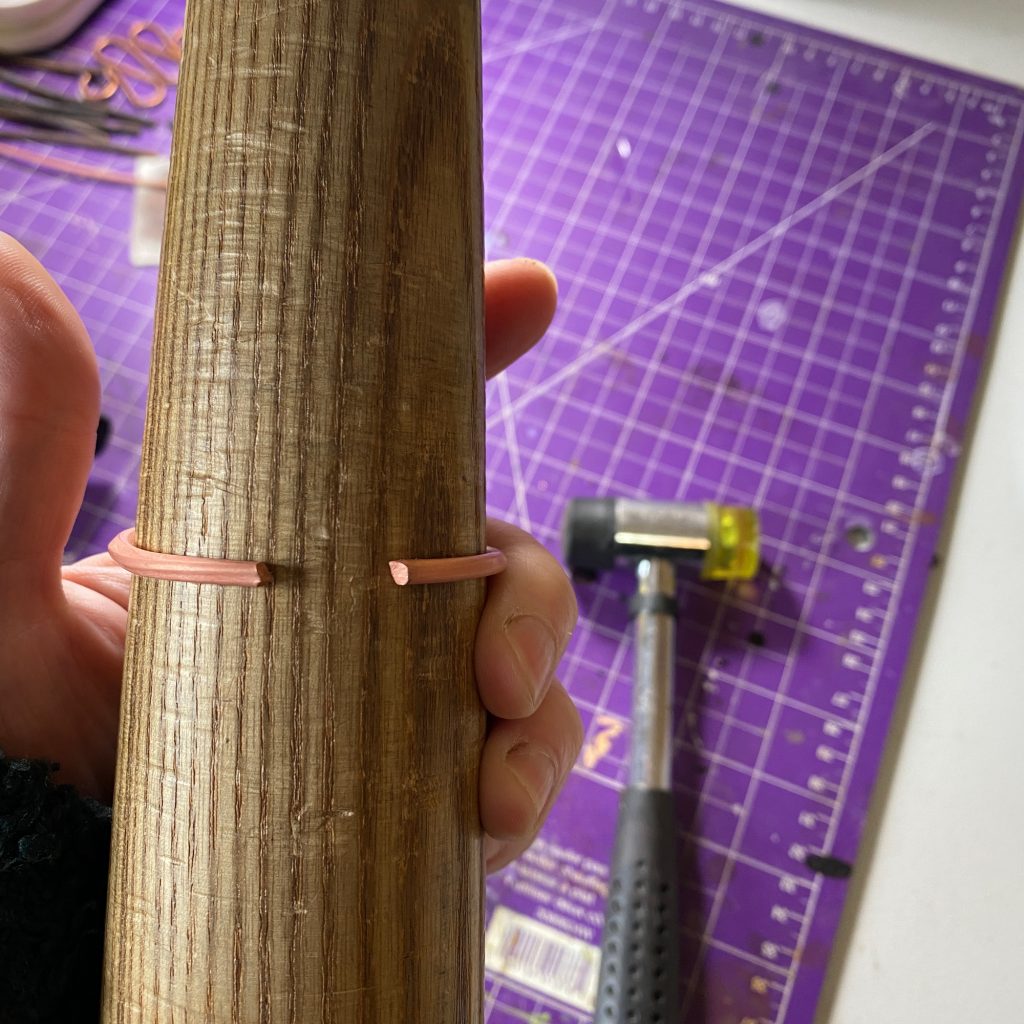
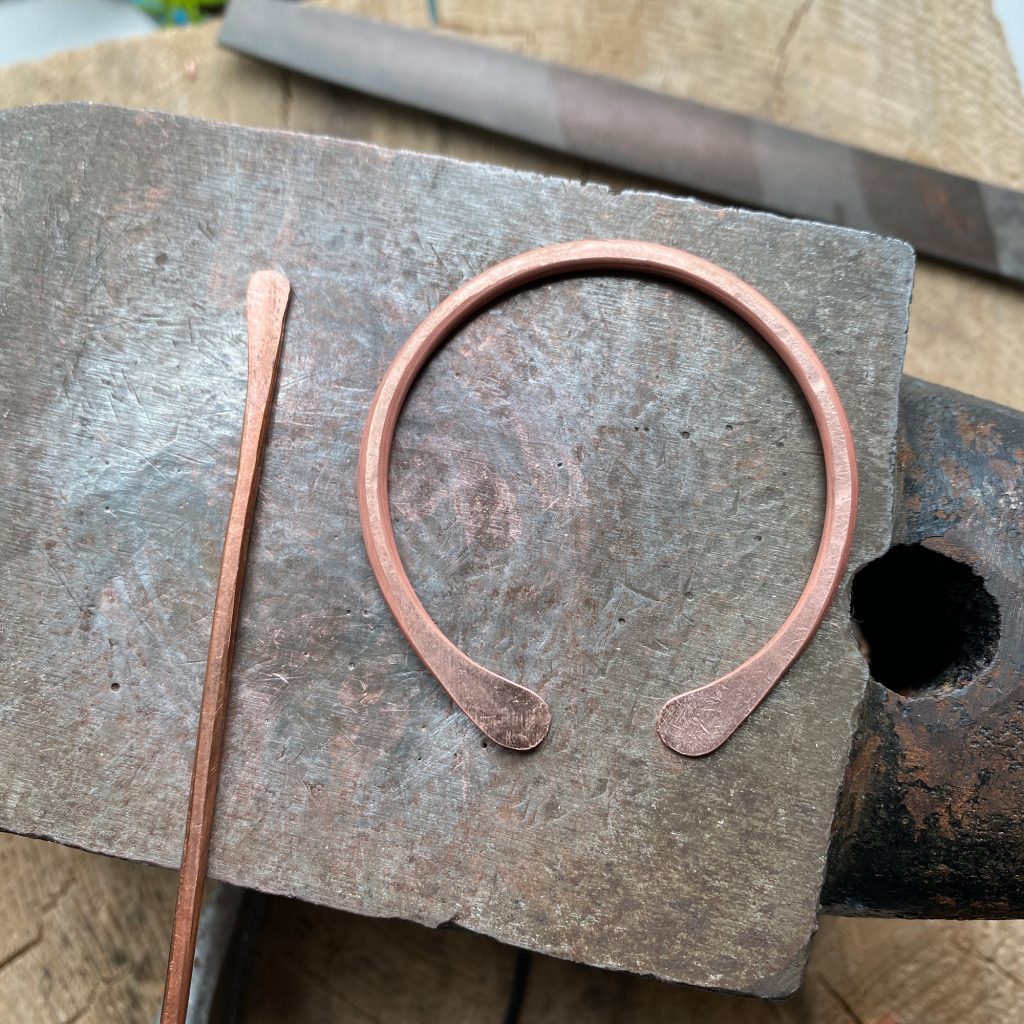
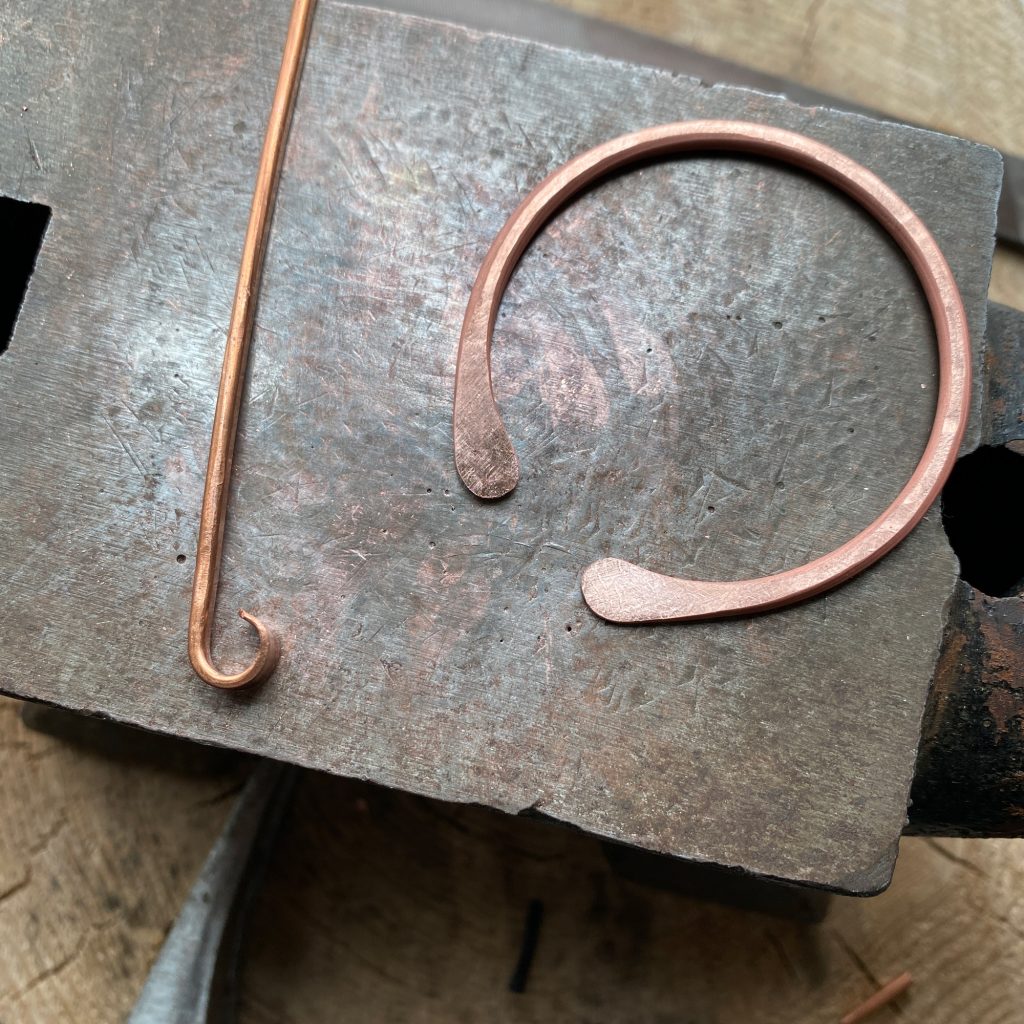
Step 5 – Wrap wire around a mandrel. I use an old baseball bat (works great!)
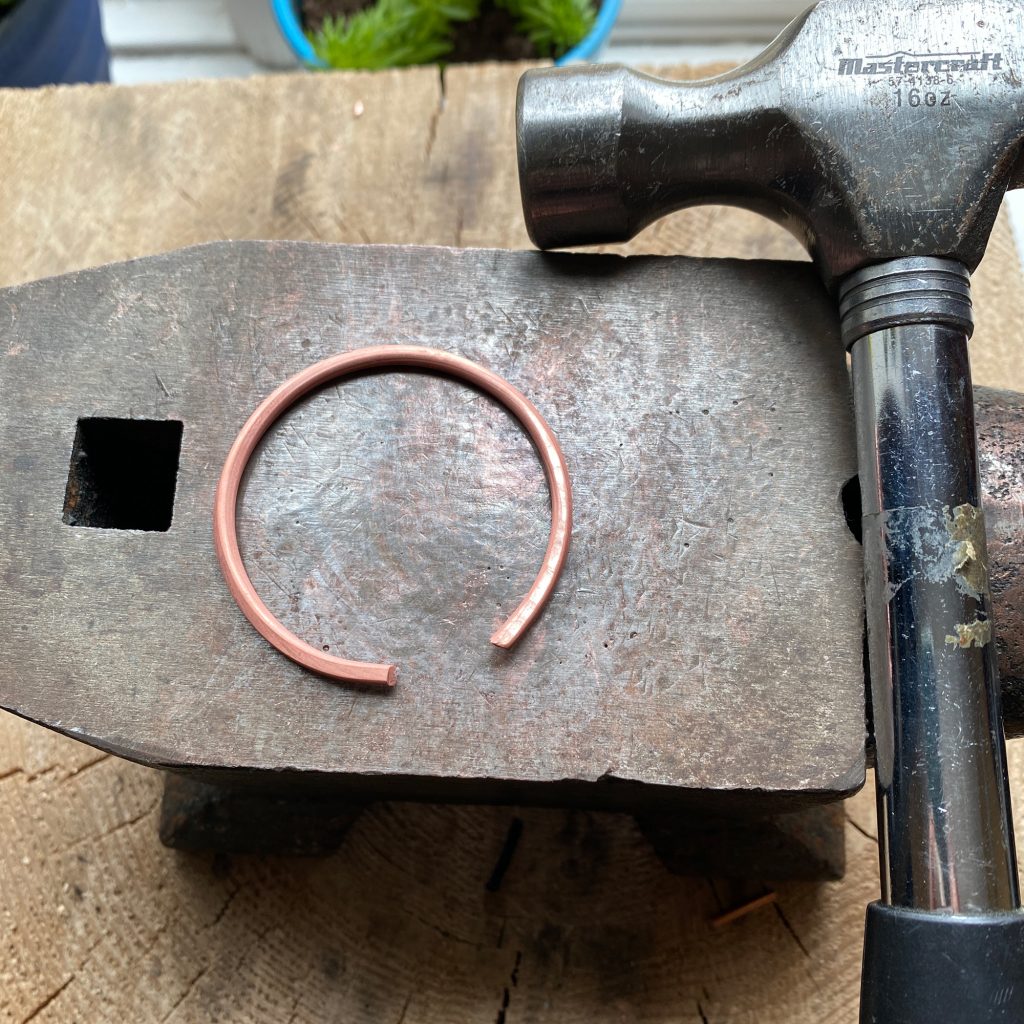
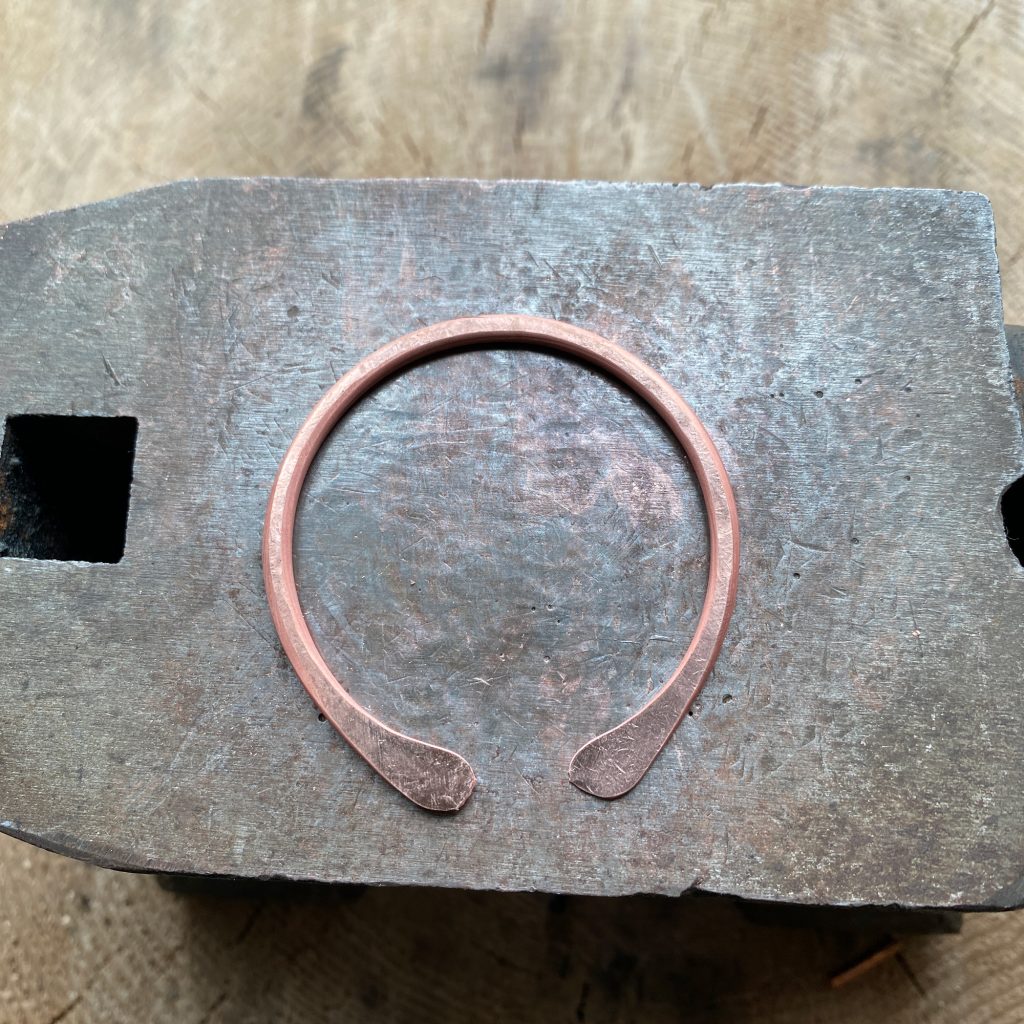
Step 6 – Hammer each side of brooch as evenly as possible. Both ends need to be hammered repeatedly so they spread out.
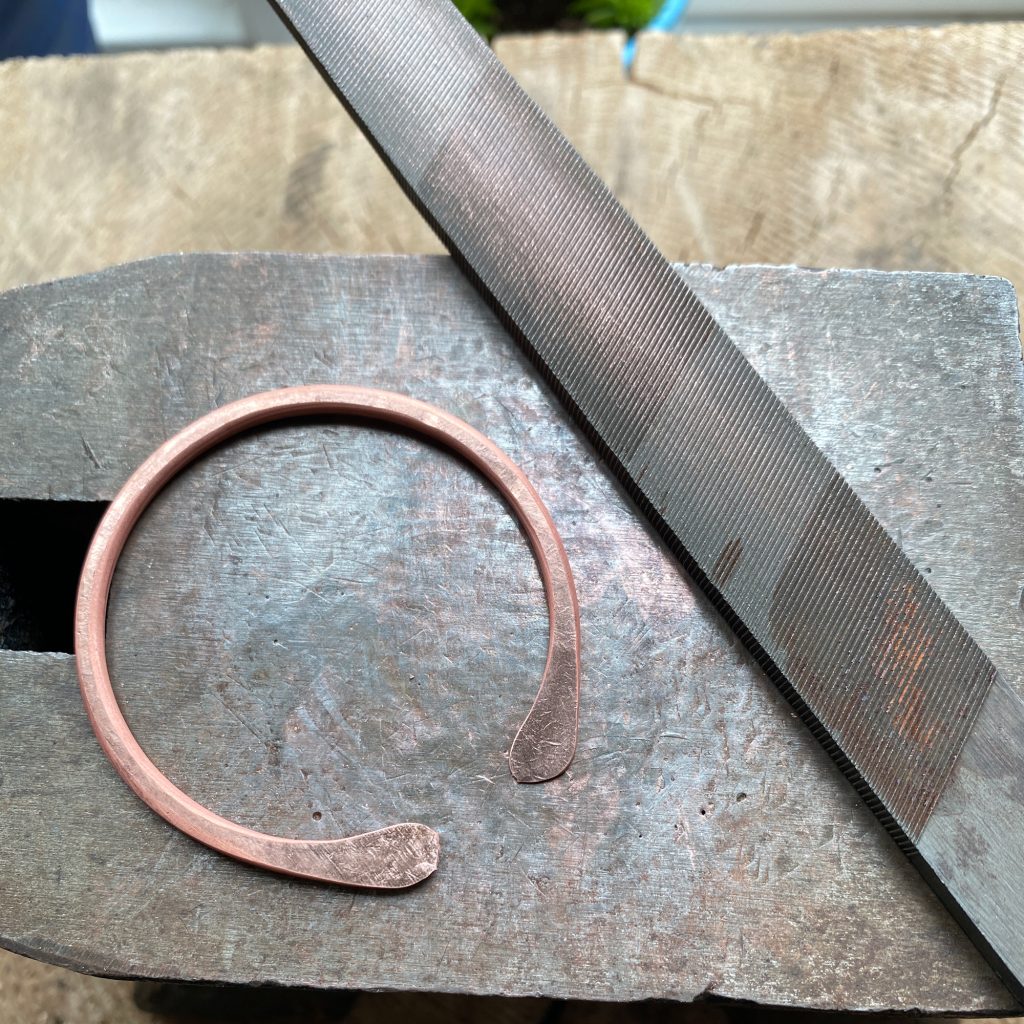
Step 7 – File the ends until smooth.
Part Two – The Needle
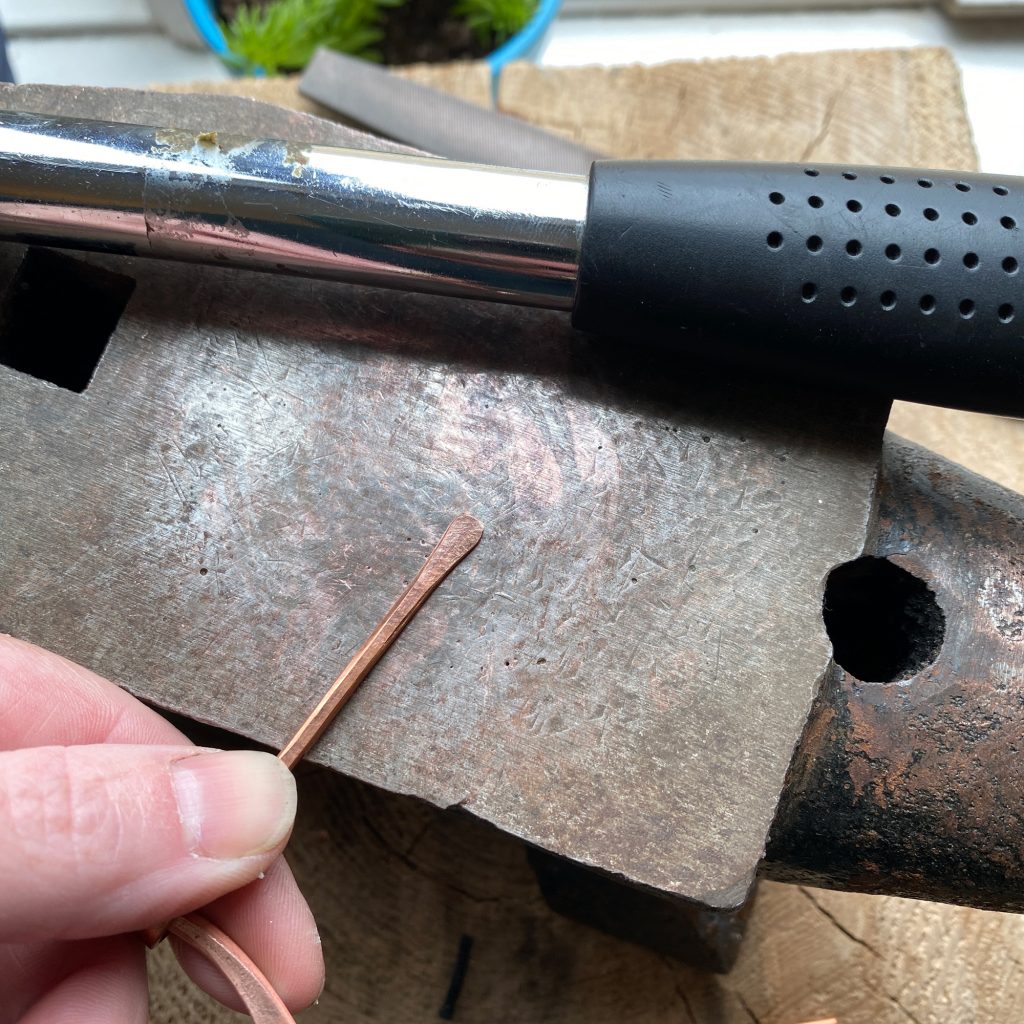
Step 8 – Cut a scrap piece of wire (10-12 gauge) about 3-4″ long.
Step 9 – Hammer end of needle.
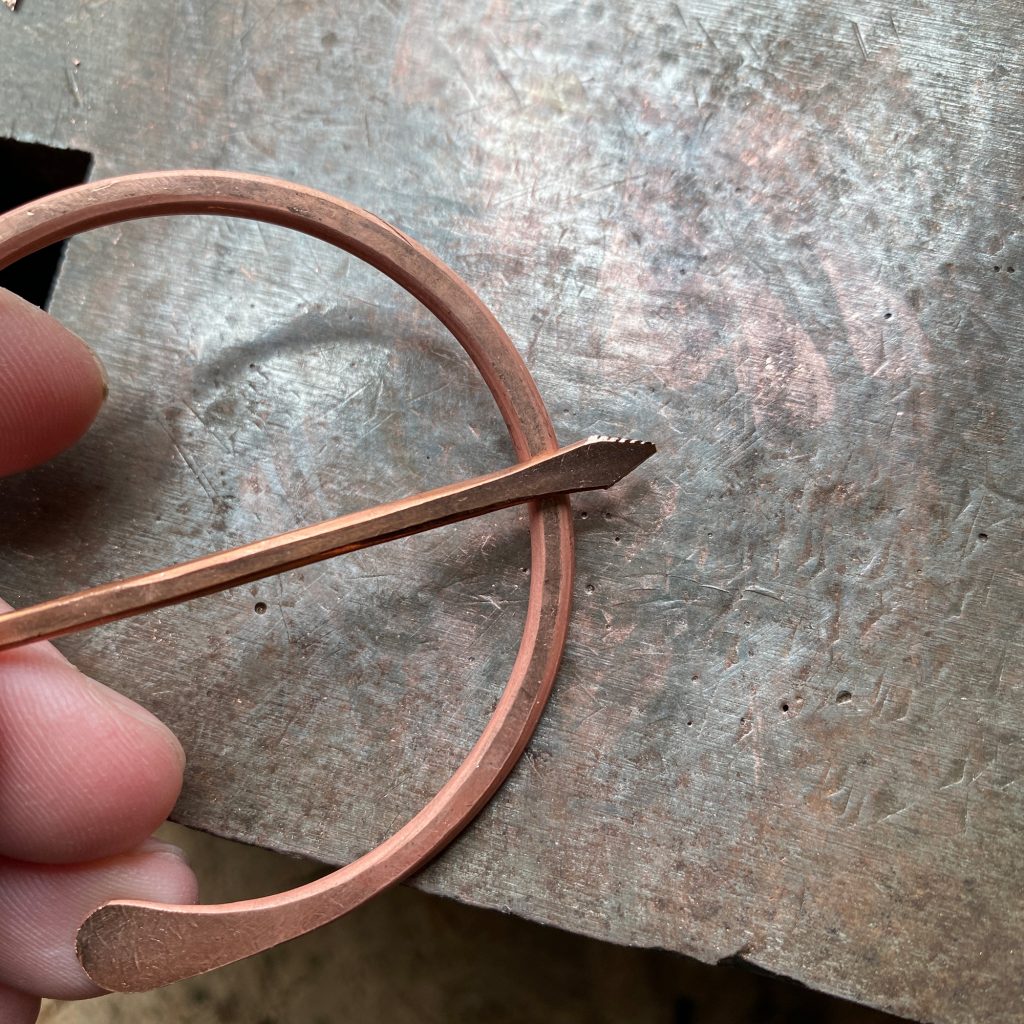
Step 10 – Using a pair of 6-step barrel pliers, roll one of the ends in.
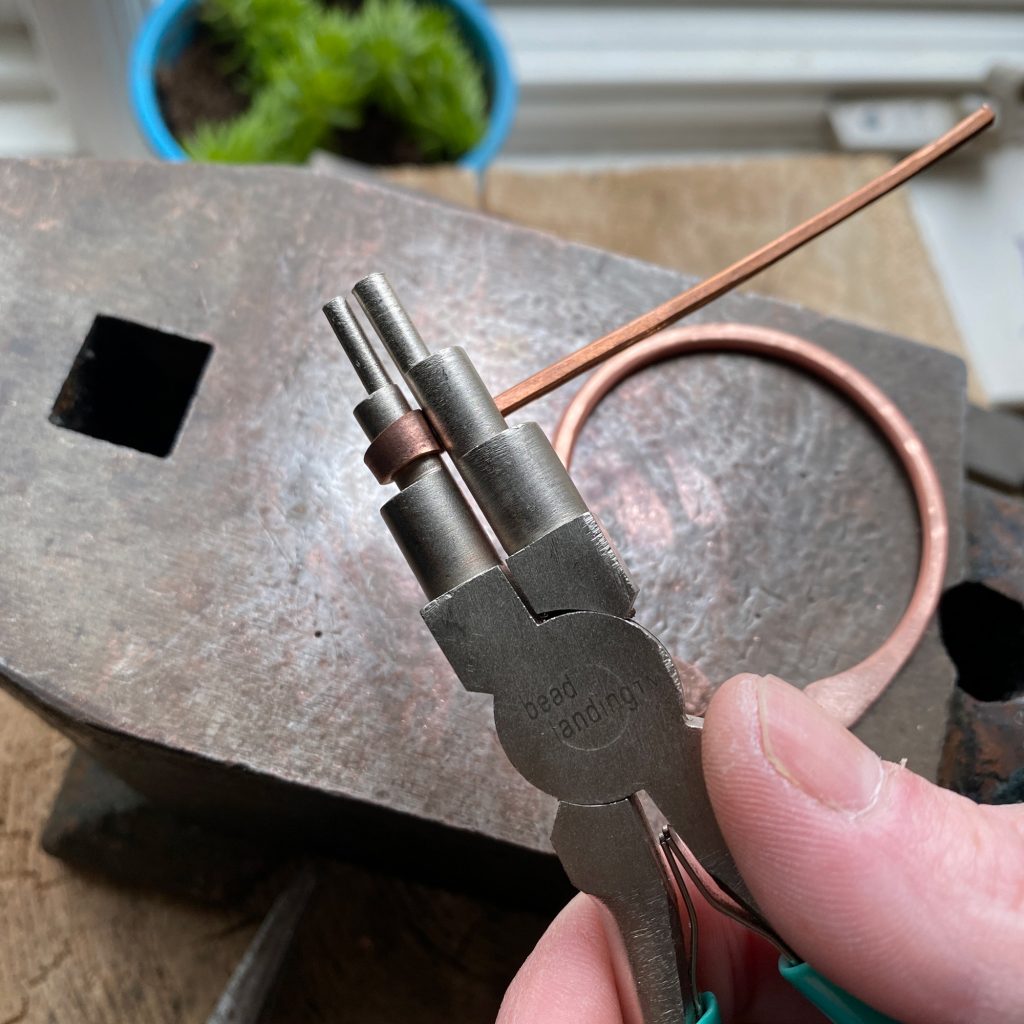
Step 11 – Hook end of needle onto frame.
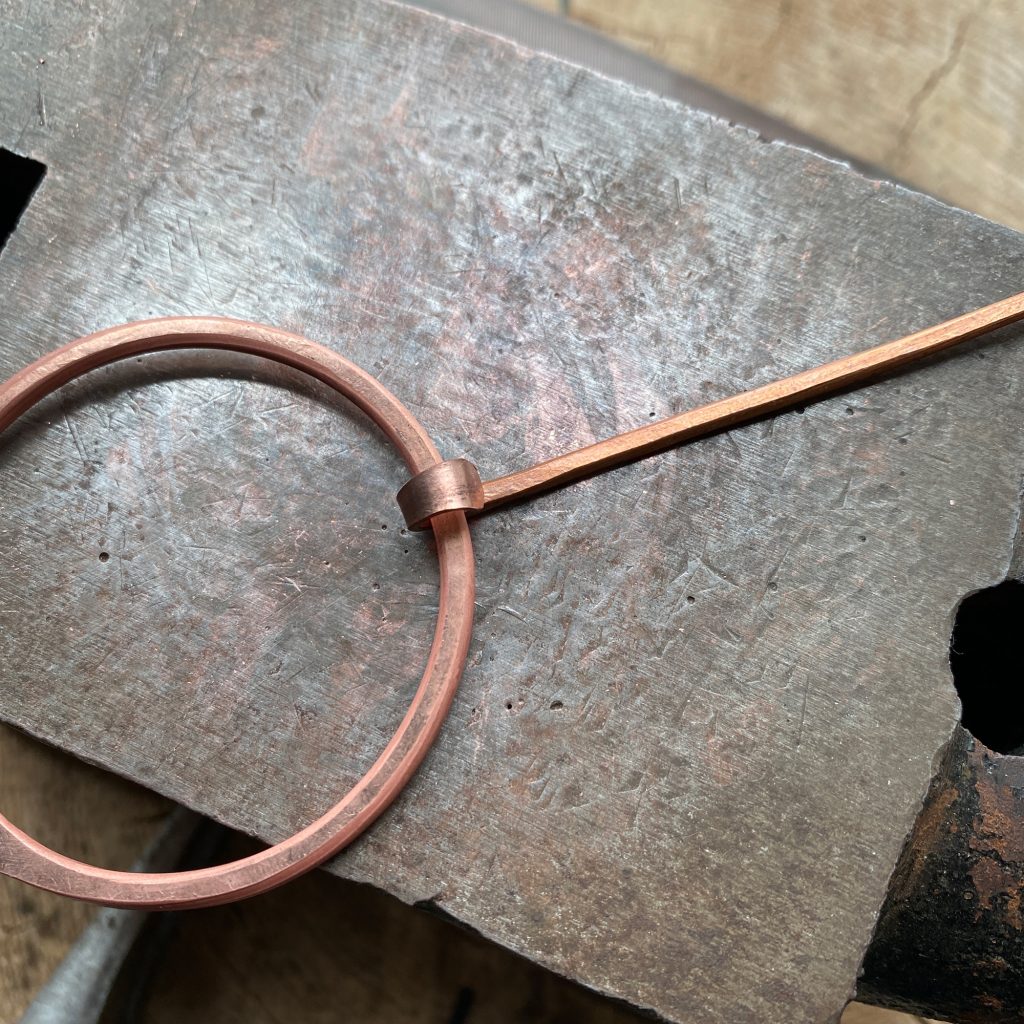
Step 12 – With a pair of pliers, squeeze the loop shut around the frame.
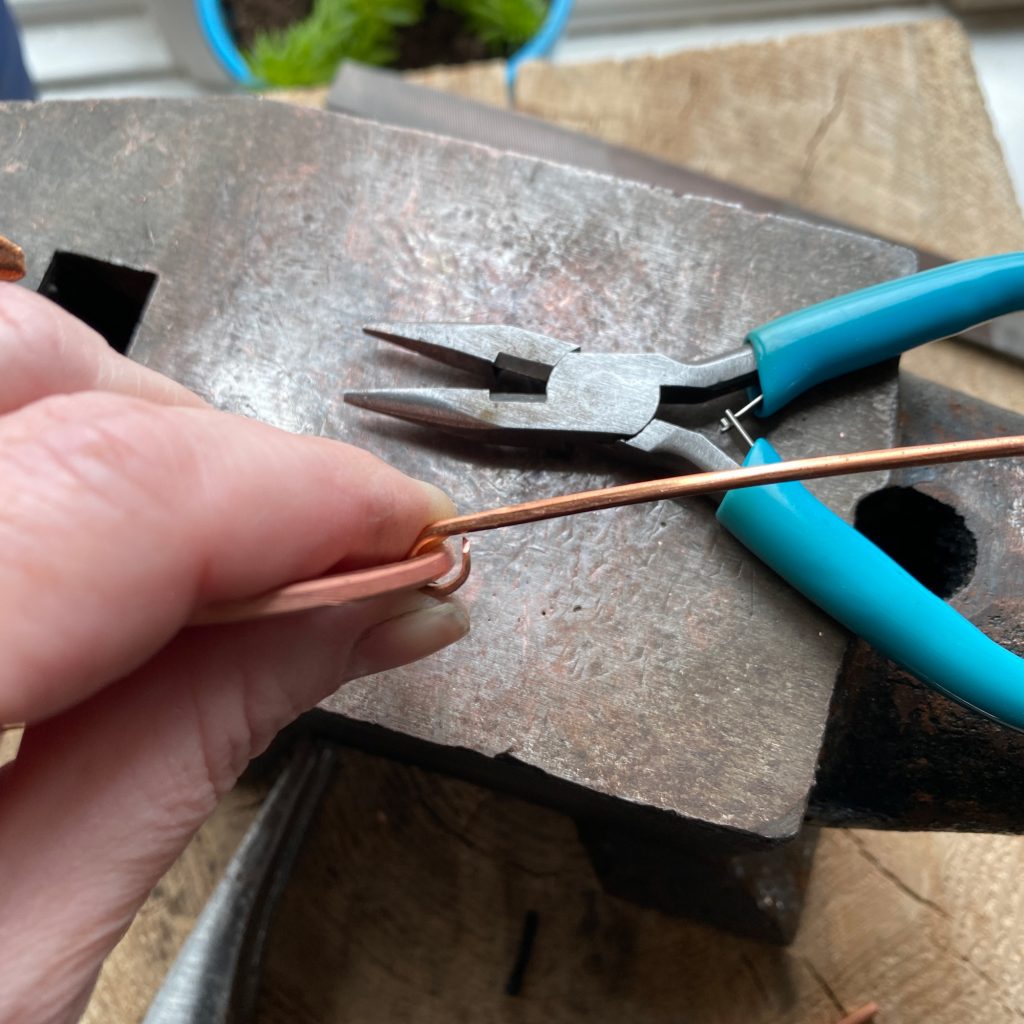

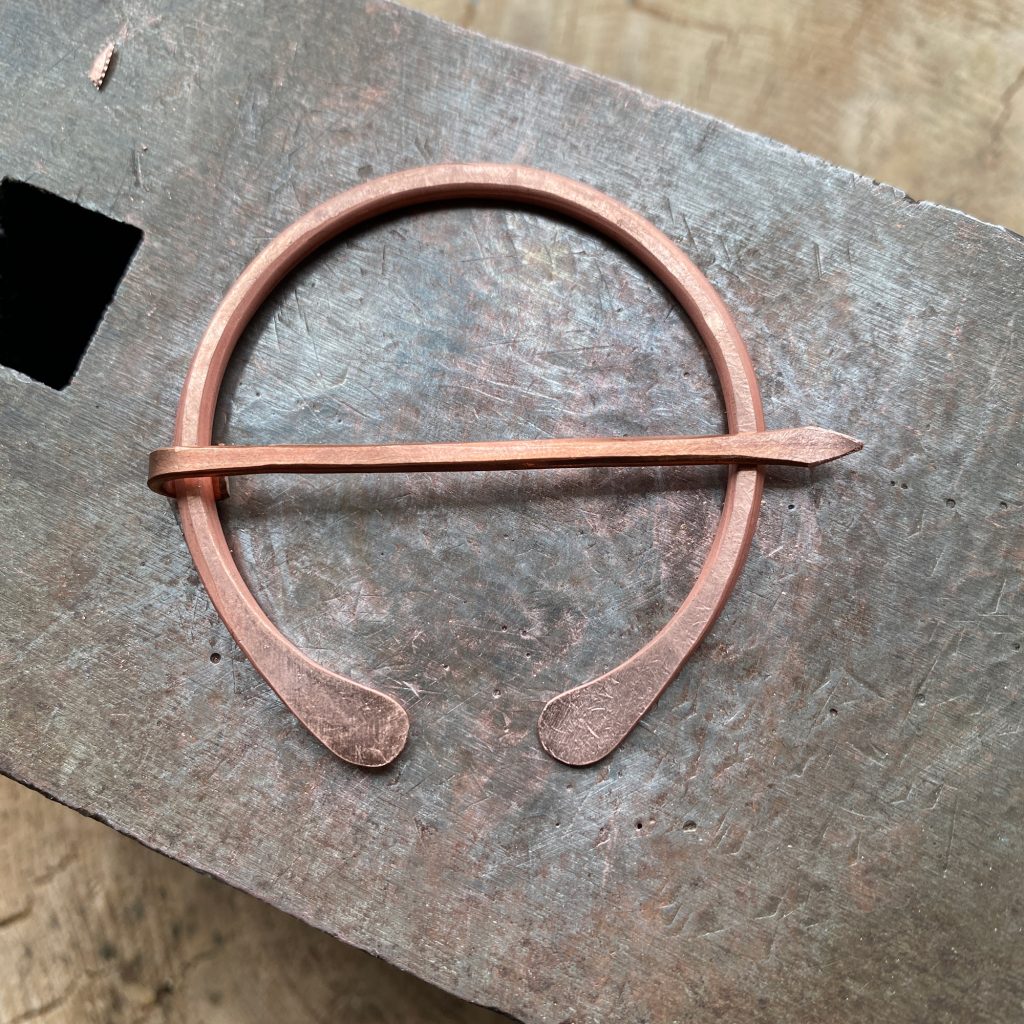
Step 13 – Cut the needle so it sticks out by at least 1/4″.
Step 14 – Hammer end of needle.
Step 15 – Snip the end with shears.

Step 16 – File end of needle to smooth it out.
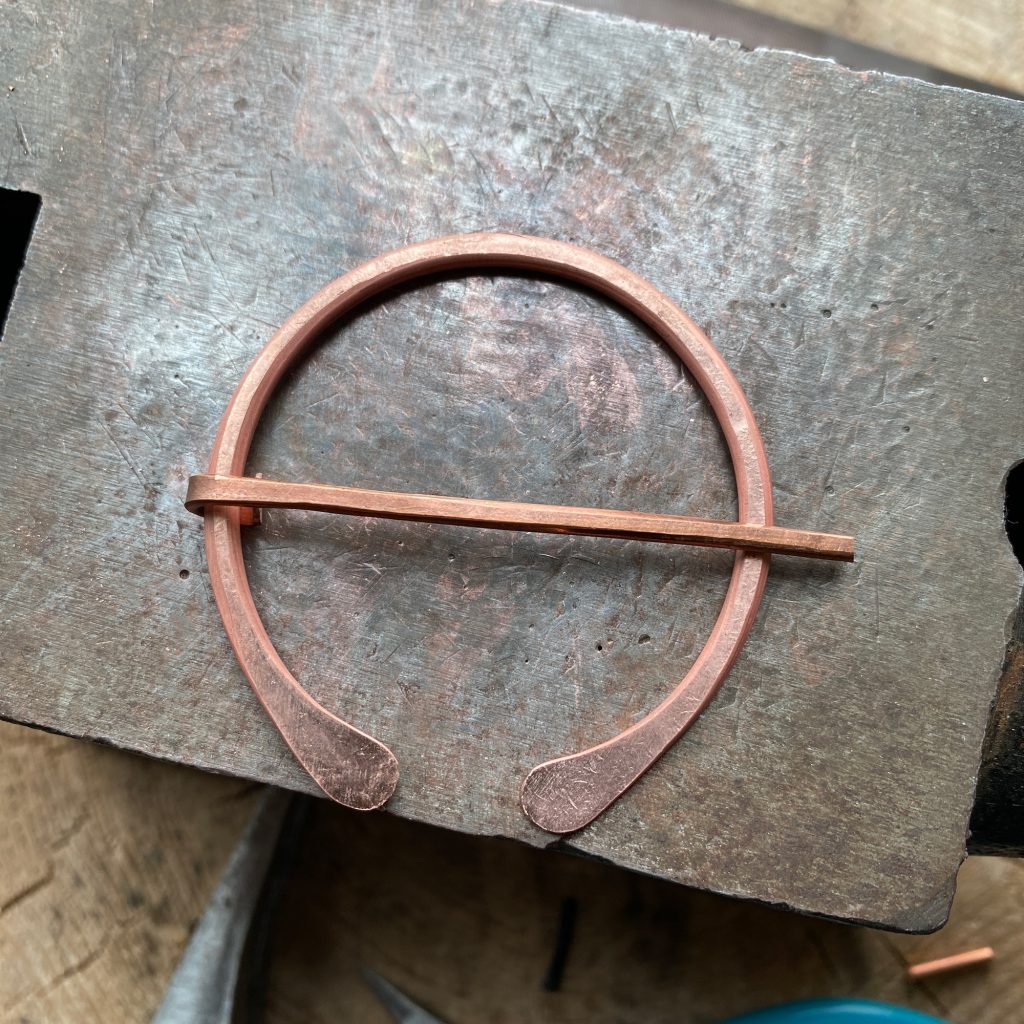
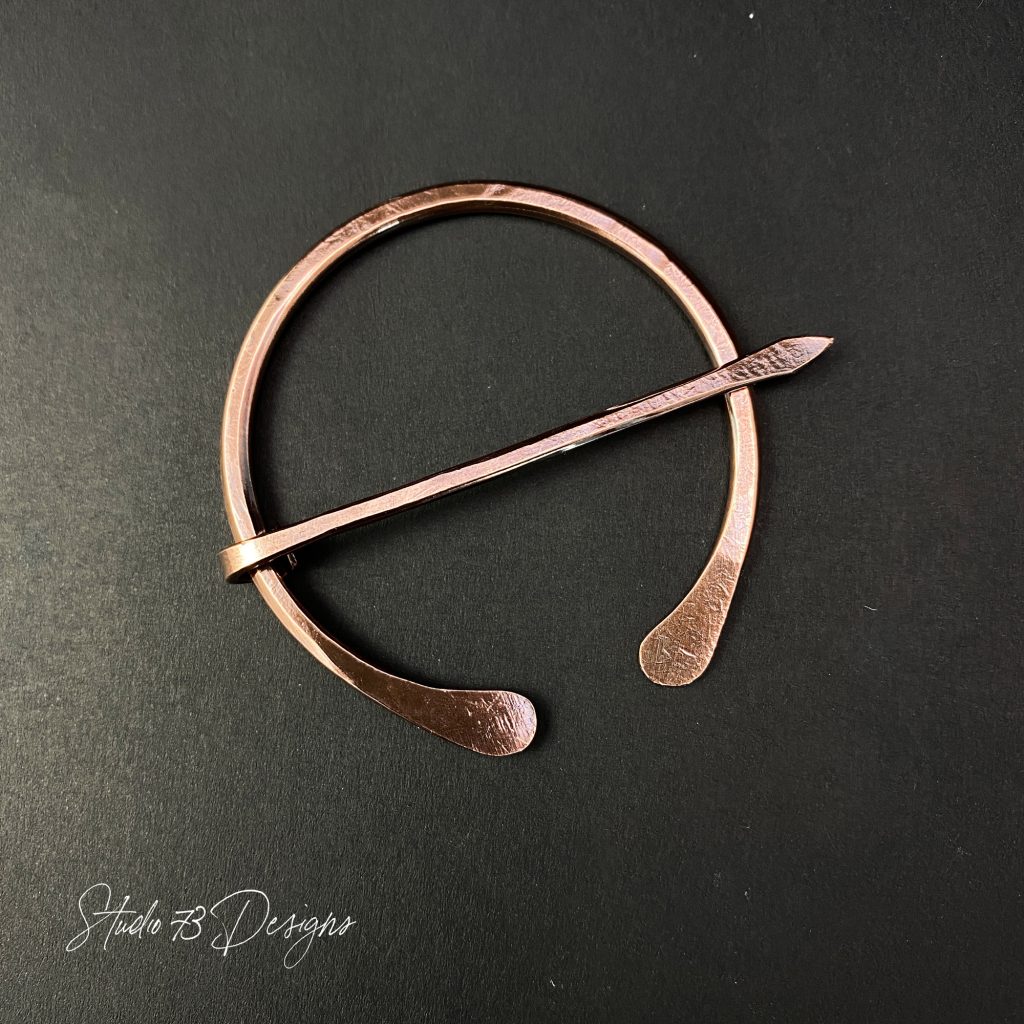
Final Product – After tumbling and polishing:
See my really short video on how to use a Celtic Penannular brooch right here => How to Use a Celtic Penannular Brooch