
Hello and welcome back, fellow creative spirits! Today we’ll talk about texture and why it is important. We’ll cover a variety of techniques you can use to make your wire-wrapping jewelry even more eye-catching.
Before we dive into the different methods, here’s a quick overview of the techniques we’ll be covering today.
- Hammering techniques
- Wire rolling mills
- Wire twisting
- Annealing and quenching
- Torch techniques
- Filing and sanding
- Stamping
- Texturing Pliers
- Wire Weaving
I’ll link each technique to the relevant external video too, so you can see the techniques in real time.


FREE WIRE-WRAPPING GUIDE TO YOUR EMAIL!
JOIN NEWSLETTER
We respect your privacy. Unsubscribe at anytime.
DISCLOSURE: This post may contain affiliate links, meaning when you click the links and make a purchase, I receive a commission. As an Amazon Associate I earn from qualifying purchases.
1. Hammering Techniques
I will admit that hammering is one of the most important techniques you’ll need to master early in your wire wrapping career
Linda Jones Wire Jewellery explains in this video how hammering can work to harden your work while adding interesting textures. Linda also explains the different textures you’ll achieve with flat (at 01:10) and dapping head hammering (at 10:35).
The video also explains how hammering will help you create jewelry that’s stable and won’t fall apart. Best of all, you’ll create jewelry that looks professional with minimal effort!

2. Wire Rolling Mills
A wire rolling machine works on the same concept—it adds texture to your wire. In this video, you will see an illustration of the texturing technique to make a textured silver chain. Different attachments will give you all kinds of interesting textured patterns.

3. Wire Twisting
One of the oldest and quickest techniques to create texture in your wire wrap jewelry is twisting the wire. There are three techniques you can use: twisting soft wires by hand, using a pin vice, and twisting your wire with an electric drill.
- Hand twisting is a quick way to add interesting texture to your wire but is more suited to short pieces of wire. Be careful not to over-twist your wire because you can break it!
- When you use a pin vice, you get a more even twist and it goes much quicker than working by hand and pure force.
- Of course, a drill is the most efficient and quickest way of achieving an even twist with minimal effort.
Each method has its merits, and it will depend on the type of project. A single twist is just two wires while a double twist is an already twisted wire twisted with a second, or doubled, piece of wire for an intriguing effect.

4. Annealing and Quenching
When I say you should heat your wire to strengthen it, you might think I’ve lost the plot. When you heat the wire with a blowtorch, as Dalilia Caria explains in her video, you’re strengthening the wire by annealing (heating) it.
Remember, as you work the wire, it becomes harder and can break easily. Annealing and quenching your wire strengthens it but also makes it more manageable to work with.
Before you worry about the wire turning dark, you’re going to cool it off in cold water to stop the heating process. Afterward, I’ll dip it in a weak acid to take off the buildup.
I find that the quick heating and cooling process hardens the wire so that I can twist and hammer it into all kinds of fancy patterns and shapes.
5. Torching Techniques
Sometimes you just need something different to add some textural pizzazz to your wrapping projects.
Enter the humble blow torch. As Aubrey Bouck explains in this video, you can add a ball or pear-shaped (paisleys—a bit later at 10:47) end to a wire by ‘dipping’ into the flame and water afterward to cool it off.
The secret to pear-shaped balls is in the curve of the wire when you dip it into the flame. When it comes to creating the perfect round ball, according to Aubrey, is to move the wire up and down in the flame.

6. Filing and Sanding
Andy from Drummer Artificer Studios offers a comprehensive breakdown of the types of files in the video below and different types of sandpaper. The key takeaway when you work with files, I learned is that the teeth only go in one direction. I’ll admit, sometimes I forget this!
Each successive filing and sanding remove the teeth marks from your jewelry. You’ll know when to stop when you reach the desired level of roughness or smoothness. Watch Andy’s tutorial on the effects of filing and sanding down below.

7. Stamping
Thus far we’ve covered quite a lot of interesting techniques. One of my favorites is stamping because I don’t need a lot of tools.
As Lisa explains in this video, you need your punches, a hammer, and a hard metal bench block. Oh, and you’ll need the item you’re adding a stamped texture to and some tape to hold it in place on the bench block.
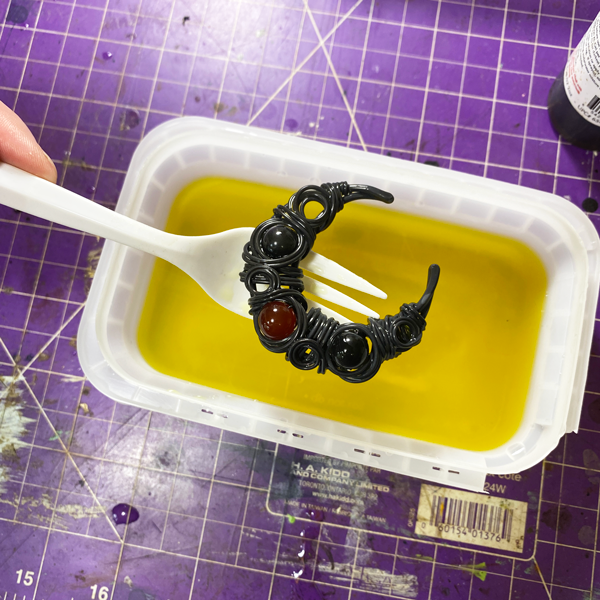
You can add color to your stamped jewelry by oxidizing it with a liver of sulfur bath (or a Sharpie pen as Lisa did). Remember, one, or two, good strikes are all you need to make an amazing textured pattern.

8. Texturing Pliers
Like metal stamps, texturing pliers will do the same job with a lot less noise and effort. I find this works best on chains with large(r) loops and on the edge of my jewelry.
Lucy Walker Jewellery shows you how to easily create texture in this video—simply clamp down and you’ve got texture!
9. Wire-weaving
There are so many options you can choose from—it makes me dizzy and buzzy with ideas! I love experimenting with different techniques and designs depending on the look I’m trying to achieve.
For example, the basic two-wire wraparound weave gives the idea of something simple and, I’d like to say earthy and hippie-like. Perfect for large, rough stones.
You can also use multiple wire wraparound weaves to create more intricate patterns for a more ‘refined’ look. Flat nose or nylon pliers will help to settle the wires into position and avoid creating possible snagging edges.
This technique is also a good choice when you have curves or curved stones. Simply use one of your woven wires and bend them according to your stone’s requirements. Or, you can just wrap as you go along the curves.

Wrapping Up
There you have it! A whole host of techniques you can experiment with at your workbench. While you’re reading this, I’m probably at my workbench experimenting with some new techniques to share with you in an upcoming post.
Happy wrapping and enjoy whatever you’re making—the sky is the limit. Remember, you and your creativity matter!
