
Hello, and welcome back! Today I’d like to cover an important topic I certainly don’t give a lot of thought to—the importance of cleaning my wire-wrapped jewelry. I’d like to share some thoughts with you and take you on a tour of options to clean your beautiful jewelry in a jiffy.
The Importance of Cleaning and Polishing

I have learned that cleaning and polishing go beyond mere matters of appearance. It plays a vital role in preserving my jewelry, too. Here’s why:

FREE WIRE-WRAPPING GUIDE TO YOUR EMAIL!
JOIN NEWSLETTER
We respect your privacy. Unsubscribe at anytime.
- Restoring Brilliance: Over time my jewelry becomes tarnished. It’s that thin layer of corrosion that forms a film on the metal’s surface. When I polish my jewelry, I get those vibrant colors and shininess back.
- Maintaining Strength: While that thin film may seem innocent, built-up tarnish weakens our jewelry. Regular cleaning helps to prevent this and ensures we can enjoy our hard work for longer. I hope some of my jewelry will become heirlooms with proper care one day.
- Preserving Detail: You’ve spent hours crafting beautiful pieces; so why let dirt and grime hide your hard work? Polishing reveals all the intricate details we painstakingly crafted. Let your artistry shine!
- Enhancing the Appearance: I prefer my jewelry to look at its best. Imagine a delicate moonstone stuck in dark and flat silver wire. Not a pleasant sight, right? But, when I polish and clean my pieces, I allow it to add beauty to any outfit.
So Many Methods to Choose From!
There are so many methods to choose from, so I’ve listed them from ‘soft’ to ‘hard’ methods to help you choose the best method. It all depends on the level of tarnishing and the amount of elbow grease you want to put in.
DISCLOSURE: This post may contain affiliate links, meaning when you click the links and make a purchase, I receive a commission. As an Amazon Associate I earn from qualifying purchases.
Soft Methods for Light Cleaning and Polishing
For lightly tarnished jewelry, I opt for one of the following methods:
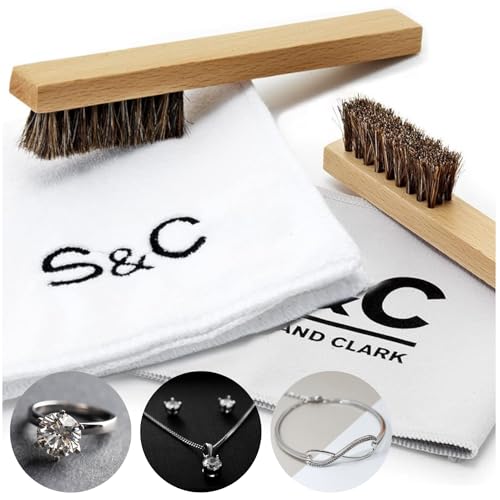
1. Soft Brushes are for everyday-use, to remove light dust or fingerprints. Soft-bristled brushes are perfect for getting the grime out of tight spots without scratching your delicate jewels.
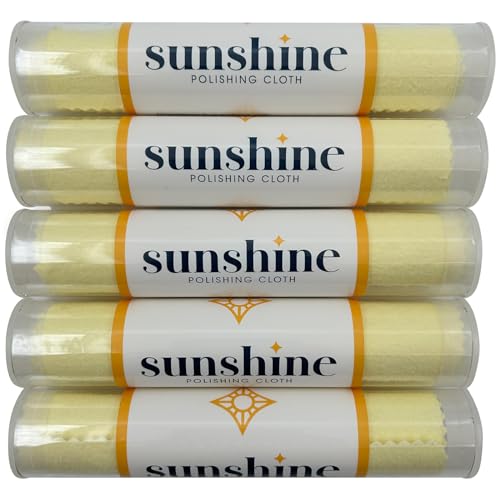
2. Polishing Cloths are a great way to restore shine to larger pieces (and smaller ones) with minimal effort. The Sunshine polishing cloth range contains a mild polishing agent to make light work of polishing your jewelry. Some elbow grease is required, but not a lot of effort!
3. Tumblers are used to polish your raw stones into perfectly shiny ones. A combination of water and polishing medium is all you need when you plug the tumbler into the wall socket. From rough-cut stones to polished ones, all you have to do is empty and fill the barrel.
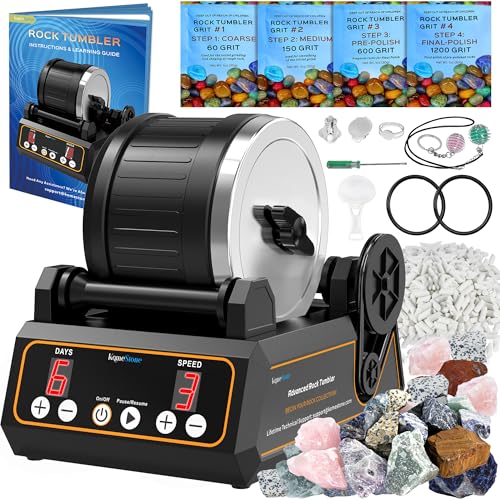
Here’s a useful video on how the Komestone tumbler above works.
Medium to Heavy Tarnish Requires More Power
I have found that a medium tarnish can take a long time to clean when I try to polish it by hand. Luckily, there are power tools and polishing discs and pads to take care of that!
4. Silicone polishing discs are one of my favorite methods to bring my pieces back to life. I usually use these on pieces with strong and thick wires—the softer wires like dead soft copper are best polished by hand. You need to be careful when using silicone polishing discs: only light pressure is necessary and don’t go full throttle!

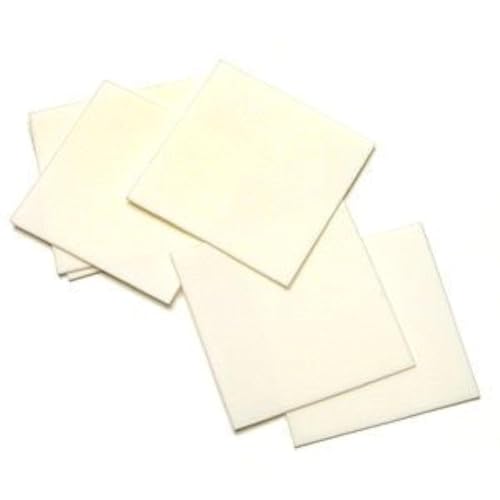
5. The Ultra-Polish Pads are one of my secret weapons against medium to heavy tarnish. I also use them when working with liver of sulfur and other stains to highlight certain elements. These pads are made from a tight-bond foam containing micro-abrasives that get rid of tarnish super quickly.
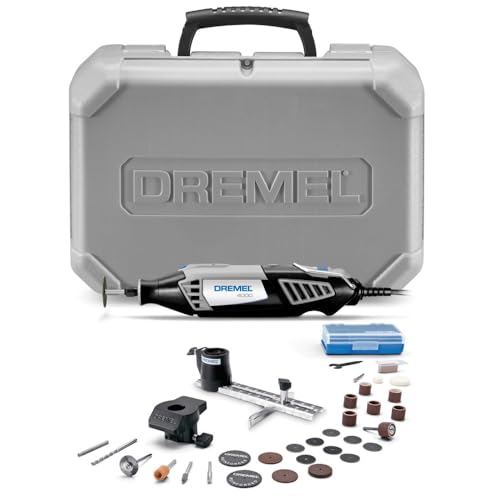
6. Rotary tools are perfect for getting rid of grime buildup, but again, do not apply heavy pressure! Work in batches and focus on a small area at a time.
7. Polishing and buffing machines are just like bench grinders—the only difference is the type of wheels. One wheel is to buff the jewelry and the other to ensure a lustrous polish..

8. For a busy workshop or studio, you might want to consider a steam cleaner. Before you pop everything and anything under that steam nozzle, remember it is hot steam (200ºF/105ºC) and it can loosen the glue. This should be your last resort and be careful. It is not the most highly recommended method to clean your beautiful jewelry. It is recommended on solid pieces, rings, or solid hammered pieces only.
Always read the instructions and follow the manufacturer’s recommendations. If you are unsure, ask your local jeweler or craft shop for some advice.
(Semi-) Hands-Off Approaches
9. Ultrasonic jewelry cleaner does all the hard work for you. Pop the pieces into the tank, add tap water, and set the timer. In under two minutes, you would have perfectly clean jewelry with almost no effort on your part. Remember, always read the manufacturer’s instructions before you plonk all your jewelry into the tank—some items like emeralds, pearls, amber, or opal cannot be cleaned like this.

10. A homemade cleaning solution can do wonders for your wire-wrapped jewelry. Why should I spend money on expensive (and harsh) chemical concoctions when I’ve got everything in my pantry and cupboards at home? SaySayDIY on YouTube offers a great recipe with instructions that came highly recommended by a fellow jewelry wrapper. Be sure to check that your metals are not going to react with the aluminum foil before you proceed! Oh, and the only effort required on your part is to rinse your pieces and dry them with a soft cloth.
11. Never underestimate the power of rubbing alcohol! Simply pop your jewelry in a clean container with some rubbing alcohol. Allow it to sit for a few minutes, rinse carefully, and dry off the pieces. Alternatively, leave them to dry and polish them with a soft, clean cloth.
The Final Wrap
There you have it—a selection of my favorite methods to clean your wire-wrapped beauties with the minimum amount of effort. It is important to ask for advice if you are unsure about a method.
Always check if you can use a particular product with a certain type of wire and stone to ensure you don’t damage it.
Until next time, happy wrapping and cleaning!